gas-saf-register logo

Call us on: 0330 173 2923

Call us on: 0330 173 2923

What To Do When You Smell A Gas Leak?

testing enquipment

We are far from the old days of manually lighting fires and carefully tending the flame. Do you feel a bit chilly? Turn up the heat of your boiler. Do you want to cook a meal? Switch on the hob. Safety is almost a guarantee because of how we have advanced as a race. While death by fire is not as common as before, there is a new danger in town: gas leaks. 

Gas can be colourless and odourless. In other words, you don’t know when it would strike. The vigilance against it begins with proper boiler service and gas maintenance. Without the right amount of care and caution, these small problems can slip past your nose. 

What Are The Dangers Of Gas Leaks In Your Home?

There are around 60 deaths per year from carbon monoxide poisoning. Out of those who recover, 10%-15% of them suffer from long-term health complications. The dangers of gas leaks in your home is CO poisoning, gas explosions, and, of course, house fires. When you smell gas, you can never know which of the three will affect you.

One out of six homes has unsafe gas appliances. It means that one house could cause a slew of problems. It does not just affect the owners, but their neighbours as well. One thing left unchecked can affect many people. When there is a gas leak in your home, you have to address it as soon as possible to minimise the harm. 

The many awareness campaigns and safety warnings are there to protect you. Gas leaks can always lead to more significant consequences. Please don’t wait for it to escalate, always contact the national gas emergency service.

Find the best local plumbers in the UK!

Are Small Leaks Dangerous?

The size of the gas leak does not determine the level of harm. While the chances for fires depend on how massive the leak is, smaller ones can be dangerous as well. Lack of detection means that they continue for a longer period, and the longer it runs, the more you put you and your family at risk. Do not underestimate its size. It can still kill.

What Are The Signs Of A Gas Leak In Your Home?

While the gas itself can go undetected, there are usually signs that accompany gas problems. It is a matter of spotting, and addressing them before the worst can happen. There are two ways you can spot the leak:

Based on your physical symptoms 

Based on your gas appliances

Using the information from both ways to spot leaks can create a complete assessment. It becomes less of a guess and more for a sure thing. Always get help from gas emergency hotlines as soon as you suspect a leak.

The Physical Symptoms Of CO Poisoning

If you feel unwell, but do not have any kind of fever or aches, it could be because of leaking gas. There are 6 significant symptoms of carbon monoxide poisoning: 

Headaches/migraines 

Dizziness

Nausea

Breathing problems/ Breathlessness

Fainting spells

Loss of consciousness

These 6 symptoms can come with fatigue and irritation in the eyes and throat. They may be common issues for some people, but it is all about the context. Do you only feel this way when you are at home? Do the symptoms disappear when you get fresh air? Do other people experience the same thing? Pay close attention to the children, the elderly, and even your pets. They may experience the symptoms first. 

Call the gas emergency service and go to the nearest hospital or clinic to check if you need treatment for CO poisoning.

The State Of Your Gas Appliances

If no one feels unwell, you can still check for leak gas through your appliances. Boilers, hobs, and other gas appliances tend to act out first. Here are some of the signs you should pay attention to:

Inefficient burn- When the flame of the boiler or your gas hob is yellow or orange, it means there are impurities in the burning process. Those impurities create carbon monoxide. Make sure your flame is always a nice steady blue. 

Soot stains- Any kind of dark powder or soot around gas appliances means there is a bit of smoke. Similar to the first sign, it means there are impurities, and your appliances are not efficiently working. 

Pilot lights frequently blow out- Majority of the UK use condensing and combi boilers. In those cases, pilot lights are a thing of the past. However, for homes that still use gas/oil-burning boilers, the pilot light can help you diagnose boiler problems. If they frequently go out, it points to improper burning. Avoid using your boiler when it acts like this until it gets serviced.

Increasing condensation- If you notice more condensation indoors, it means there is poor ventilation in your home. The water vapour from the heating is not escaping the house properly. On its own, it is harmless. However, when this happens with the other signs above, it could be a sign for carbon monoxide leak. 

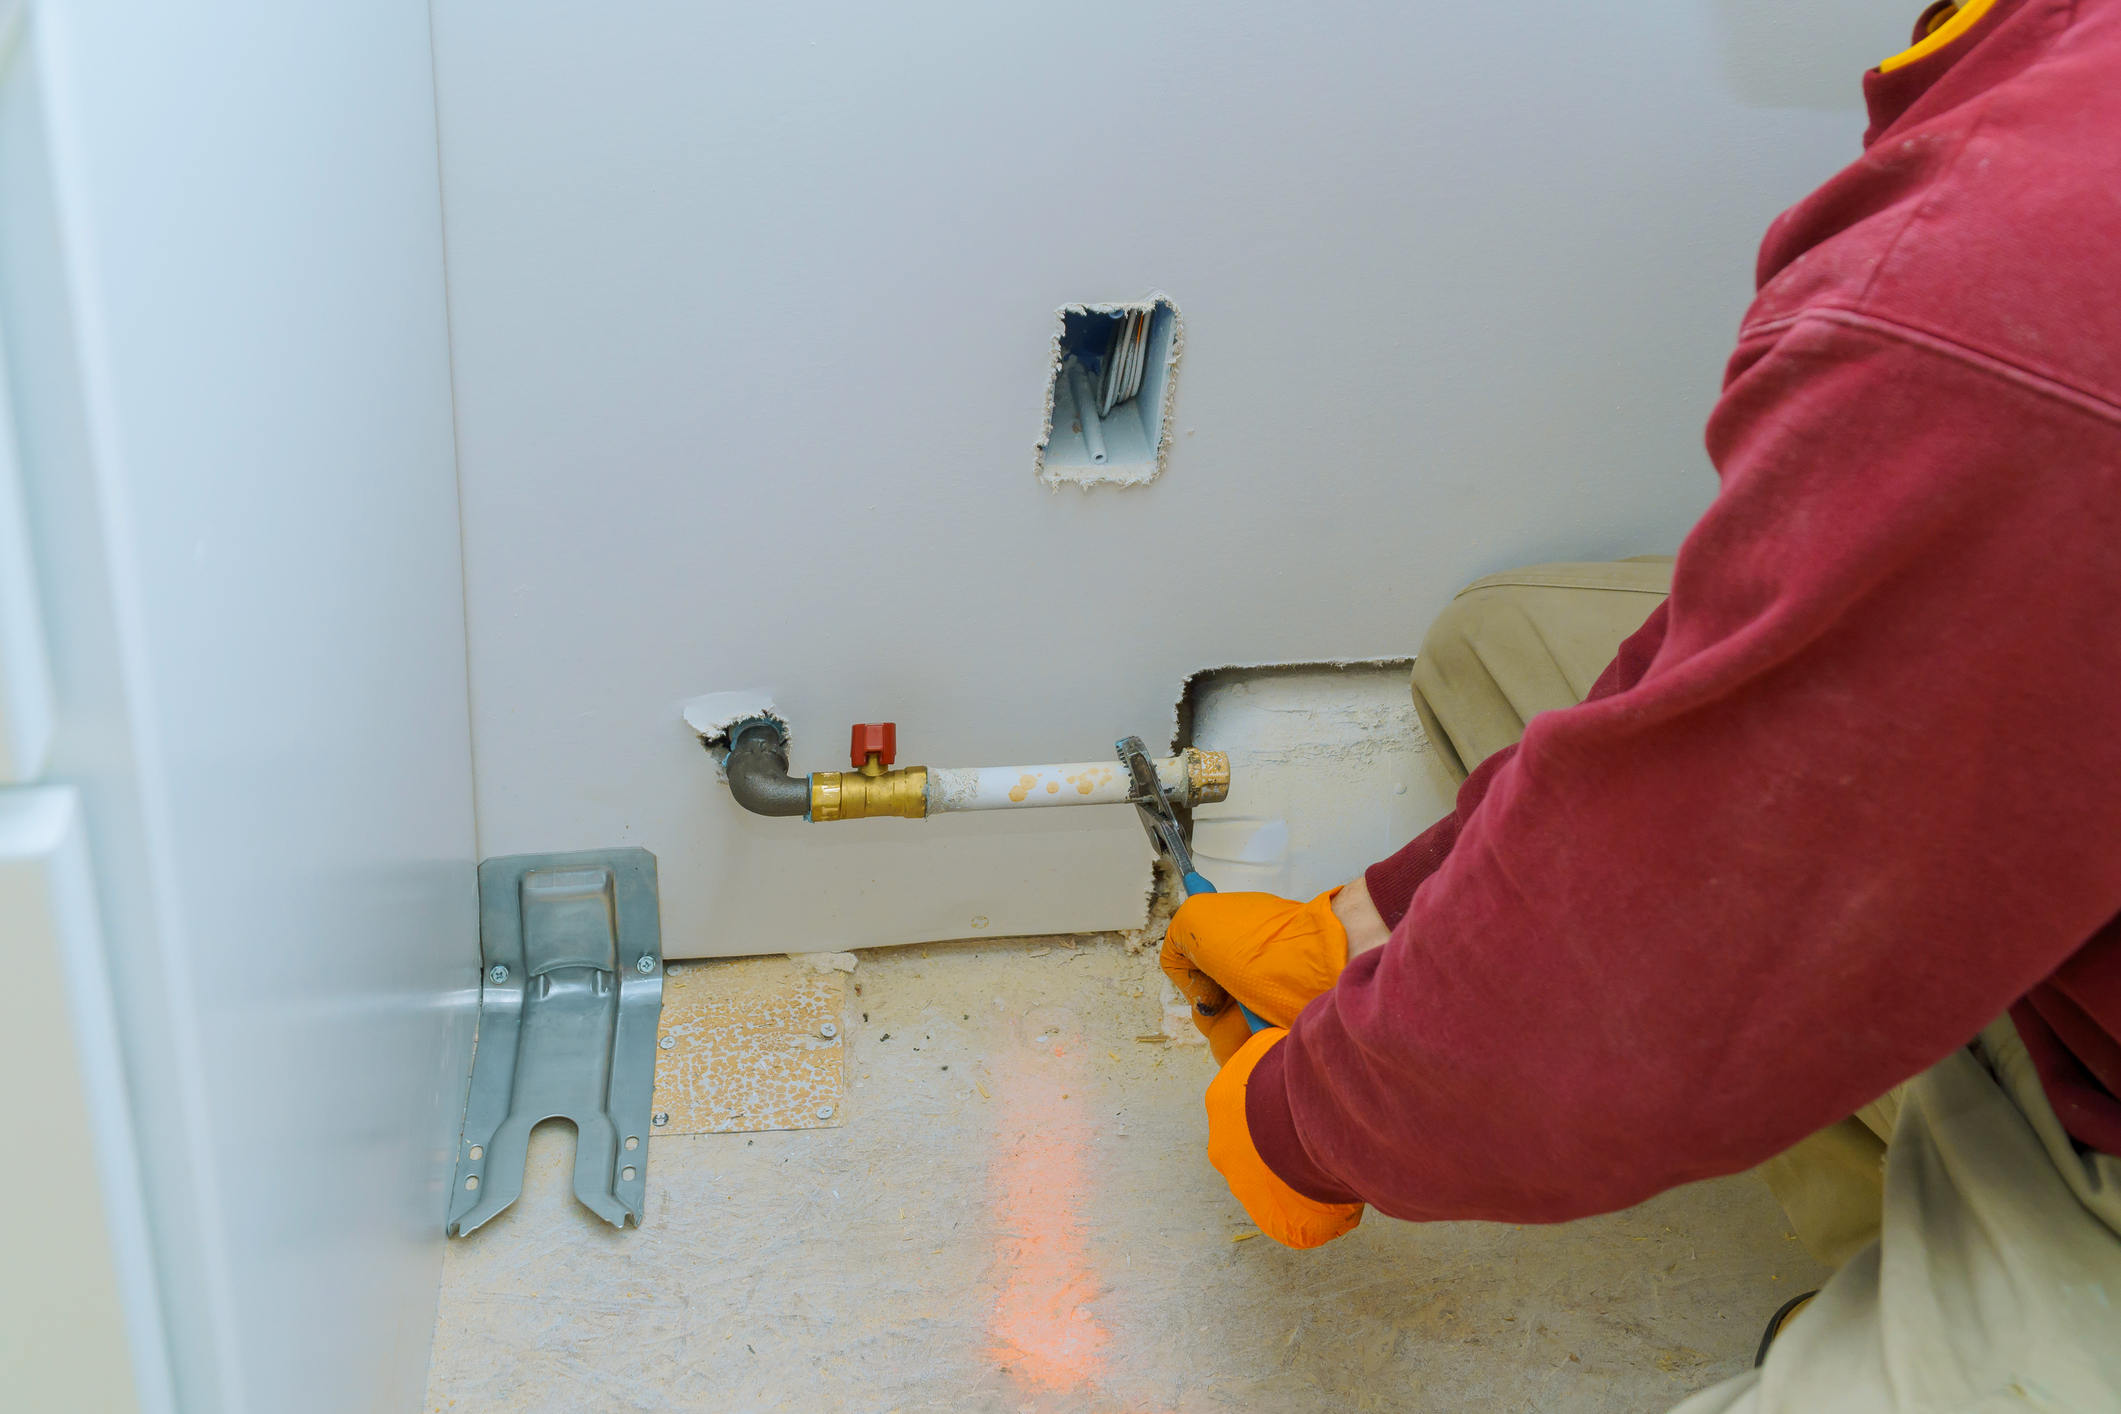
When all the signs point to CO leak, you have to act quickly. Contact the national gas helpline for further instructions and contact your local Gas Safe engineer in Plumbingforce for inspection. Or you can check Gas Safe for a registered engineer in your area for inspection. Enter your postcode and browse the registrar for help. If you had similar problems before, the website use cookies to save important information which streamlines the process for the future. While waiting for the plumber to arrive, there are also emergency steps you can take. 

Connect with the best local plumbers and boiler engineers near you

What Do I Do If I Smell Gas?

Gas usually has no smell. The scent that you smell? That was added by manufacturers for safety reasons. Without the scent, the numbers for gas-related deaths would be a lot higher as you wouldn’t be able to detect them. Now, the gases with scents are LPG and propane. You cannot smell gas for carbon monoxide. So there are some gas leaks you can notice immediately, and there is one that needs other signs. 

When you smell gas or notice the other signs above, contact your plumber first. They need to properly inspect your home for the leaks you do not see. Then you do the following steps: 

Ventilate your space

Try to get fresh air in your home ASAP. Open your doors and windows, turn on your exhaust fans, do anything that can help ventilate your area. Keep your doors and windows open and don’t close them until your place is in the clear.

Turn off all your gas appliances

Go through your entire house and disconnect or turn off your gas appliances. Avoid turning your lights on and off as well. Try not to turn on your electricity. Emergency methods are about avoiding sparks.

Turn off the main gas supply

The main gas supply is usually in the basement near the meter. Turn the handle to cut off the gas. If you live in a building contact your landlord or maintenance crew about your concerns. 

Leave your house

Immediately go outside to avoid CO poisoning. If you have neighbours nearby, you may want to inform them as well to make sure everyone is okay.

Visit the doctor

Your local clinics or hospitals have tests to see if you need treatment for CO poisoning. It is a 50-50 chance, but it is best to err on the side of caution. There’s no way of knowing just how long you have been exposed to the gas.

If the matter is pressing, call the gas emergency helpline. The national gas emergency helpline is 0800 111 999. For emergency electricity issues, you can contact the national power cut helpline at 105. Both helplines are open 24/7.

Ignore the embarrassment that comes with a false alarm, that feeling never lasts. The health problems and the safety hazard from a real gas leak, on the other hand, can create a lasting impression. It is simple math, human life and safety over doubts and feelings all the time. 

What Are The Other Preventive Measures I Can Take?

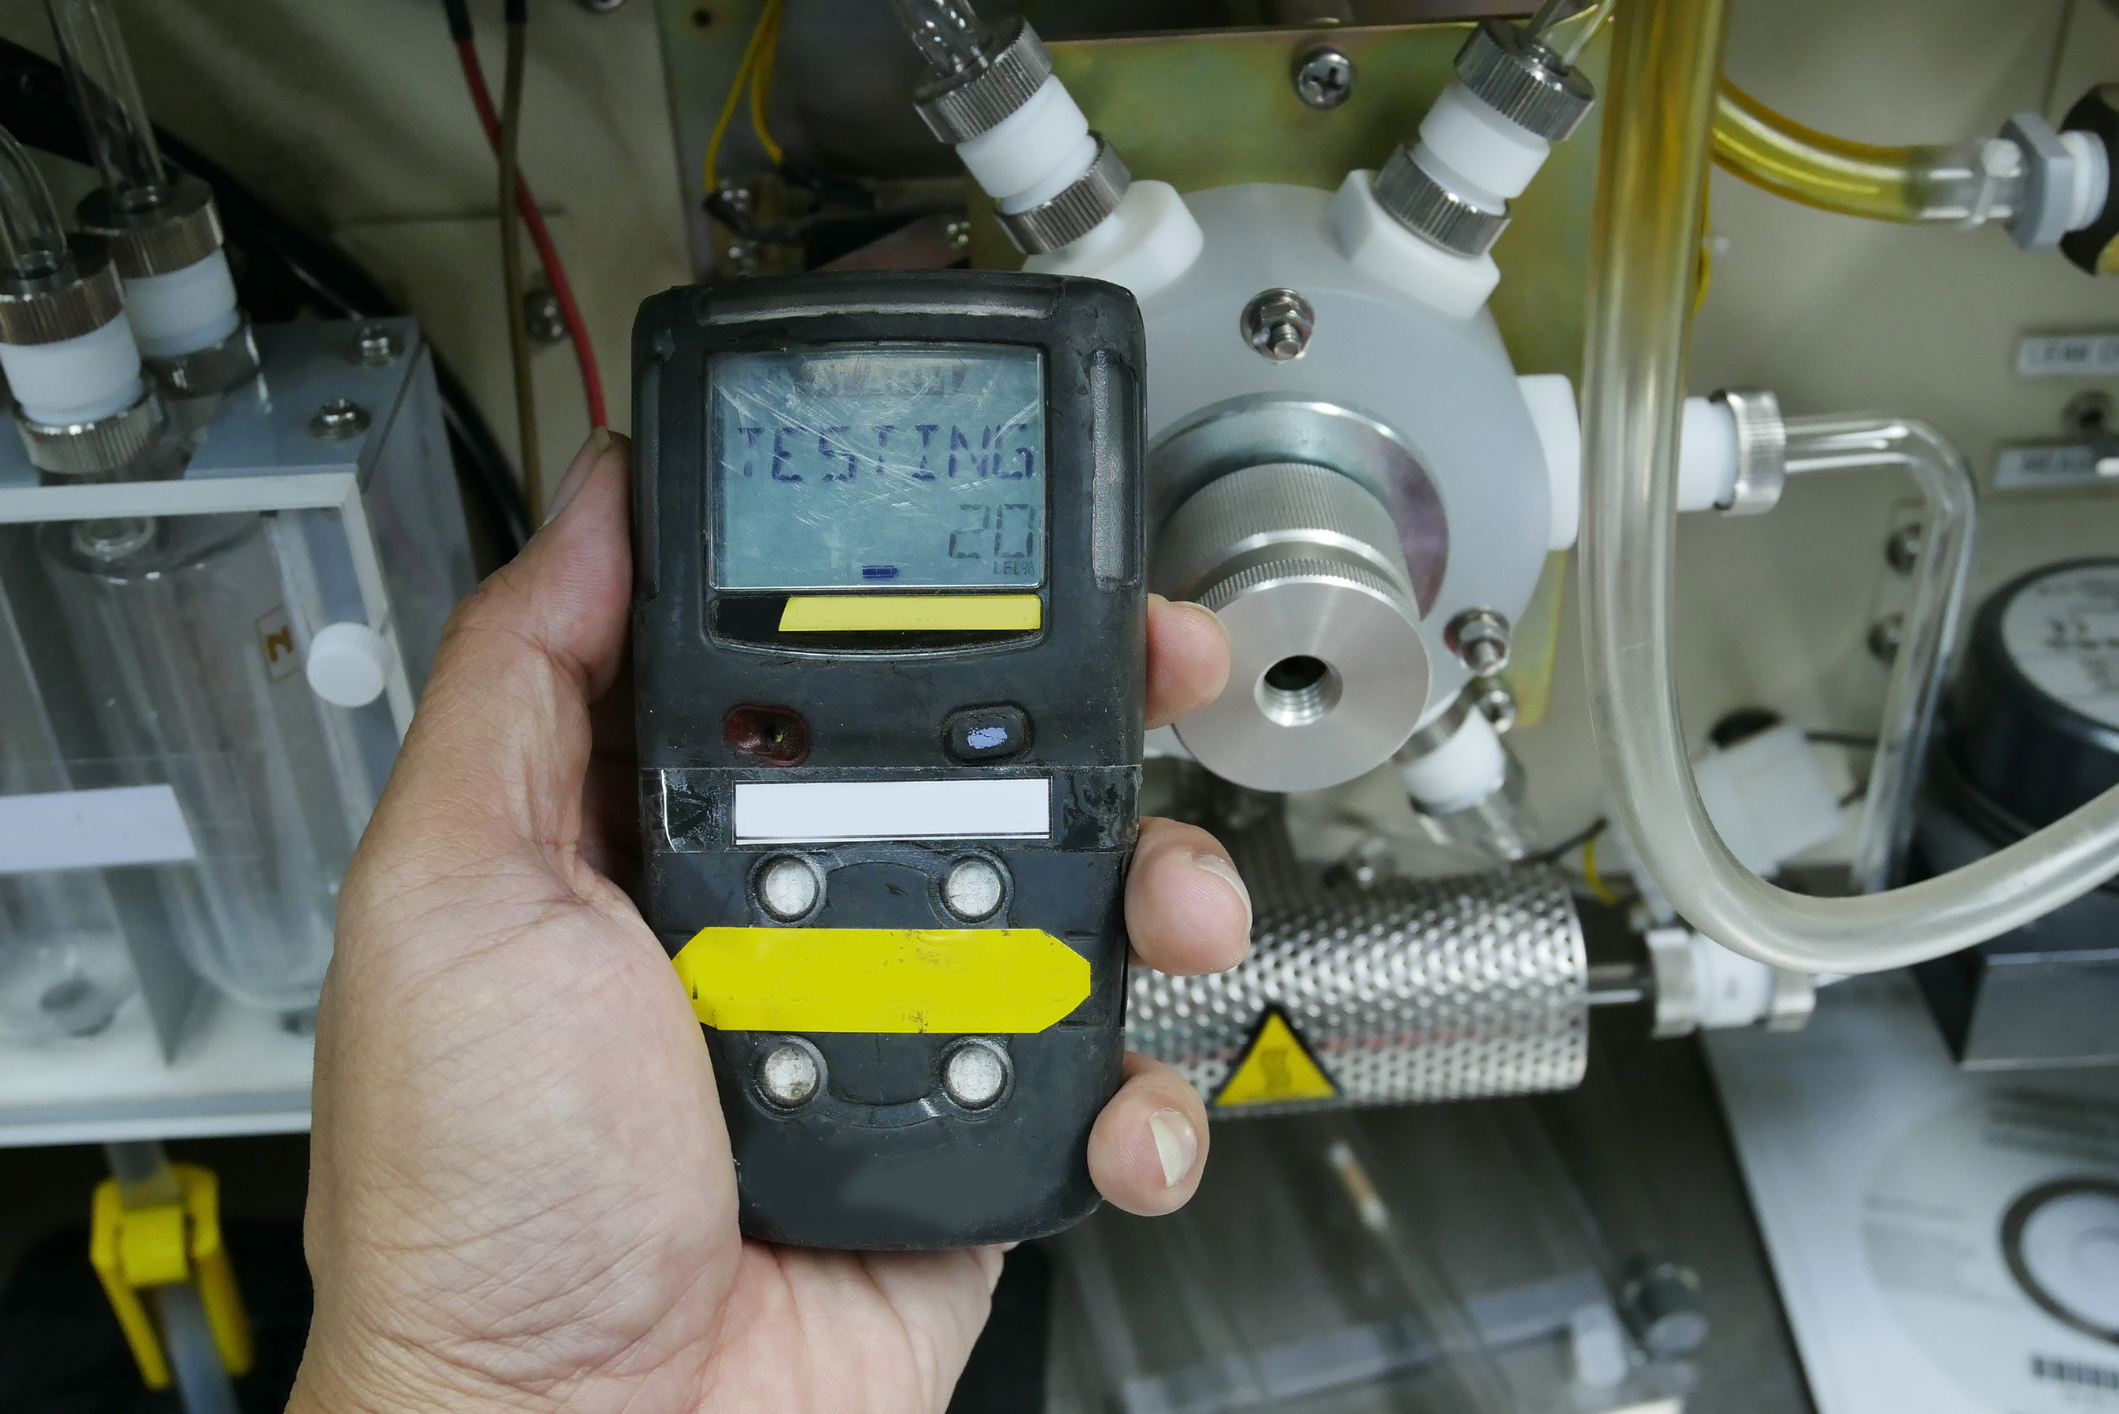
While the danger is real, we can always take a more active role in preventing gas leaks. You can get a CO detector and install it in your home. They are easy to find and relatively inexpensive. Get one that catches your attention so you can quickly respond to the emergency. Remember to replace the batteries every year. 

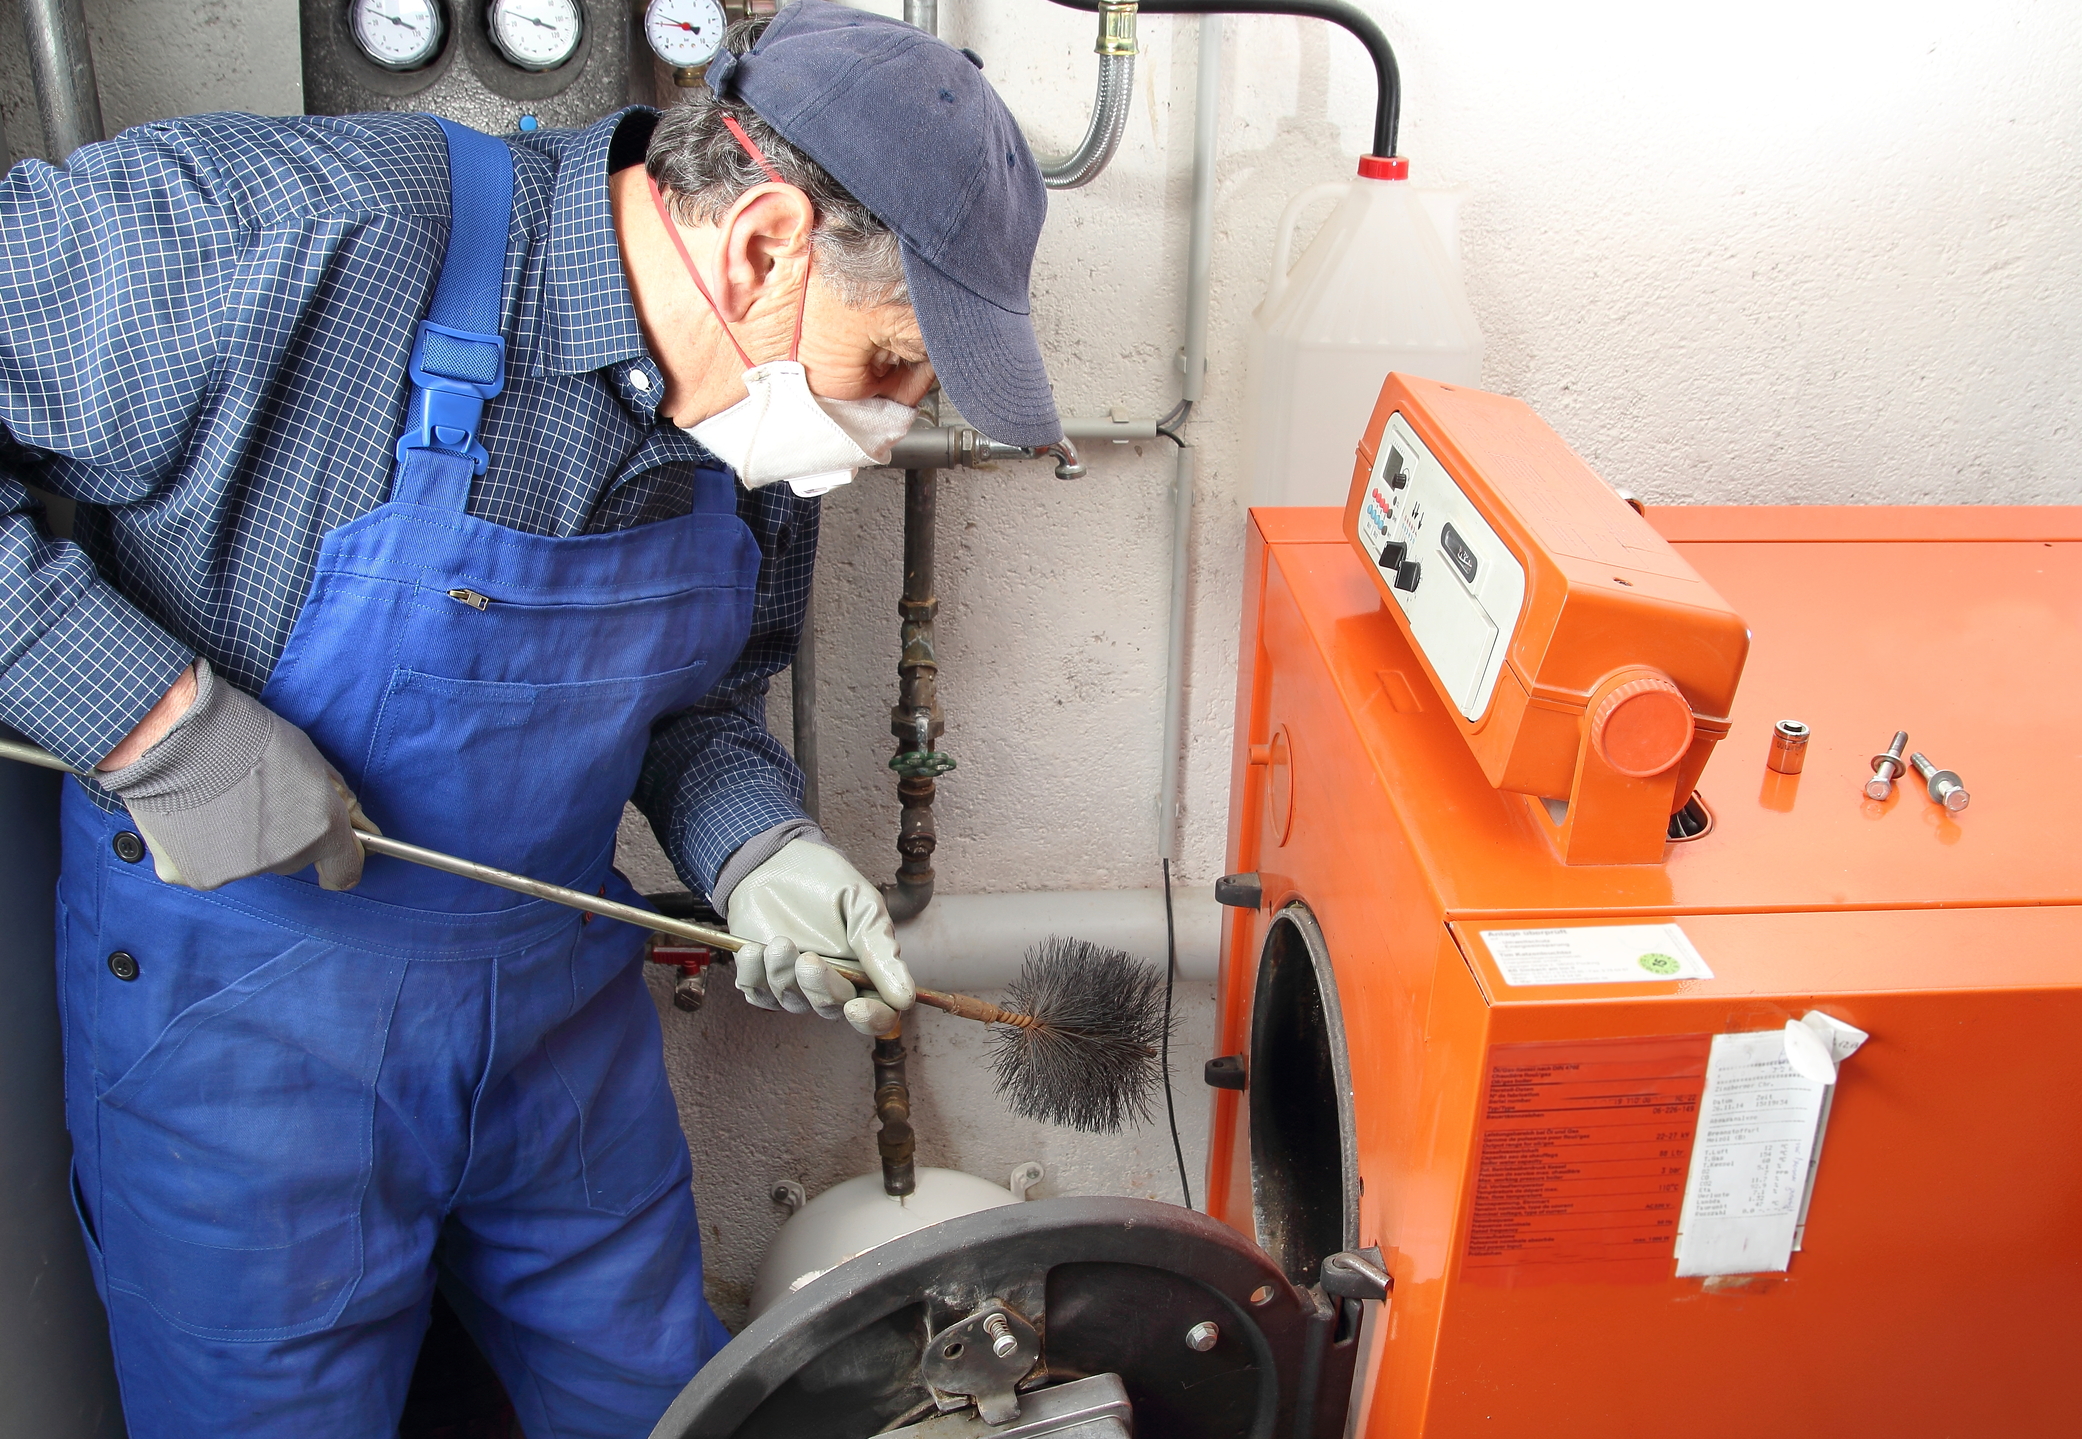
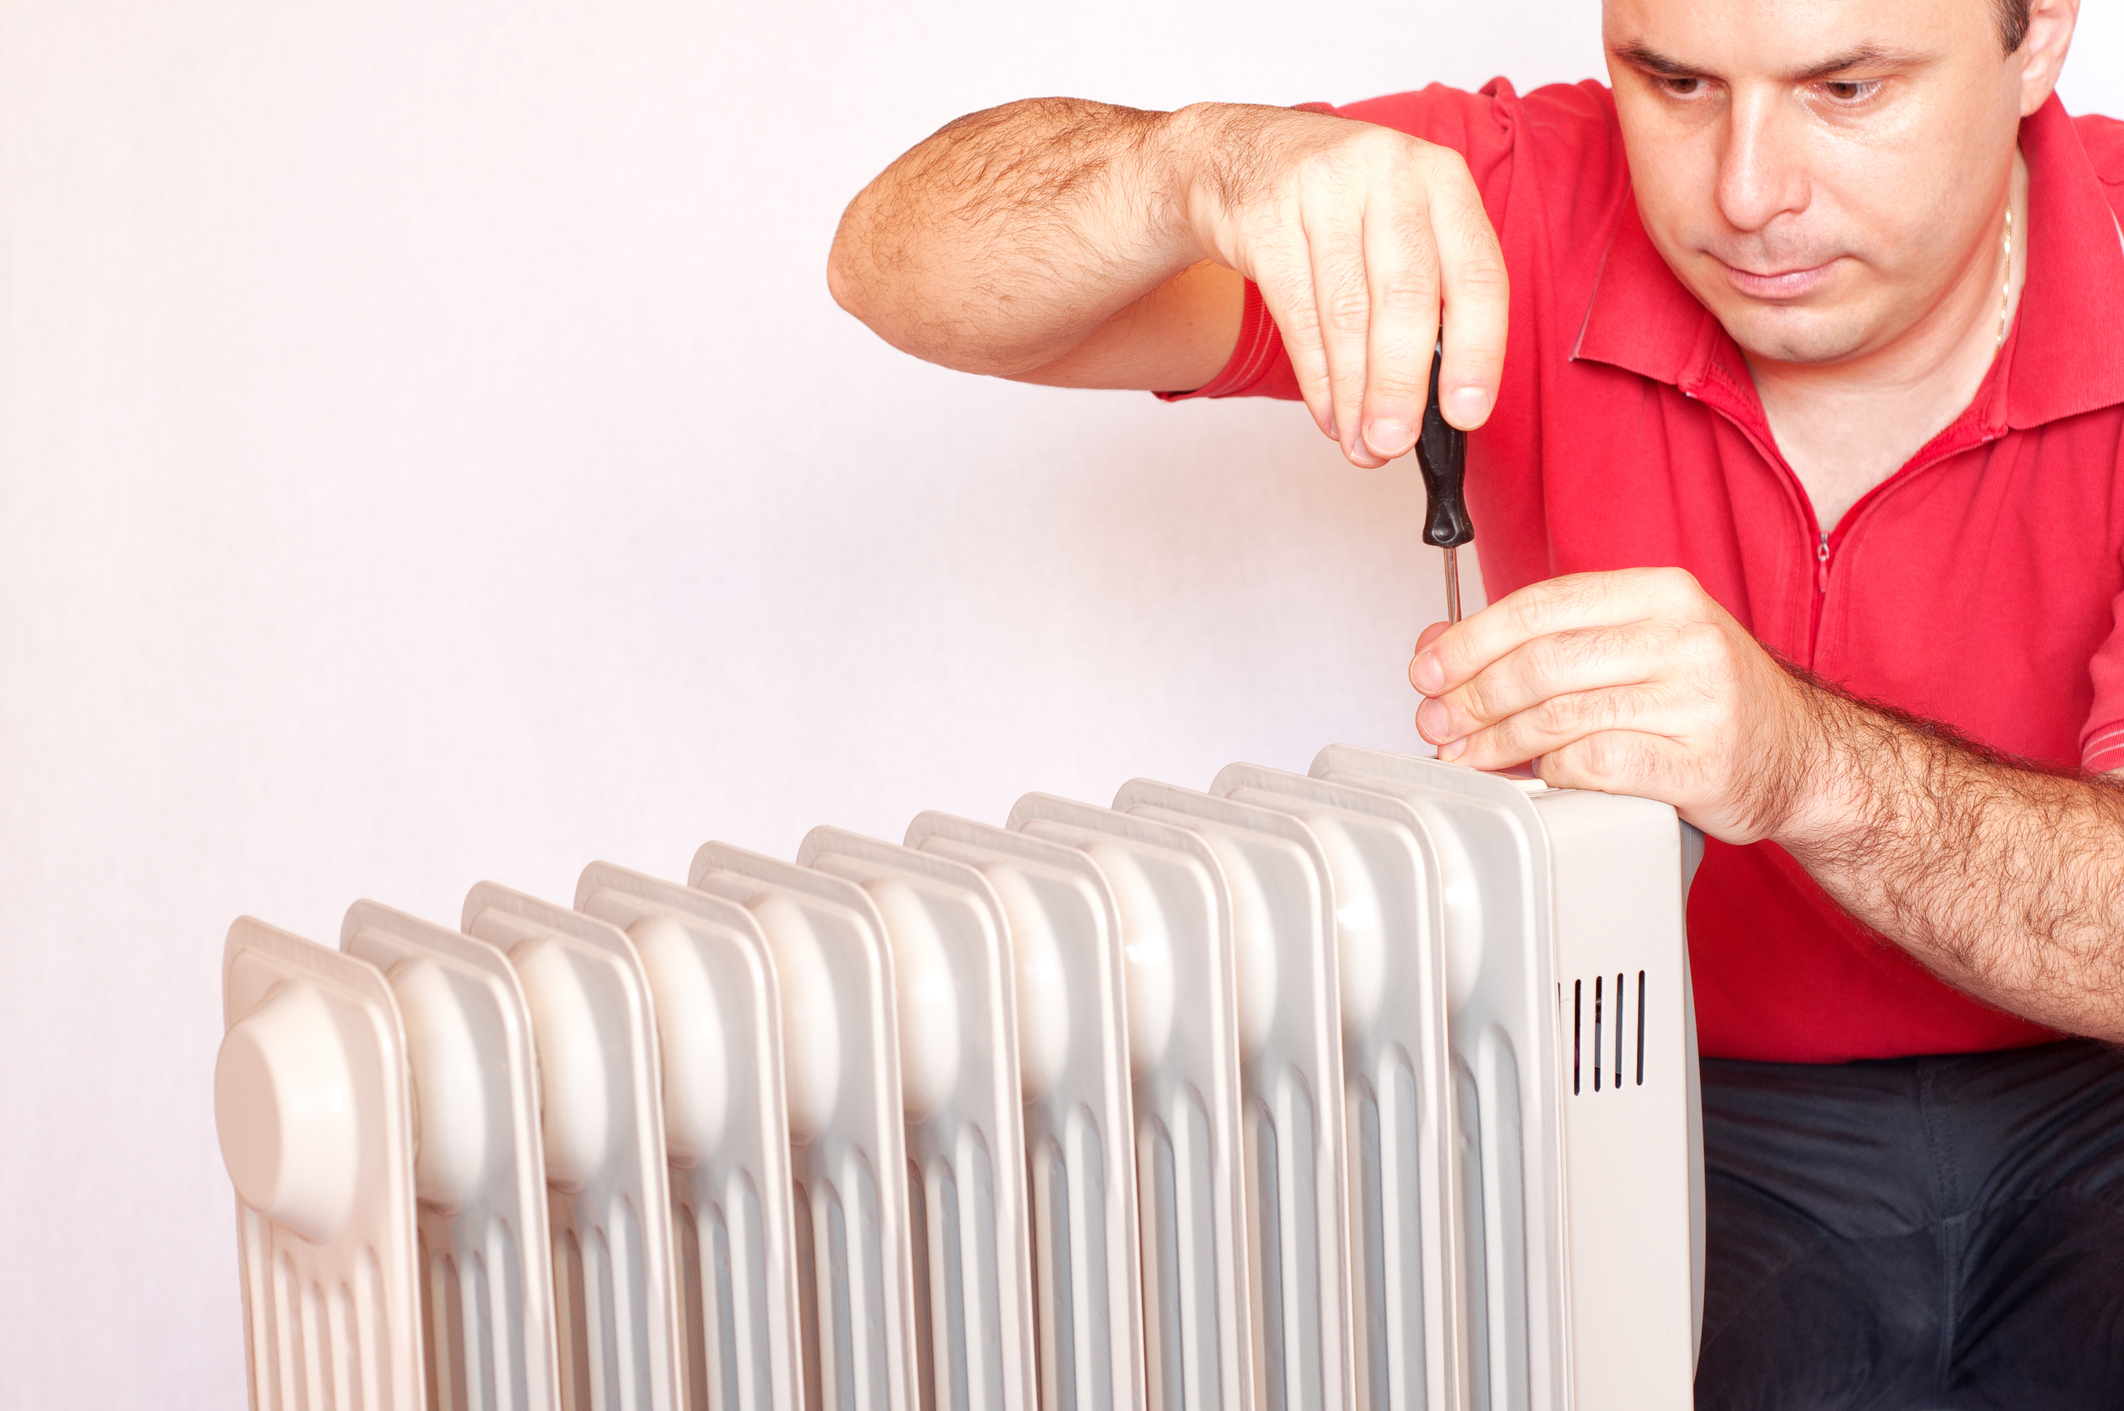
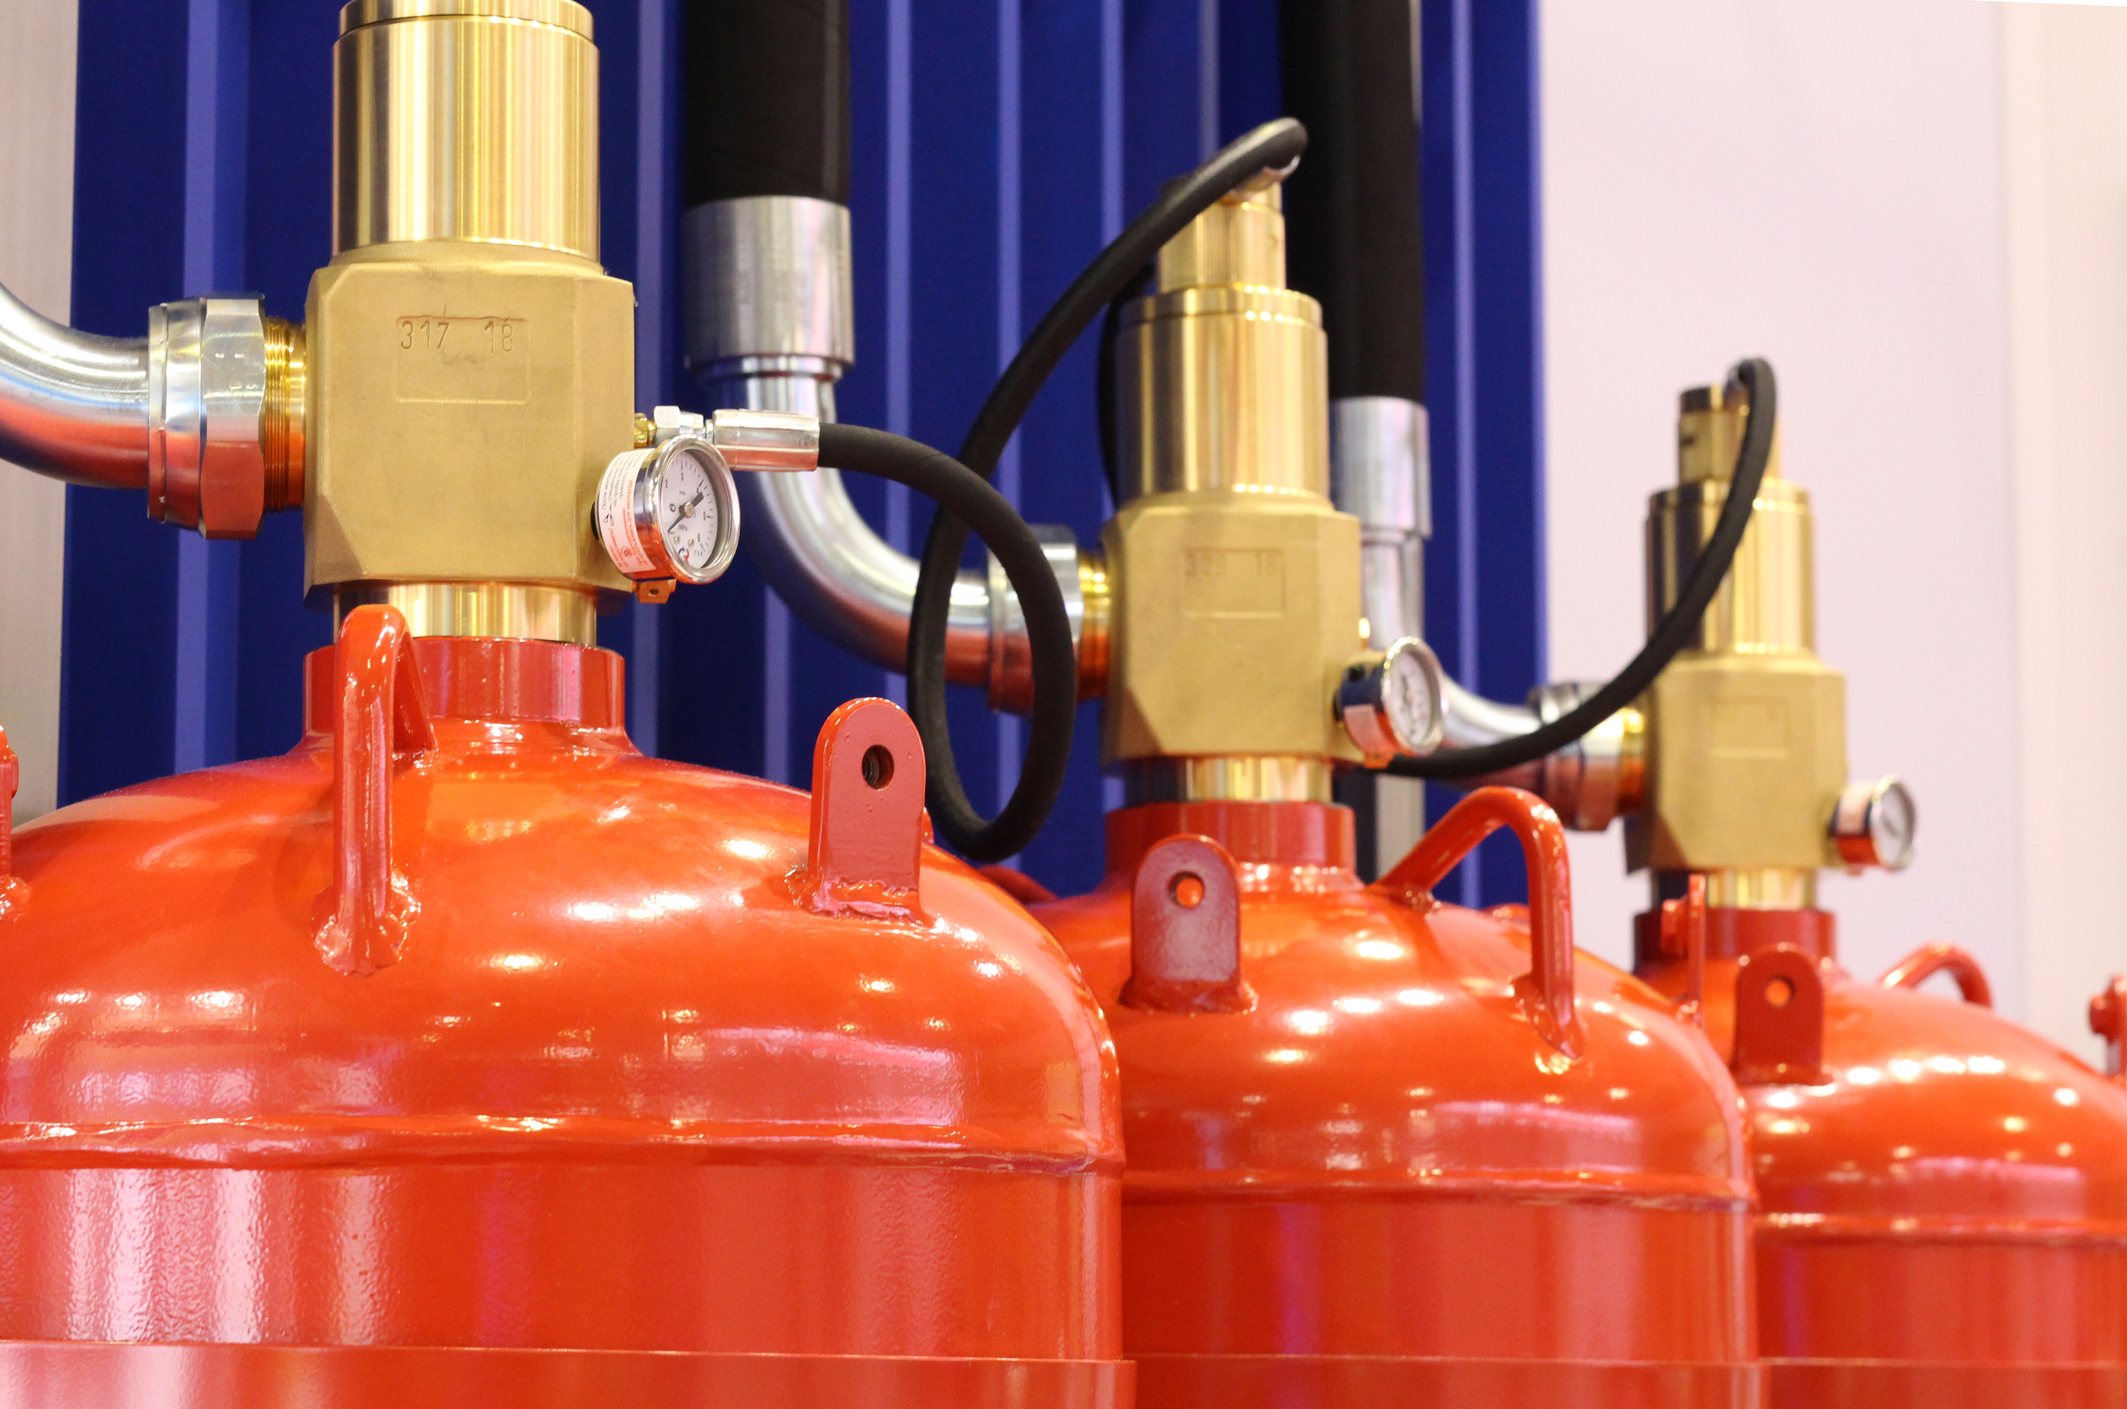
Properly maintain your boiler. Annual boiler service means less debris in your system which means no impurities. Annual boiler service also includes cleaning your flues and making sure there are no leaks.

These two simple habits can make a world of difference. Gas and fire are not new inventions. Whether you smell gas or not, we should continuously work against safety hazards that come with poor maintenance. There is no lack of information online. 

With the right effort, we can bring down the statistics further and make CO poisoning a thing of the past. Proper maintenance 

For any kind of boiler service or help, you can contact Plumbingforce’s engineers.

What Is A MagnaClean And Should You Have One?

central heating maintenance

Central heating maintenance does not start and stop with annual check-ups. There are a lot of things that can affect your setup. Think about it – the age of your home, location, water type, and habits all contribute to your central heating system’s wear and tear. Proper maintenance always includes a system that addresses those variables.

One of the few things that your boiler, radiator, and pipes have in common is the water. Hard water can create limescale/scale build-up and clog up your system, but another more tricky problem to deal with is the metallic sludge. The air that seeps into your system bit by bit mixes with the water and metal pipes. Next thing you know it, your radiator needs a power flush from all the rust. Adey’s MagnaClean is a system that addresses this. 

What Is It?

It is a filter by Adey whose creator is a former apprentice for British Gas. The MagnaClean filter is something he created for other installers. They place the filter in the pipes before the water enters the heating system with magnetic filtration. It is just like the old science school project with magnets and sand. It attracts the bits of metal and separates it from the rest. 

What Is The Product Range?

The Adey MagnaClean is not just one product. It is a whole range of products. At the moment they have the following filters: 

  1. MagnaClean Pro 3 Sense (22mm) at £148.36
  2. MagnaClean Pro 2 (28mm) at £232.85
  3. MagnaClean Atom at (22mm) £84.00*
  4. MagnaClean Micro2 at £136.66
  5. MagnaClean Professional 2XP (28mm) at £232.85
  6. MagnaClean TwinTech at £151.96
  7. MagnaCleanse at £564.60

Please note that all the prices above come from Wolseley’s website. It does not include VAT, and some of them have additional parts. To get an accurate price, don’t forget the 20% VAT. Promotions are available for most of these products. Keep an eye out for deals and bundles. These prices are subject to change, and it is best to ask about the price before purchasing. The prices here should give you an idea of the new front-runners of MagnaClean’s filters. 

Each product has its own specialisation, but the tech behind them is pretty similar. Among the 7 models, the UK’s favourite seems to be the MagnaClean Pro 2, a new revamp of the MagnaClean Pro 1. For this 5 stars product, statistics on their website shows that it saves 6% of the annual heating bills by keeping the system efficient. It can extend the lifespan of your central heating system while reducing carbon emissions. The product has a 10-year warranty available as well. 

You can find Adey products from the units to the solutions in stores like City Plumbing Supplies, Graham, Plumbing Trade Supplies (PTS), Plumbase, Travis Perkins, and Wolseley. These filters tend to be a little expensive. Do your research and make sure you are getting the real deal. 

Find the best local plumbers in the UK!

What Does A MagnaClean Filter Do?

The Adey MagnaClean Professional series does an all-around job. The top and bottom of the canisters take out non-magnetic debris like scale, a common problem in hard water areas. The middle section has magnetic rods that take out the magnetite. Once the magnetite attaches to the rod, it will not move until you clean out the filter. There are no moving parts for the filter. It is just the water going around the magnet. 

Is It Necessary?

Whether your home needs one or not is up to you. Other methods for filtering water before it enters the central heating system are not very efficient. Solutions like fine mesh strainers or cloth filters need frequent replacements. They do not get every kind of debris, and they can also clog up your system.

The filter, on the other hand, is pretty low-maintenance. It requires minimal cleaning and receives better results. There is no harm in getting one as a precautionary step.

Is It A Good Investment?

It depends. It is very understandable if you are hesitating. It is an expensive investment. If you are the type to only purchase if you need it, here are questions you can use to see if it will be a worthwhile investment for your home:

  1. How old is your house/building? Is it from the 1960s?
  2. Do you live in an area with hard water?
  3. Do you have to bleed your radiators often?
  4. Do your boiler and radiators have rusty valves?
  5. How often do you have to power flush your radiators?

If you answer “yes” or “very often” to these questions, then an Adey MagnaClean can be an excellent investment. Houses from the 1960s have untreated pipes that make it easy to rust. Radiators that do not heat evenly have too much sludge and debris inside, and they need a power flush from a professional plumber. The magnetic filter addresses all these problems with little to no effort. 

How Often Should I Clean It?

You should clean your filter once a year. The Adey recommends that you have it done along with other boiler service and radiator maintenance. There is no harm in making a day out of it. 

Connect with the best local plumbers and boiler engineers near you

How Do I Clean My MagnaClean?

You can opt to clean your filter yourself, but that comes with the risk of leaks. You can have your plumber do it when they visit during your boiler service. However, if you are a bit handy here are the instructions for cleaning the filter.

  1. Close the valves connecting to your magnetic filter
  2. Use a big spanner to ease the lid, then open it completely
  3. Lift the cap along with the plastic sheath and magnet, and transfer it to a container 
  4. Wash the individual parts (the plastic sheath, the magnet, the lid, the rubber seal, etc.) separately in the sink under running water
  5. Wipe it down and reassemble the filter and return it to the rest of the unit
  6. Seal properly and turn the valves on again
  7. Check for leaks

You can also add a bit of silicone lubricant with the rubber seal to make sure it stays tight. If the rubber is a bit stiff or hard, you may want to get another replacement. 

When Do You Replace Your Filter?

You do not ever need to replace the magnetic filter. The MagnaClean has no disposable parts. They should last as long as your boiler. All you have to do is clean it out once in a while for it to work efficiently. The only things that need replacement or top-ups are the scale reducers and other solutions if you use them. For these solutions, please use the recommended dosage. 

How Do You Remove MagnaClean?

If you are removing it to wash, follow the instructions above. Turn off the isolation valves and use the lid spanner that comes with the filter and unscrew the lid. They are notoriously hard to open when the cover is not clean. So make sure you do that step properly and add a bit of silicone grease/lubricant every time you open it. Also, avoid over-tightening it or else suffer at a later date.

However, if you are planning on removing the filter completely, you need to get a professional plumber. To install it, you have cut the pipe and redirect it to the unit. If you are planning on removing the unit, you need to connect those two pipes again. Do not attempt to do this on your own. Pipework should only be done by plumber or else face the consequences of a faulty central heating system. 

Heating systems are a temperamental bunch. However, when you have the system in place, it pretty much does its job without bothering you. Annual maintenance here and there can make a world of difference in your heating bills and carbon emissions. Is the MagnaClean something you need in your home? Plumbingforce can help you with the installation and removal process.

How to Remove a Radiator in 6 Easy Steps

central heating system radiator

Since your radiator is an integral part of your central heating system, they are rarely moved. Aside from the maintenance checks and minor repairs, radiators are pretty much left alone

In any case, removing your radiator is left for the most drastic of situations. Some of the reasons include: replace radiator, repair back wall, change pipes, etc. Regardless of why you want your radiator gone, did you know that you can DIY it?

While removing a radiator can be done by an untrained individual such as yourself, know that any installations and pipework must still be done by the professionals.

Just remember to leave any installation and pipework to the professionals. It is illegal for people to do work that requires a certified plumber. With that out of the way, let’s tackle common questions about radiator removal! 

When Can I Remove My Radiator?

Before you take out your tools and get to work, think about the best time for home maintenance or renovation. The average temperature in the UK is around 10ºC. However, in winter, temperatures can go down to freezing temperatures of 0ºC-5ºC. It would not be to your best interest if you take out your central heating system during the winter.

Plan your replacements or renovations well. Do them during the summer when you won’t miss the warmth of your radiator. 

Find the best local plumbers in the UK!

What Do I Need To Remove A Radiator?

If you regularly do maintenance checks yourself around your home, then you’re in luck! There is a high chance that you have all the tools necessary to remove your radiator. If you don’t have a tool kit, hit the store first before attempting the rest of the steps. You can’t just finesse your way to taking the unit out without any tools. It is not effective or safe. Here is a list of things that you will need. Don’t worry. They’re quite common tools that you probably already have inside your house. 

  1. Radiator bleed key/ flat-top screwdriver
  2. Adjustable spanner/wrench
  3. Towels and sponge
  4. Bucket/ Small container/ paint trays

If you are planning on removing a radiator completely, leave the capping radiator valve and other pipework to the professionals. You might end up creating “dead legs” in the pipework. For temporary removals to clean your old radiator you might also want to also get these items, for cleaning as you go: 

  1. Replacement valves (Thermostatic radiator valve or Lockshield valve – depending on the damage)
  2. Old tights
  3. WD 40 or other metal lubricants 
  4. Rag

Regardless of what you’re doing for your home renovation, you should prepare a good amount of newspapers and old rags to protect your furniture and floor from dirt and debris. Radiator maintenance can be quite messy so it’s best to bring some failsafe.

Do You Need To Turn The Water Off To Remove A Radiator?

Water damage can get pretty serious, especially with hardwood floors. When working to replace your radiator, keep your place as dry as possible. You do not need to turn off your connection to the main water line to take out the radiator. 

Radiators have valves that can separate them from the central heating system. Close the valves and empty the water in the unit. You can opt to switch off the water if you have other concerns, but it is not an absolute requirement. 

Note: While your water can stay on, remember to turn off the heating! Stay safe and only work when your radiator is completely cold. 

How To Remove Radiator Without Draining The System?

In a home with multiple radiators, draining the entire system can take a lot of time. If you are only removing a couple of radiators though, you don’t have to! Just bleed the radiators you plan on removing and then proceed. 

Draining your central heating system is not a bad idea. It has to happen once and a while to clean out the system. While you are removing your radiator, you can take on two tasks at once. Other times you have to drain the system are for pipe cleaning, major pipe repairs, and leaks. 

If you decide to drain your central heating system while removing your radiator, you have to turn off your main water line. Draining your system shouldn’t take too long, it is around 20 mins to 2 hours depending on your set up. 

Steps For Removing Your Radiator

If your heater is big, bulky, or very old and extra pair of helping hands can get the job done safely. Do not overestimate your strength. Radiators can get heavy. 

Even professional plumbers need a helping hand with vertical radiators. If you are struggling with how to remove a radiator in your home, contact a professional. Plumbers can come in and take care of this work. 

However, if you still want to DIY, then read on. Gather your tools and prep your space, because here we will go through the steps for removing a radiator

Turn Off Your Heating And Wait For The Room To Cool

Before you get to work, there should be no heating. Once you’ve turned your thermostat off, wait for a bit and make sure the radiator is cool to the touch. You don’t want to accidentally burn yourself while removing your radiator. Do this during warmer months of the year. Dealing with cold water in the middle of winter with no heat is not a pleasant experience.

Close All The Valves

Now that you have done so, close the valves completely. Use an adjustable spanner for your thermostatic radiator valves (TRV) if you have them. Avoid using pliers because they can damage your pipes. While you are turning it off, take note of how many turns it takes to close for future reference.

Closing the valves means you isolate the unit from the water supply. As long as those valves are tightly closed, you can go to the next step. You can also choose to drain your system here. Since everyone’s home is different, look for other instructions for emptying the whole system. 

Bleed/Drain The Radiator

With your radiator separated, you can bleed your radiator. Use your radiator bleed key. First, a bit of air will release, then comes the water. Get a container ready to catch the leak. A painter’s tray or a shallow container that can fit under the radiator is ideal. For more thorough instructions for bleeding radiators, you can check out this post. 

Remove The Union Nuts And Wall Brackets

First, loosen one union nut and tip the radiator a bit to get the water at the bottom. If you do not do this step, it will leak when you lift the radiator. When there is no more water, unscrew both union nuts. Older radiators could have additional wall brackets or screws holding it in place. Take the time to make sure all of these pieces are gone.

Connect with the best local plumbers and boiler engineers near you

Remove The Radiator

With all those nuts and bolts out of the way, you can lift the radiator! Make sure that you keep all of the nuts and bolts in one place so that you don’t lose any. Find someone to help you here. Slowly lift the radiator and keep it in a vertical position when carrying it out.

Even when you properly bleed your radiator and take out the excess water, there is a good chance there is still some left. Covering your entire floor with newspaper and old clothes can help with the mess as you take out your radiator. 

Here you can use your cleaning supplies and clean your radiator. Use the old tights to polish the metal, and spray a bit of metal lubricant to help. After you get all the nooks, you can wipe it one last time with a rag. 

Temporarily Cap Your Pipes

You should be able to leave everything as is, but capping your radiator valve is a good safety measure. Now, you might be able to get away with temporarily capping it off if you plan on putting your radiator back. However, for any permanent pipework, get a professional plumber to do it. It is illegal and dangerous to DIY your pipework, especially with your central heating system. Contact your local plumber from Plumbingforce to take care of this for you. 

Common Removal Questions For Radiators

Everyone’s central heating system is a bit different. There might be questions that we didn’t get to cover in the general portion. Here are the common questions:

What Is The Difference Between Temporary or Permanent?

The main difference between the two is with the last step. Temporarily removing a radiator means you will install the same unit again. There are no changes in the pipework. As long as no one bothers that area, you can connect the union bolts and wall brackets again. Take away the temporary capping and proceed as usual and install your radiator back.

With permanently removing your radiator it implies you have other plans for your space. A new electric fireplace perhaps? Or maybe you are taking down the wall completely? Shoddy work can affect the heating of your home and resale value. You may need to get a plumber in to connect the two pipes with a pipe nipple or have them microbore or solder a cap permanently. 

How To Remove A Radiator With A Thermostatic Valve?

If your radiator has a thermostatic radiator valve (TRV) close it completely. There are two types of TRVs, the manual and the automatic. Twist the manual TRV clockwise to isolate the unit or set the automatic TRV to its lowest mark.

These valves are mostly automatic, so they adjust to different temperatures. After the first step, make sure it is not in the frost position. The drop in temperature will open the valve, and you get a leak on your hands. You may also want to cap your TRV when you take out your rad.

For those who want to make sure water damage is not a problem, you can switch off your water. It is an extreme step, but if you aren’t living in the home or flat yet, might as well be cautious.

How To Remove Your Radiator From A Combi System?

A radiator with a combi boiler or any kind of pressurised system follows the same steps. You do not need to drain the system either, just close the valves both the lockshield and thermostatic valve and proceed. You can repressurise your system with no problem. 

Your combi boiler should be within the ½-1 ½ bar, or you could follow your manufacturer’s recommendation. Use your bleed valve to release the pressure. When you try to adjust the pressure in your system, match the original number, and you are good to go. 

Repressuring your system varies depending on your model. Do you have a filling loop or repressure key? Follow the steps in your boiler manual. 

If your TRV does not fully close, try to release the pressure from time to time. Areas with hard water can build-up scale in the system which affects all the pipes and valves. You can get an inhibitor for it, but don’t use too much. 

How To Remove An Old Radiator?

All the steps for removing an old boiler are the same, but there are more things to pay attention to because of its age. The main unique feature of an old boiler is the many brackets and extra fixtures. Carefully take them out with a screwdriver and adjustable spanner. 

Another problem common in old radiators is poor maintenance. Rust, sharp edges, and sludge that can be as disgusting as canal water are common problems. Protect yourself with a good set of gloves and avoid being cut by rusty pieces of metal. Make sure that you have your radiator maintenance checked annually.

If you plan on keeping your vintage radiator, get a professional clean. Removing dirty water is just the first step. A certified plumber can better address these issues. 

Removing your radiator can be a scary task at first, especially when it is your first time. But never fear! As long as you carefully follow the steps, you can safely replace your radiator. Just keep in mind the type of work your plumber should handle. Capping, power flush, leaks, and major pipework are not DIY friendly, contact your local plumber at Plumbingforce for those jobs. 

Heating Conundrums: How to Balance Radiators

home water radiators

Only 5% of homes in the UK do not use central heating. For the 95% of the population, you more or less know the moving parts that keep your house nice and toasty. Your boiler, radiator, and hot water collection work together to make the colder months more bearable. Every part of your central heating system needs to properly work for you to enjoy the benefits of a warm home.

Your boiler takes care of the heating, through gas, fossil fuels, or electricity. They heat the water that enters your home. It splits into two categories, most of that goes into your shower, dishes, and hot tea. The rest of it goes through your radiator and becomes a vital part of keeping you warm.

Heating problems can significantly affect your quality of life, so it is best to get to work. You can choose to DIY some of these problems like balancing your radiator. But when in doubt, always contact a professional

Find the best local plumbers in the UK!

What Are Radiators?

They are an important part of your central heating. Hot water runs through the series of bent pipes in the radiator. The twists and turns slow down the journey of your water and create a spot where you can feel the concentrated heat. So, when you stand by a radiator, you can feel that heat transfer. The longer it runs, the warmer the room will be. 

After the hot water cycles through the house, it goes back to the boiler to reheat. While traditional hot water radiators do not need plugs like other appliances, you can still save energy with proper use, by properly maintaining them throughout the year and turning them off when not in use. With proper use and maintenance, you can extend the life of your central heating system. 

When your radiator works properly, you don’t have to increase the heat of your boiler. By changing the set temperature, you can save on electricity and money.

Why Do I Need To Balance My Radiator?

In flats with multiple rooms or large houses, you need to have numerous radiators for your central heating. When radiators run warmer in one place more than another, there is an imbalance with the distribution of hot water. 

For example, you find it chilly in the bedroom, and you turn up the heat on your thermostat. You feel fine, but your roommate starts complaining about the temperature in the living room. You check it out and agree that it is significantly warmer than your bedroom. That means that your radiators are not balanced. 

When left like this, your boiler will have to work harder to keep your house at a decent temperature. If you don’t live alone, other members of your home may play around with the thermostat too much and destroy your boiler. The worst-case scenario is you get higher fuel bills, and you need to replace your rad and boiler. Just imagining the costs could give you a major headache.

When Do You Balance Your Radiator?

It shouldn’t be too hard to maintain your radiator correctly. Try to balance your radiator once a year or whenever necessary regularly. As soon as you notice one unit taking too much time to heat up, it’s a good sign you need to balance a radiator.

It is a time-consuming task that needs a bit of manual labour. Try to block off a good chunk of your day when you decide to get to work. The more radiators you have in your home, the more work you need to do. 

What Is The Difference Between Balancing And Bleeding Your Radiator?

Balancing is about the distribution of heat in your central heating system. Rad A is hot, but Rad C is cold, even with a 30 min wait. Bleeding your radiator is about even heating within the unit. The top part of Rad A is cool, but the bottom of Rad A is hot. Bleeding takes away the air inside the unit, which makes the top part cool.

You need to do both to maintain your radiator properly. When balancing your radiator, you need to bleed it first. However, you do not need to adjust your system every time you bleed your radiator. 

How Do You Balance Radiators?

Balancing your radiator is about cycling the water through your system until all your radiators heat up at the right time. The air, debris, or a faulty valve can affect the heating times of your radiators. Balancing it out takes care of most of it. 

With the right patience, these steps on how to balance radiator are beginner-friendly. If the DIY method does not work, your radiator might be in worse shape. You may need a professional plumber like Plumbingforce to come in and take care of that. Now, let’s get to it!

Materials and Tools

It is time to invest in a couple of tools so you can do this on the regular. For most radiators you will need the following things: 

Radiator bleed key or a screwdriver*

Digital thermometer or multimeter that can work as a thermometer

Lockshield valve adjuster or adjustable wrench 

Paper and pen

A helping hand

* If you do not have a radiator bleeding key, a flat-blade screwdriver can work, but it depends on your radiator. Radiator keys are easy to find in your local hardware store, so you may want to invest in one for your toolkit. 

DIY Steps To Balancing Radiators

When you do try DIY balancing radiators, do not rush the process. Work with a friend or family member and go through the following steps together.

Turn Off Your Heating System

Radiator balancing should happen when the weather is comfortable or warm because you will be turning your heating system on and off. Give yourself a clean slate and turn off your heating system. It is an essential step in bleeding your radiators. Even if you opt not to bleed, starting from ground zero can give you better numbers for balancing later. Wait for your radiators to cool before proceeding to the next step.

Bleed Your Radiators 

 Radiators tend to unevenly heat when there is air or debris. Bleeding your radiators first is an ideal step. Start by prepping your space for the leak with towels and a bucket. Use the radiator bleed key and release the air and water. You can read more about draining your radiator here

Go Through Your Radiator Valves

Open all your radiator valves. Each one has a lockshield valve (LSV) and a thermostatic radiator valve (TRV). Open the TRV manually, no tools necessary. Open the lockshield valve by removing the plastic cap and turning it with a lockshield valve adjuster or an adjustable spanner/wrench. Keep the plastic caps!

Connect with the best local plumbers and boiler engineers near you

Create A Basic Map Of Your Radiators

Take your paper and pen and draw out your radiators, name or number them, so they are easily identifiable. You will need this map to keep track of how the heat distributes in the system. 

Turn The Heating System On And Take Notes

After you turn the heating back, it’s a race against time. See the first radiator to heat up, then identify the heating order of your radiators. If you live in a large house, it can be challenging to do it alone. Recruit help and signal each other when other radiators heat up. This step could take a while, but you must get the order right. 

Turn It Off Again And Wait Until It Is Cold

Once you have your list, turn the system off again. The radiator balancing starts after this. Make sure that all of the units are cold. You can step out for a while. 

Turn The Heating Back

Turn the heating back to a random temperature and go to the first unit on your list.

Adjust The Valves On The First Radiator

Close your lockshield valves completely and slowly open it by a quarter turn as your unit’s temperature reading reaches 12 degrees. Use your thermometer or multimeter here. You can also take note of how long it takes for it to reach 12 degrees for future reference. 

Check The Temperature Of The Radiator

Use your digital thermometer to check if the temperature is 12 degrees. 

Check The Temperature Of The Pipes

After the unit reaches 12 degrees, move your digital thermometer and take the temperature of the nearby pipe. Take the temperature reading and wait until it reaches 12 degrees as well. Take note of the time between your heater and the neighbouring pipes to heat up. It can help you spot damaged units. 

Repeat Until You Finish All The Radiators

Then move to the next radiator on your list. Follow the order of radiators heating up and do steps 8-11 until you finish all the radiators in your home. It shouldn’t take too long for a small flat, but a large house might take a while. 

Note

When your radiators are not heating the way they should even after bleeding, check if the valves have signs of corrosion. The air, water, and metal could create debris in the system that could damage your radiator. 

You can call a professional plumber for a power flush if the valves are in good condition. It takes 6-10 hours. If the valves are not ok, you can replace them. DIY the replacement or ask a professional. 

Do You Need To Balance Radiators With Thermostatic Valves?

Thermostatic radiator valves are slowly phasing out in the era of smart homes. However, that does not mean you don’t have one in your place. The TRV is there to help regulate the heat of your radiator. Without them, the water can be scaldingly hot and be a safety hazard. 

There is at least one radiator with a TRV. Since it gets cold water, do they still need balancing? Yes, it does since it is a part of a greater system. 

How Long Does It Take To Balance Radiators?

There is no clear answer to how long it takes to get the job done. There are too many variables:

How many radiators do you have?

Are your radiators well-maintained?

How efficient is your boiler?

Did you recently power flush and bleed your radiators?

What model do you have? 

How large is your home?

A conservative estimate for how long it takes to finish the job in a small flat is 2-3 hours. A home with multiple floors and many rooms can take up to half a day, maybe more if you don’t have help. 

What Is The Quickest Way To Balance Radiators?

There is no quick way to do this. You can streamline the process by having a map, and previous notes ready so you don’t have to watch the clock closely. Doing it right means taking the take to balance each radiator.

However, if you just want to “loosely” correct it, you can open the lockshield valves in the beginning. The rooms that need to heat up quickly should have their LSV’s open fully. Places that don’t get the same traffic should partially open their LSV. This method does not fix your system, but it can do well in a pinch. 

When Do You Need Professionals For Radiators?

Always call professional plumbers when in doubt. If there is uneven heating even after bleeding, signs of corrosion, or leaks in the pipework – do not attempt to do it by yourself. These are not DIY friendly. Contact your local plumbers from Plumbingforce for these extreme cases. 

You can also opt to get the professionals in when you don’t have the time to go through balancing your radiators. When you have a place that can take half a day they can do it better, save your time for other tasks. 

All homeowners should be able to have a little heating-know-how. Learn to do basic maintenance steps yourself so you can troubleshoot radiators in your home. However, it is also essential to identify what you can and cannot do. A well-functioning home is a balance of DIY and professional work. 

Best Smart Thermostat to Use: Hive Vs. Nest

thermostat
Since their first introduction in the 1830s, thermostats are an industrial invention that made its way into our homes. They do more than regulate the heat. They are a tool that makes homes across the UK eco-friendly without too much compromise. So we cut down on electricity and fuel bills while living in a warm and comfortable space.  How does a small panel manage to achieve all of that? Besides heavy-duty appliances like refrigerators, the top expense for home energy consumption is our central heating system and hot water collection. These systems run like clockwork, and in the cold and wet UK weather, it is a necessity. The proper regulation of our heating system saves energy, budget, and repair costs. When you upgrade to a smart thermostat, you can have better control over these things and move towards a smart, sustainable home.

Smart Thermostats Vs Traditional Thermostats

Now, what is the difference between a regular thermostat and a smart thermostat? A smart thermostat follows the trend of creating smarter homes. Smart homes are all about control. You can control how much energy you use and plan ahead without too much effort. The main feature of a smart thermostat is that it can connect to other devices like your mobile phone or tablets. Say good-bye to small errors like forgetting to turn off your boiler while you are away. Cold showers or long waits when you run out of hot water will be a thing of the past.  You cannot compare smart thermostats against their traditional counterparts. It isn’t a fair fight. It is easy to sink into the new habit of checking your phone instead of walking to your thermostat. They can work with most modern homes and can pay for themselves. Smart thermostats are a convenience that is here to stay. With so many features, it is quite obvious that a smart thermostat is the way to go. There are two stand-out brands for thermostats with smart tech: Hive and Nest. Let’s go into the nitty-gritty details and see which one between the two is the best.

Find the best local plumbers in the UK!

 Nest Vs Hive

Both companies have the same goals. They hope to improve your home experience by giving you more control by managing your heating schedule. From there you can use the saved money in other projects and focus on living your best life. As you read the Hive vs Nest comparison, think about your heating system and your home to see how they can fit. 

What Is Hive?

The Hive is a company that now creates smart appliances. Their first model is a riff of the British Gas remote heating control. Their current model is the Hive Active Heating 2

The Hive Active Heating 2 can control up to 3 zones of heating in your home. From your mobile phone, you can manage the schedule of your heat. Maintaining your heating schedule means that while you are away on holiday, you can keep your home warm enough for things without blasting the heat. 

There is also a frost protection feature for your pipes in the winter. Besides your pipes, your Hive thermostat can also control your floor heating. You can get into detail about their features on their website. 

In your everyday life, it can turn off the heat while you are at work, and warm up as you brave traffic on your way home. There is also a geolocation feature that reminds you to turn off your heating if you left it on. When your hands are full, you can voice activate this thermometer. Smart houses are all about the hands-off experience. 

The Hive Active Heating 2 is compatible with the majority of the boilers available in the market. You will have no problem with combi boilers. They can work with oil and electric boilers if they have a thermostat or programmer. It is a bit tricky with gas and LPG models, it’s okay for the majority, but some models are not compatible. There are so many boiler models out there. There is a chance it won’t work, so it is best to ask first. 

Design Features

The sleek version of Hive 2, both wired and wireless, is a small box with a colourful frame. You can select from 12 different colours and purchase them separately at £19.99 per piece. It has a mid-century modern vibe with its strong geometric shapes and bold colours. 

It has a dial that you can use to control the temperature. There are three buttons for your main controls. You can also opt to use the thermostat stand and keep it in the room you use it most for your convenience.

The Hive app covers all its bases. However, in the Hive app vs Nest, Nest has a more user-friendly design. Though finger-crossed that this changes in the future. Hive is steadily improving their design to catch up with the competition. First, it was their device. Maybe the app could be next? Who knows. 

What Is Unique To The Hive Thermostat?

The model is quite easy to install. You don’t necessarily need professional help since it uses batteries. The A4 batteries can last you 2 years without replacement. It is portable and there’s no messy wiring here! The Hive hub and Hive receiver that comes with your active heating purchase take care of that for you. Talk about convenient.

How Much Is Hive? 

The Hive Active Heating 2 cost £179.00. The box includes the Hive Hub and Hive Receiver. Every purchase has a 1-year hardware warranty. Right now, there is a promotion for a free Amazon Echo Dot (3rd Gen) for every Hive active heating purchase. This price does not include installation since you can do that yourself. If you are a British Gas customer, you can get a discount with the Hive active heating packages. We, at PlumbingForce, would be more than happy to install your Hive system for you so you don’t have to do it yourself.

Hive also has a monthly subscription service for their smart house packages. The subscription aims to bridge the gap between smart houses and renters. The monthly payments make the expensive price tag that usually comes with these devices affordable. You can cancel your contract any time, but you may have to pay the remaining balance. 

The prices online for the Active Heating subscription tend to vary. It should be around £12-£27.99 depending on your setup. 

Hive In Your Home

The best way to check if a smart thermometer works for you is to see how well it fits into your smart home ecosystem. Your Hive thermostat is compatible with both Amazon and Google assistants. You should have no problem connecting it to your current setup. 

What Is Nest?

Google and Nest are now one entity since the merge in 2014, as Google Nest. It is all about taking the Nest products and pairing it with Google Assistant and Home to create the whole smart house experience. Despite its rocky start, the focus right now is to be a competitive presence that can rival Amazon. 

For the most part, their Nest Learning Thermostat accomplishes most of that. Their smart thermostat is the first to get an Energy Star certification. Surveys show that homes with Nest thermostat can save 10%-12% off of your heating bills. 

The thermostat can heat up to 20 different zones in your home. You can manage them all from an app on your phone. You can remotely control the heating and cooling inside your house while you are away. 

You can manually set your heating schedule, but it defeats the purpose. The thermostat smart, compact, and convenient – learns from your habits. It tracks how you use your boiler and adjusts. Even without pre-setting anything, it only takes a matter of months for Nest to create a customised plan for you.

Similar to other smart thermostats on the market, Nest has a geofence feature. When you get past a specific area, it will remind you about your boiler, and you can remotely adjust. Nest also controls the heating for your pipes and your floors. 

They also are compatible with 95% of the heating and cooling systems on the market. Old boiler models and certain oil boilers might not work with it, but combi boilers and condensing systems should be fine. 

Besides being a feature that adjusts so you can live an energy-efficient life, it also tries to make it a learning experience. A leaf symbol appears every time you change the temperature to save energy. The balance depends on the home and climate, so the leaf’s appearance is customised as well. 

The Nest app can show your energy history. They have daily, monthly, and yearly reports. The report is an excellent reference if you want to change your boiler and hot water habits. 

Design Features

The early models of their thermostat like the Nest Thermostat E have the same circular shape. But while they tried to blend in, the new model is here to stand-out. It now has a high-res colour display, a significant difference from the old frosted glass. You can also customise the ring/frame with 7 neutral colours. For the app interface Nest vs Hive, Nest has a sleeker, user-friendly interface. 

Connect with the best local plumbers and boiler engineers near you

What Is Unique To The Nest Thermostat?

Stand out features for the Nest thermostat is its ability to learn. No worries about the data leaking though! Since it is a part of Google, they have a strict privacy setting for your home data. The way it keeps track of your energy-saving habits is also unique to the Nest.

How Much Is Nest?

You can purchase the Nest Learning Thermostat (3rd Gen) in the Google Store for £219 with free shipping. This price does not include installation fees. You can opt to do it yourself or just call the professionals to avoid unnecessary hassle.

Google Nest does not provide installation services, but they can link you to recommended services. Or you can look for Gas Safe engineers in your area to help with your installation. Companies like Plumbingforce are based around the country and can help you with your thermostat and boiler needs. 

Your Nest thermostat comes with a 2-year limited warranty. Read the terms and conditions to know more. Always consult your sales representative if you have more questions. 

Nest In Your Home

Nest has a bunch of other smart home appliances that have a similar design to the Nest Learning Thermostat. Besides them working seamlessly together, they have a consistent look. There are no clashing styles here. 

Despite being a Google sub-company, Nest also works with Amazon or Google assistant. It can blend in your current home from the home assistant to the other smart appliances. There is no problem. 

Which Is Better, Hive Or Nest?

So, which one between the two is the best? The Nest vs Hive question is difficult because they do the same things. It isn’t a battle between the one with the unique features, but between which product does the job better. No matter the outcome of Nest vs Hive, always purchase according to the needs of your home. 


Hive Active Heating 2

Nest Learning Thermostat (3rd Gen)

Price

£179.00 or with a monthly subscription
Installation not included

£219

Installation not included

Connection

Wifi

Wifi

Geolocation

Available

Available

Design Customisation 

12 different colours 

7 neutral colours 

Mounting

Wall Mount or Stand

Wall Mount or Stand

Multizone 

3

20

Heating Schedule

Manually set

Self-learning

Warranty 

1 year

2 years limited

Heating Package

Available

Available

Voice Control Compatibility 

Amazon Echo and Google Home

Amazon Echo and Google Home

A couple of years ago, Nest would have blown Hive out of the water, but the steady changes and updates by Hive have put them on an even playing field. However, even with the upgrades, Nest Learning Thermostat is still the best on the market. The extra £40 is worth its self-learning abilities.

However, Hive Active Heating 2 is still a great option, especially for those who like the monthly subscription. There is always a little manual input, but it is more convenient than traditional thermostats. 

Can Nest And Hive Work Together?

Nest and Hive smart thermostats do the same thing. So there is no need to have both in the same home. However, if you are considering mixing and matching your other smart home appliances, then yes, you can make it work. 

Hive’s smart light bulbs with Nest’s wifi? No problem. Nest’s smart thermostat with Hive’s sensors or plugs? It’s okay too. You cannot, however, control Nest products through Hive and vice versa. It is best to buy the things in the same range so you can better control them.

No matter what you decide, homes that are always on the go can rest easy with Nest and Hive thermostats in their home. The smart home might still be a distant possibility for most families, but the tech is here. It will only advance more in time. 

Besides Hive vs Nest thermostats, you should also consider the other bare bones of the house. These systems cannot work well if you have a faulty boiler or damaged pipes. For any central heating and hot water needs, just contact us here at Plumbingforce and work towards building an energy-efficient home. 

Fixing Radiator Leaks: A Guide

radiator leaks

Conducting some DIY plumbing repairs within your home is a milestone every homeowner has to face. Whether it be unclogging a drain, fixing a dripping tap, or repairing a radiator leak, there will come a time in your life that you will have to get your hands dirty yourself. However, none of these tasks is easy enough to do without some kind of guidance. 

Fixing radiator leak, in particular, will require you to thoroughly read, watch, and understand numerous guides for you to be able to pull it off smoothly and without a hitch. To save you the trouble of having to go back and forth between numerous sites, we’ve prepared a short guide on what you can and should do when your radiator is leaking. 

So, You Think Radiator Is Leaking?

Is there a puddle near your radiator or a wet patch on the carpet beneath it? If so, then it’s probably leaking.  You don’t have to worry, though. Leaking radiators are a pretty normal occurrence. No need to panic and call for a radiator repair or boiler repair service immediately. Chances are, this is something you can resolve all on your own. 

To be able to stop a radiator leak from occurring, the first thing you need to do is identify where the leak is coming from. You may do this by first patting the radiator dry using an old rag or a traditional towel. Once you have patted it dry, run a kitchen towel or paper napkin all over the radiator and if you encounter moisture in any area around the radiator, then that is probably where the leak is. Remember, if the radiator is hot, make sure to keep your hands and arms protected while conducting this step. 

Is A Leaky Radiator Dangerous?

A leaky radiator is not dangerous all on its own. However, leaving it unchecked for long periods of time can lead to water damage on your furniture, flooring and eventually, the structural integrity of your home. Water damage may also cause moulds to form, which in turn, will pose many health risks for you and your family. 

Moreover, leaking radiators may also cause your central heating systems to stop working due to loss of boiler pressure. While this shouldn’t be a huge problem, heat could be a matter of life and death during winter. 

Find the best local plumbers in the UK!

What Can Cause A Radiator Leak?

There are many possible reasons as to what could be the source of the leak and why your radiator could be leaking. Here are some of the most common reasons:

A Leaky Radiator Valve

Out of the three things on this list, this is the most common culprit to leaky radiators. This is usually due to the wear and tear of your radiator’s internal workings. As the valve loosens, it will start to become less watertight, thus leading to a water leak. 

Half-open radiator valves may also cause this leak If this is the case, all you have to do is tighten the valve or turn the valve to the off position.

A Loose or Damaged Spindle 

Radiator spindles are joints that connect the radiator valve to the main body of the radiator. When it is loose or damaged, water will naturally leak out. 

Rust and Corrosion

You may also be having a radiator leak due to corrosion and rust. Over time, the insides of your radiator will develop corrosion due to its constant contact water and sometimes the lack of chemical inhibitors, which is a liquid added to the water in your central heating system in order to prevent the development of rust and corrosion. 

When corrosion develops inside your radiator, chances are, small holes will form underneath your radiator. When this happens, you will start seeing brownish puddles of water on the floor beneath it.

How Do I Fix A Radiator Leak?

Now that you’ve identified the most common causes of a radiator leak, you may begin making the repairs on your radiator. This guide will be divided into three parts depending on the type of leak as mentioned above. Before you begin, make sure your radiator is turned off and that you have towels and buckets ready nearby to prevent and clean up any messes that may occur. 

Fixing A Radiator With A Leaky Radiator Valve

Step 1: Drain your radiator system to below the location of the leak. 

Step 2: Turn off the supply valve where the water enters from, and the lockshield valve (the plastic capped valve). Be sure to remember how many times you turned the lockshield valve. 

Step 3: Undo the union nut with an adjustable spanner. Be ready to catch water when water drips from your radiator. 

Step 4: Open the bleed valve and let your radiator bleed

Step 5: Wrap your valve tails with PTFE tape. 

Step 6: Replace the union nut. Turn on the lockshield and supply valves. Be sure to turn the lockshield valve as many times as you did when you turned it off. 

Step 7: Close the bleed valve and check if leaks still persist.

If the situation requires you to replace your radiator valve, make sure to know exactly what kind of valve you will be needing before purchasing one. The size and fit of the valve to the radiator are very crucial to prevent further leaks from occurring. 

Once you’ve found the right valve, drain all the water from your central heating system. Unscrew the nuts connected to the water pipe as well as the valve you intend on replacing. Clean the threads at the end of the radiator before installing a new valve.

Wrap the threads with PTFE tape before attaching the new valve. Once attached, bleed your radiator and then refill the system. 

Fixing A Radiator With Loose or Damaged Spindles

If your radiator is leaking from the spindle, you may easily remedy this by tightening the gland nuts. If the leaks persist, undo the nut, add some PTFE tape around the spindle before re-tightening the nut. This should prevent any more leaks occurring. 

If the leaks continue, you would need to either replace the valve or call on a plumber to assess the damage for you. 

Fixing A Radiator With Rust and Corrosion

There is no fix for a corroding radiator, as rust and corrosion are both irreversible. If there has been too much damage by corrosion and rust, the only thing you can do is replace your radiator. 

How Do I Prevent My Radiator For Leaking In Again In The Future?

There are quite a few ways to prevent your radiator from leaking again in the future. One would be conducting regular checks on your radiator. Also, be on the lookout for unexplainable moisture or puddles on and around your radiator before the problem gets worse. 

You may also want to regularly drain your radiator to prevent the sludge from rusting away your radiator. Meanwhile, to avoid corrosion, use a chemical inhibitor, which is a liquid compound added into the water. 

If you don’t think you are confident in doing the repairs on your own, or if none of the methods above seems to work in fixing your radiator, it is best to call for the help of a professional plumber as soon as possible. 

Connect with the best local plumbers and boiler engineers near you

Addressing, Identifying and Preventing Water Leaks

fixing water leaks

The sounds “drip, drip, drip” has always been a dreadful sound for property owners, homeowners and renters alike. That is because aside from it an annoying sound that can keep you up all night, it is also the sound of your money quite literally going down the drain. 

Water leaks, unfortunately, are very common in households all over the world. A fact that the Association of British Insurers confirmed when they disclosed that one in every four building and content insurance claims are for “release of water” cases, which basically insurance-speak for leaky pipes or burst pipes. 

Sometimes, it makes itself known with persistent dripping sounds, some moisture here, or even a puddle there. However, more often than we realize, water leaks like these sneak up on us and only makes itself known with a flood in our kitchen or a ceiling that gave in after a pipe burst.  

Either way, though, such leaks are an extreme inconvenience that we must all, at one point, face. What you can do, though, is take the steps to help minimize the damage that a water leak may cause on your home and your wallet. 

And so, to save you the headache (and the heartache) of having to worry about spending lots of money on house and plumbing repairs, as well as an expensive meter reading, we’ve come up with a comprehensive guide to help you take on the challenge of a water leak in your new home.

Find the best local plumbers in the UK!

What Happens When You Have A Leak In Your Home?

Leaks in your home should be a cause of alarm for a multitude of reasons. Paying your bill which is alarmingly and significantly higher than your usual water bill is only the beginning of your issues.

Aside from expensive water bills, water leaks can be the beginning of many problems in your home. For example, unchecked water leaks can cause tons of physical damage to your home. You may also encounter damaged furniture and appliances due to the moisture, or worse, flooding caused by the leak. If the leak is subtle, undetected, and unchecked for months, it can affect more than just the visible parts of your home but compromise its structural integrity as well. Property managers, from all over the world, agree that a house flood can exponentially decrease the value of a house when you try to sell it. Potential buyers are easily turned off from a property if they find out that it has experienced a flood. This is because the damage seeps through the floorboards and opens up a lot of unfortunate possibilities such as mould growth.

Moreover, such water leaks may also have the potential to ruin your home’s market value forever. This is because while you may have been able to “fix” the leak, its effects will remain. Lastly, such leaks can and will cause mould and fungal growth if not properly addressed. This, in turn, may pose a handful of health risks for you and the rest of your household.  Humans exposed to mould may experience nasal congestion, difficulty breathing, coughing and sneezing fits, and a compromised immune system. Furthermore, mould can eventually grow within them, thus opening them up to worse health complications. Meanwhile, infants exposed to mould develop an increased likelihood of developing asthma.

Aside from the hazards stated above, sewage leaks are also toxic to humans and pets. 

Signs There Is A Leak In Your Home

Stopping or fixing a leak, however, is only possible when you know that there is a leak in the first place. Here are some telltale signs for a leak that you should be on the lookout for:

Cracks On Your Walls

Leaks, no matter how minimal, may have an effect on the foundation of your home and compromise its structure. When leaks persist and affect the same spot on the ground underneath your home, it may eventually cause your house to shift ever so slightly. While you may not feel this happen, it will cause some stress on your walls. 

The Sound of Running Water

Make sure you’re not hearing the sound of any faucet, shower, toilet valve or spigot running. Once everything is shut off, check your water meter reading. Do not use the water for a few hours, and then check your water meter reading again. If you see a change, then chances are you do have a leak in your home. 

Damp or Wet Floors

If you find unexplainable damp patches on your carpet or puddles of water on your floor, then you probably have a sewer leak. Such leaks are extremely persistent and pose a handful of health hazards for you and your family. 

Unusually Expensive Water Bill Costs

If your monthly water bill comes out more costly than usual for no explainable reason, then you are more than likely to be sporting a leak in your home. 

Foul Odours

If you’re smelling funky and couldn’t find its source, then chances are you’re smelling the mould and mildew that are slowly developing within your home. 

Where Am I Most Likely To Find A Leak In My Home?

If you think you’ve got a link, but are not entirely sure on where the source of the leak could be, then here are some areas of your home where a leak could be possibly located. 

  • Water tank
  • Toilets
  • Showerheads
  • Pipework
  • Appliances i.e. Washing Machines, Refrigerators, Radiators
  • Boilers

Connect with the best local plumbers and boiler engineers near you

What Do I Do When There’s A Leak?

If you experience sewer flooding, burst pipes, or even just notice a small water leak within the boundary of your property, the very first thing you should do is turn off your water mains. This will not only help you save water which would have otherwise been wasted due to the leaks on your supply. 

Once you have done that, try to identify or locate the source of the leak. Check your appliances, supply pipes, and any water pipe you can think of. If you cannot find the source of the leak, then it is best to call in a registered or approved plumber, preferably the one who is responsible for your pipework. If this is not possible, then any emergency plumber will do. 

Do not attempt to fix leaks on your own, as this may only cause more problems for you in the long run.  

Looking Out For and Preventing Catastrophic Leaks In Your Home

While it is important for you to know when a leak is present in your home and what to do when there is one, it also wouldn’t hurt for you to be vigilant in order to stay ahead of the leak. Here are some steps you could take in order to be constantly and actively on the lookout for possible leaks within your property. 

  • Before paying your bill, dedicate some time for reading it. Understanding your bill is vital, as it helps you make sure that everything is in perfect order. You may ask your local water resources management centre to give you monthly statements based on your monthly reading in order to properly check your water usage and consumption rates. 
  • Take note of the water pressure when you use the sink or take a shower. Low pressure could also mean a leak somewhere along your water pipe. If the case is isolated to tap or showerhead, though, then it could be a small clog.
  • Monitor when your boiler or water heater comes on. If you notice it running almost constantly, then you probably have a leak somewhere along your water pipes. 
  • You may also call for a plumber to conduct routine maintenance checks on your plumbing system to ensure that there are no leaks and that everything is in perfect order. Approved plumbers may opt to check for leaks using thermal imaging and acoustic listening devices to complete the task more efficiently. 

Final Thoughts

While you do not necessarily have the option of completely preparing your home for a catastrophic water leak, there are many steps you can take to prepare yourself for it. Moreover, by taking these steps, you can help minimize the damage and costs that could result from a water leak. 

It is also important to remember that you should not attempt to fix leaks in your property yourself. Always seek out the help of a professional plumber to ensure any issues from worsening or escalating. 

A First Time For Everything: How to Unblock a Toilet

Unblock a Toilet

Learning how to unblock a toilet is a helpful life skill that can save you in a pinch. Whether it is your toilet at home, at work, or a friend’s house, letting someone else deal with your backed up waste is considered embarrassing. It becomes more about your poop and less about the toilet. Not all toilet clogs are not due to the density or size of your waste. There might be an existing blockage like toilet paper, sanitary pads, tampons, and the occasional whatever-my-child-tried-to-flush. Never fear! There is more than one way to unblock a toilet. Before we go into the steps of how to unblock the toilet, let us consider what happens when they are left alone.

Will a toilet eventually unclog itself?

Toilet blockages are a case to case basis. If you are living alone or with other adults and the likelihood of unexpected items in the drain is low, you can try to wait it out. Gravity plays a significant role when it comes to the drainage. There is a chance that the toilet will unclog itself with enough time. If you notice that it is decreasing slowly and you have another toilet in the home you can leave it overnight and reassess the next day. Sometimes the blockages fix themselves.

How to Unblock Your Toilet (DIY)

A proactive approach is fixing the blockage yourself. There are different levels of effort, depending on the severity of the blockage and the materials you have on hand. Before trying any of these methods, prep yourself and your bathroom for possible messes. There might be splashes on your bathroom floor and your clothes. Equip yourself with old clothes that you don’t often wear and can easily toss into the wash after you unblock your toilet. Wear a pair of rubber gloves meant for toilet cleaning. If you do not have a couple of rubber gloves, find the next best thing you have on hand from latex gloves to plastic bags. To streamline your bathroom cleaning process, cover the floor near the toilet bowl with newspaper, scrap paper, towels, or old clothes to absorb any excess water.

Tip: If your toilet is overflowing, do not attempt to flush the toilet again. Take the lid off the tank and press down on the toilet flapper, the flapper is what prevents the water from entering the toilet bowl. When it does not stay down, look for an object to weigh it down. By stopping the additional water, you can calmly decide the next step to take.

Find the best local plumbers in the UK!

No-Plunger or Auger Methods

A blocked toilet can happen any time, and if you find yourself in a new place without any of the proper tools, there are things you can try to help the blockage along. These methods take up more time compared to unblocking a toilet with tools. There is no instant gratification; patience is required. 

Dish Soap and Hot Water

Heat some water, bring it up to a boil and let it cool or mix in a little cold water. Trying to find the right temperature that can help break down the blockage, but not too much because it could damage the porcelain toilet bowl. You can opt to add the hot water first and see how the blockage is moving then add a bit of dish soap. Or mix the dish soap with the hot water and pour the mixture down the toilet bowl. The dish soap helps loosen the blockage and provides a nice slip to help things along.

Baking Soda and Vinegar

Another DIY drain cleaner is using baking soda and vinegar. The general idea is to use the chemical reaction to help breakdown waste. It will fizz and bubble a lot, but don’t be afraid. It is a familiar and safe cleaning agent that has been in countless school science projects.

There are different ways you can go about it. You can create the mixture first in a separate container, or pour the baking soda first and slowly add the vinegar. The ratio of baking soda to vinegar varies as well. You eyeball the amount, but if you want to go by the numbers a 1:1 or 1:2 parts baking soda to vinegar should do the trick. You can also add a bit of hot water along with your DIY drain cleaner. There is no fixed time, but leave it for a couple of hours. If you can manage to wait overnight, do so. Checkback in the morning with a test flush and see if it unblocked the toilet.

Improvised Tools

If you are willing to sacrifice a wire coat hanger, a mop, or a toilet brush–you can create an improvised toilet plunger or auger. For the mop or toilet brush, cover the end with a plastic bag and make sure it is secure. Tie it off with a rubber band or a duct tape. Use it the same way you would with a plunger, push it down with short thrusts then lift.

For the wire coat hanger, you can create an auger/ toilet snake. Break the coat hanger and try to come up with a long thin strand with a hook on end. Run it through the drain and try to feel for the blockage. You can opt to pull the blockage out or break it down. To break the blockage, twist the wire, use the hook to break solid pieces that need help. If the obstruction is not human waste, it’s best to pull it out and collect it. There is no good in pushing the blockage further down the drain and have a similar problem at a later date. Even without the right tools, you never have to wonder about how to unblock your toilet.

Connect with the best local plumbers and boiler engineers near you

Plunger

For conventional methods, the plunger is the first thing that comes to mind! It is best to invest in a good quality plugger in the shape of a ball or with a rubber flange. Tap your plunger on the floor, if it is stiff pour hot water to soften up the rubber. A flexible plunger is easier to use and provides better results. Give deep and shallow pushes, then release. Repeat until you have unblocked the toilet.

Auger/ Toilet Snake

An auger, not an improvised coat hanger, is easier to use. Before you use it, make sure the plastic/ rubber is intact, if the metal is exposed, it could scratch your toilet bowl. You can cover it with duct tape when you are in a pinch. Run it through the drain and twist the handle to break down the blockage.

When do you call a plumber?

Three cases could push you to call a plumber. The first is that you have tried all available DIY methods. If it cannot be taken care of by the auger/ toilet snake, the block is probably too far gone. Your toilet might need to be taken apart, and a professional is best suited for the job.

The second is even before you tried DIY methods; you noticed the water is backing up through other drains in the house. If your initial attempt to flush affects your sink and shower, then stop the overflow and contact a registered plumber in your area. Your toilet affects other drains is a sign that there is a problem with the main lines.

The last case is when you don’t want to or have the time to address the issue yourself. While getting a plumber can be expensive, they can take care of the range of problems that come with it. Never stare at a blocked toilet in fear! Work the problem slowly but surely.

Things You Need To Know Before You DIY Your Gas Hob Connection

Gas Hob Connection

Food is one of our basic needs as human beings, needing it primarily for energy and nutrition. That is why homes need to be fitted with cooking stoves, whether electrical or gas. As opposed to the open fires that our ancestors used to cook with, using stoves produce less smoke and needS less work. Because we can adjust the heat accurately, stoves are also less dangerous and more efficient. With just a flick of our wrist, a blue flame flickers to life, ready to cook up your meal. If your old stove is starting to break down or you’re moving into a new, unfurnished home, we’ll be tackling everything you need to know about connecting and fitting gas hobs in your property.

The Different Parts of a Gas Hob 

As their names suggest, gas appliances use gas as fuel. Before installing a new one in your house, you need to first understand how it is meant to work and what are its different parts. It’s also beneficial to know a gas hob’s difference from a gas cooker.

Natural gas comes from a gas main that is connected to the cooker or stove. When you turn the control knob on, the valve regulator opens and gas flows through the jets of the burners. And once the cooker ignition is pressed, a circuit or batter produces a spark that ignites the gas. A hob burner is merely a part of an entire cooker. Let’s examine its parts.

The valve of your gas hob controls the gas supply from the pipe to the jet. It is either fully opened or fully closed. The jet is used to distribute the gas evenly through tiny slots that form a circle on the edge of the burner. In the middle of this circle, a burner cap prevents food from spilling onto the burner and keeps the gas flow focused on the burner slots. When you switch your knob on, the ignitor creates the spark that should burn the gas as it exits from these slots.

When part of an entire cooker, the gas is shared by the oven and the grill. Setting the oven to your desired temperature will trigger a gas flow to the burner at the back of the oven. While the grill works the same way, the gas flames flow our from the pipe’s tiny holes to heat up the gauze or grid equally.

To make a booking or to find out more about our services!

Can I DIY my Gas Hob Connection?

Now that you know how a hob operates, it’s important to learn what you can or cannot do during a gas hob connection. If you want to fit a gas hob yourself, always remember that you are not allowed to connect the hob unless you are a Gas Safe registered engineer. 

According to the Gas Safety (Installation and Use) Regulations 1998, you must be competent before working on a gas appliance. Regulation 3 (3) it states that anyone who is rewarded for gas work (whether fitting or otherwise) should be registered with Gas Safe. While a lot of DIYers debate the meaning of “competence” under the regulation, we believe that you must have the knowledge and experience to fit gas appliances before installing your own. There are different exams, as well, that cover domestic, commercial, liquefied petroleum gas (LPG), and other gas fitting skills.

While this regulation prevents unregistered professionals from selfish motives, it also protects the public and the customer from dangerous activities. Should some catastrophe result from your work, then that is a clear sign that you are not competent enough to handle a gas fitting task and have broken the law. Assuming no major accident befell you, you are most likely going to face legal action.

When looking at instructions fitting your gas hob may look simple and straightforward. However, this four-step process needs to comply with different standards that your installation manual may not mention. Gas Safe Registered engineers normally run many checks before, during and after their work. Though tedious, the process is necessary. Before carrying out any gas work, it’s important to know and understand the regulations and standards for every aspect of your task.

A good compromise we recommend is to call a registered fitter and work together in a mentor-student type of fashion. The fitter can act as your adviser when dealing with finer points of the regulations, approves the final plan before starting and checking the work once finished. While you may have a difficult time finding registered fitters who are willing to do this, this is still a better way to DIY your gas appliances without breaking the law.

What are the Regulations for Gas Hob Connections?

Before you start fitting your gas hob, you need to draw out your plans. Here are some things you can take note of:

  • Distance: While you work, keep a safe distance from anything that could be a fire risk. If you’re working with an LPG instead of NG, it is worth noting that LPG tanks are more flammable than NGs and should not be placed below ground level. For this reason, consult a gas engineer for specific regulations.
  • Ventilation: While you’re keeping a safe distance from any fire risks, make sure that the room you’re in is also ventilated. Should a gas leak occur before or after installation, it is better to place the gas appliance where there is a window or door nearby. With this in mind, there are also guidelines when it comes to positioning your hob:
  • If the hob is placed under a window, the window should be at least 500mm away from it.
  • If it is by a door, it should be at least 500mm away.
  • The hob should always be against a wall and at the end of a worktop.
  • Hot Zones: When installing your cooker or hob, take note of the hot zone on top of and on either side of the appliance. Make sure that there is nothing fixed for 760mm above it, including the extractor hood. On both sides, the hot zone is at 150mm where nothing is placed up to a height of 460mm. Once you have your hot zone laid out, there should be no plugs, kitchen units or wares placed here that could burn or melt.
  • Gas and Electricity Supply: Your gas and electricity supply should be placed within 1.5m from your appliance’ location. Check what kind of feed your hob will need. Normally, most gas appliances only need 13A. In some cases, however, you will need a 32A fused spur.

Fitting a gas hob into your home is not as simple as it sounds. While you may have these regulations and standards down pat, we still recommend having an expert on board. Our engineers at Plumbingforce are Gas Safe registered and can install and test your gas hob. Book an appointment with us today.

Gas Fire Installation: The What’s and The How’s

Gas Fire Installation

Coming home from a long and cold drive home, it feels nice to settle on your couch in front of your fireplace. The sight of the swaying flames, the smell of burning oak and the sound of crackling wood is enough to calm the mind of the day’s worries. While it can be comforting to lay in front of your open fire, having to sweep up the ashes, stabilising the temperature and keeping the warmth in your room is time-consuming and inefficient. If you want to be more efficient with your time and money, you may want to consider replacing it with a gas fire. 

In this blog, we will tackle what a gas fireplace is, the process of gas fire installation and how much it may cost you.

What is a gas fire fireplace: Open Fire vs Gas Fire

Heating your room through an open fire will give you the ambient temperature, allowing you to choose between different types of wood or coal available in your area. However, as its name suggests, having an open fire leaves your fuel (the wood) to burn up quickly, wherein most of the heat escapes through the smoke and out of the chimney and warms your room only by 30%. Even after the fire is extinguished, the heat from the room will still rise up and out of the chimney. What’s more, it’s hard to put out a full grate of coal once it starts burning. You will need to make sure it keeps burning by stoking the flames from time to time. This means, four hours into your sleep, you will need to plan ahead before refuelling your fireplace with more coals.

Your gas fire is a cleaner and more convenient way to heat up your room. While there are real flames, a modern gas fireplace is sealed with glass and provides radiant heat. Because the fuel is gas, the fires don’t emit smoke. Instead of a chimney, they will need a tube in the wall where waste gases can escape. The experience is very like having an open, giving off radiant and convected heat without wasting so much energy. In comparison to wood fires, the air in your home is cleaner and the installation is more affordable. You won’t need a complicated masonry hearth and chimney that can take up a lot of floor space. If you already have a hearth, engineers will have an easier time fitting a gas fireplace insert instead of building a fully-functioning chimney. While, of course, electric fires offer the highest level of cleanliness, gas also has the lowest cost among the three choices. And you don’t even need to buy wood and find a space to keep them dry.

To make a booking or to find out more about our services!

Now that you know how gas fireplaces work, it has three different build types.

  • Insert: As mentioned earlier, if you already have a wood-burning firebox, it can be retrofit with a gas fireplace. This is a reliable source of warmth, filling your room with warm air and heat.
  • Built-in: If you don’t have a hearth in your home, built-ins are more common in minimalist and modern homes as they can be built according to contemporary styles. Whether you want your fireplace underneath your television or in Scandinavian design, built-ins tend to be more flexible.
  • Log sets: Built for style more than heat, basic burners are installed in open fireplaces.

With each type, you may choose to either have a vent where the fumes are sent outside of your home or have no vent where all the heat and exhaust disperses into the house.

How does gas fire installation work?

While it may be cheaper to run a gas fireplace than an electric one, gas fire installation requires a Gas Safe registered engineer for safety and legal reasons. This badge of credibility assures you that your appliance will be tried and tested before and after installing it. While it may be tempting to connect a gas fire to your system on your own, it is illegal and dangerous. Given this, it is important to add an installation fee to your budget. Though most retailers also offer installation services, this easy route may not be the most affordable.

If you’re in need of a replacement instead, you will need new plasterwork where the old gas fire was removed. This means, hiring a plasterer and redecorating the affected areas. 

Before choosing a new gas fire, make sure that your engineer comes to your place to have your flue or chimney lined and tested. If you don’t have one, you may opt to install the matching flue to your gas fire or choose a gas fire that does not need one. These models use catalytic converters to change the particles into a harmless vapour that can be dispersed into the room.

How much does installation cost?

An average gas engineer will charge about £100 to £150 per day in labour. It can take about one to two hours to fit a new gas fire but if the engineer were to replace an old model, the work may take up to three hours. The price of your installation will depend on the model you choose and on any extra work (e.g. pipe repairs). 

Once your new gas fire has been installed, make sure that you or your landlord procure a Gas Safe certificate. Carrying out an annual maintenance check may cost from £60 to £100 and take up to two hours. We also recommend installing a carbon monoxide detector in your room to alert the household if your gas is leaking.

Should I DIY?

If you are interested in building your own fireplace, we recommend that you still call a gas engineer to check your DIY-ed creation and have professionals install your gas fire. Whether or not you have a background in construction, having other experts check on your build can prevent further accidents from happening (especially when you have no prior experience with carpentry). When it comes to installing your gas fire, however, leave it to the Gas Safe Registered engineer.

When it comes to heating your home, we always recommend choosing the safest option. Not only are gas fires cleaner and more efficient, but they also keep your family and pets from unnecessary burns from getting too close to the flames. Our engineers at Plumbingforce are Gas Safe registered and can install or repair your gas fireplace. Book an appointment with us today.