gas-saf-register logo

Call us on: 0330 173 2923

Call us on: 0330 173 2923

Heating Conundrums: How to Balance Radiators

home water radiators

Only 5% of homes in the UK do not use central heating. For the 95% of the population, you more or less know the moving parts that keep your house nice and toasty. Your boiler, radiator, and hot water collection work together to make the colder months more bearable. Every part of your central heating system needs to properly work for you to enjoy the benefits of a warm home.

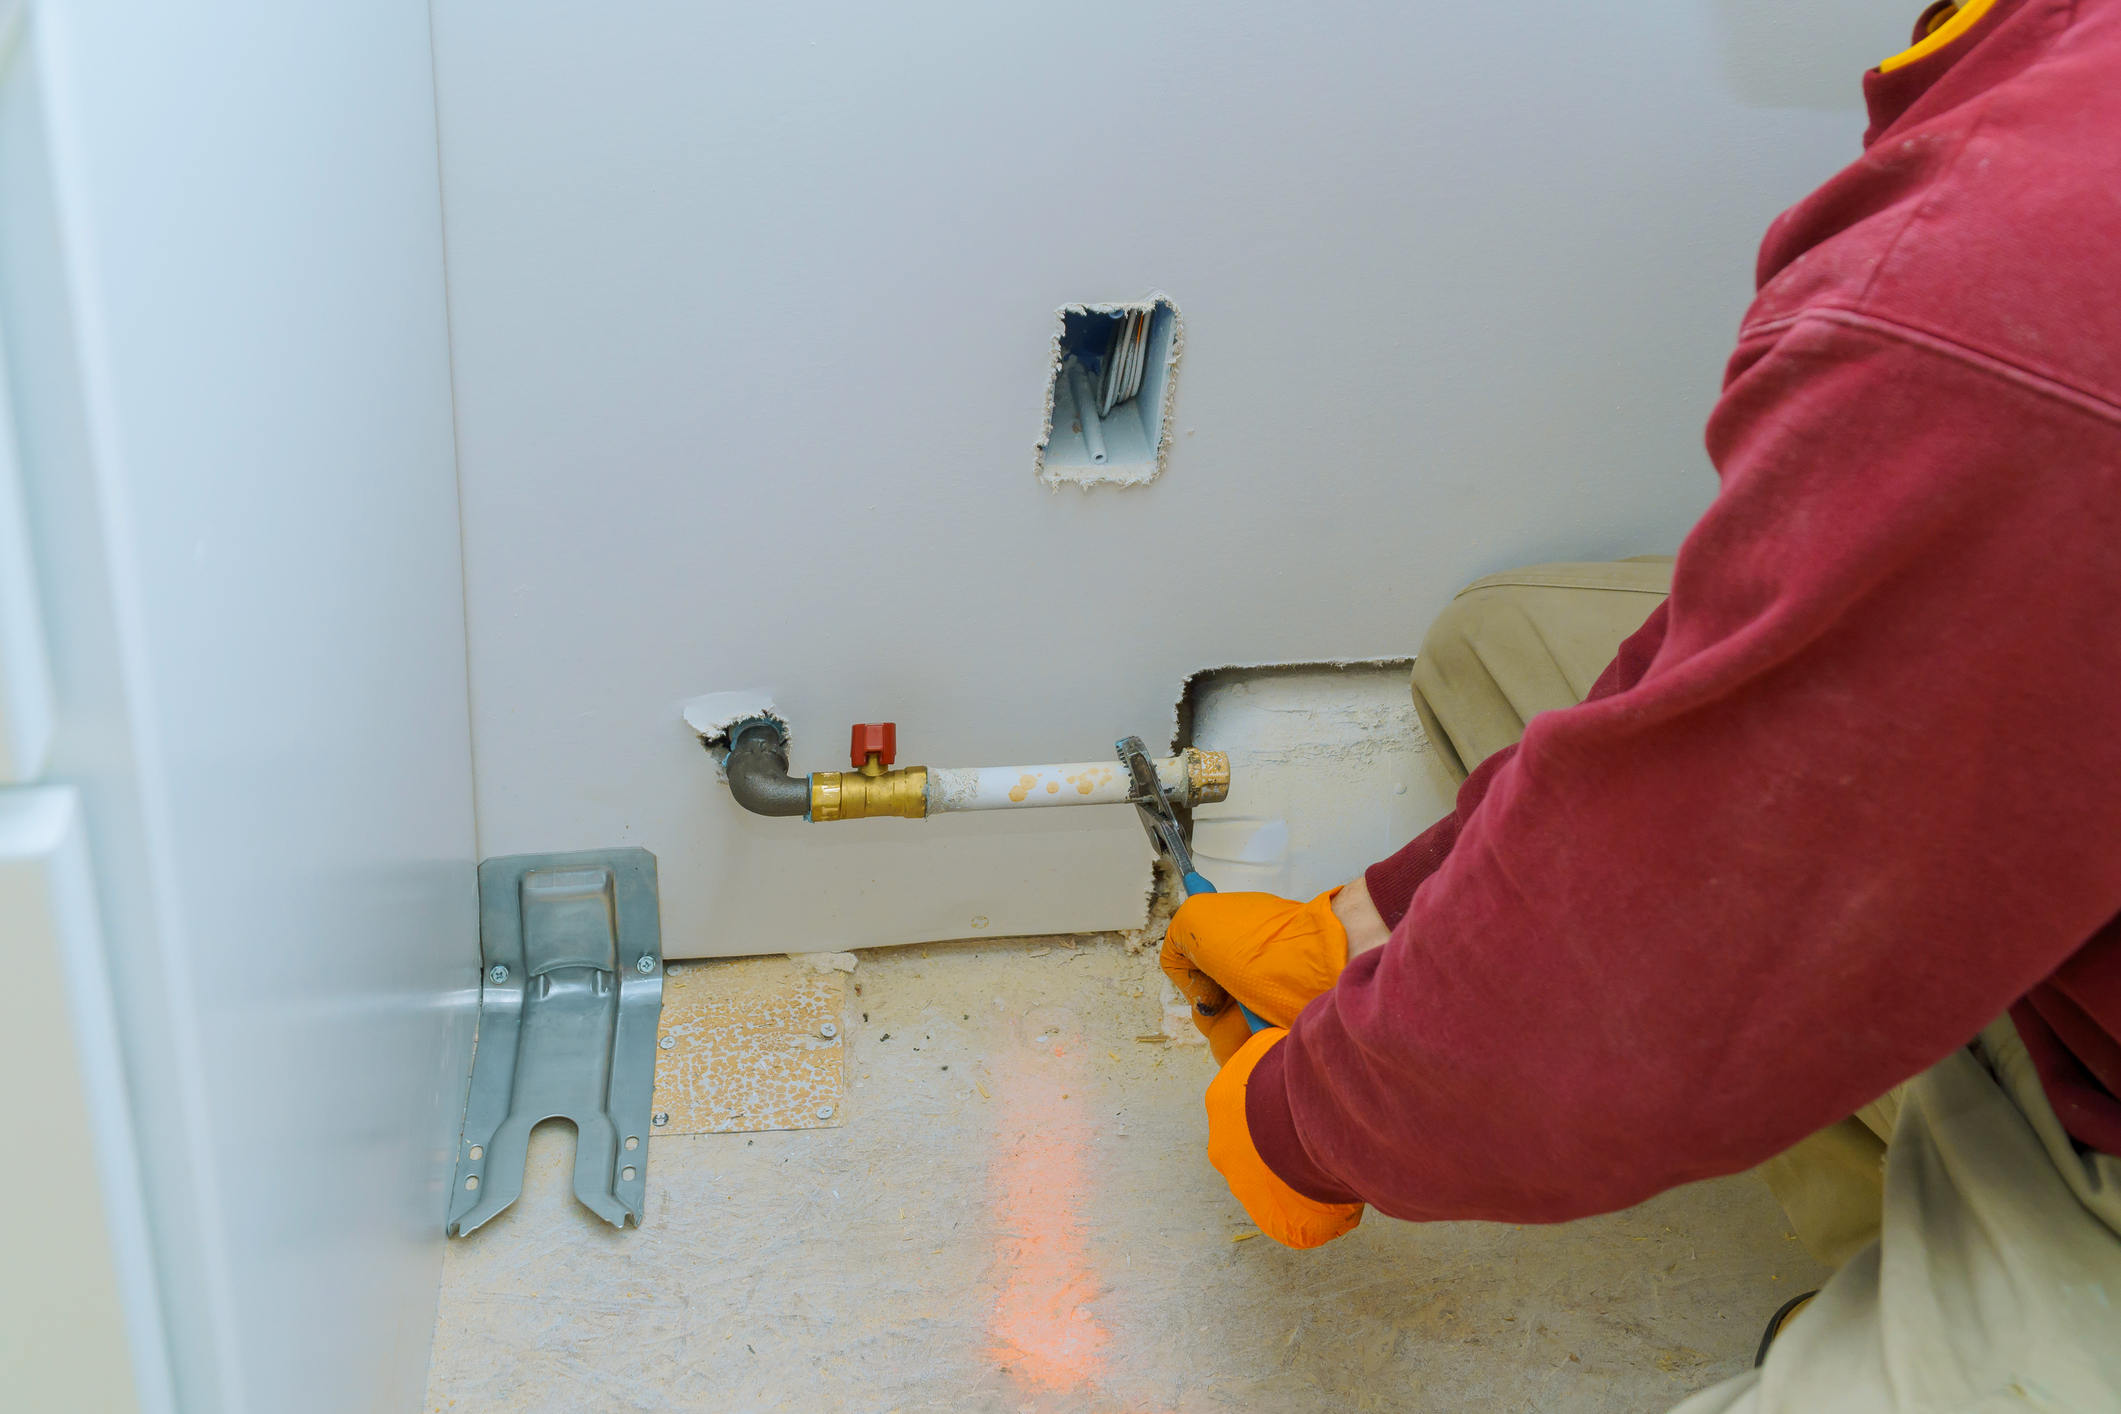
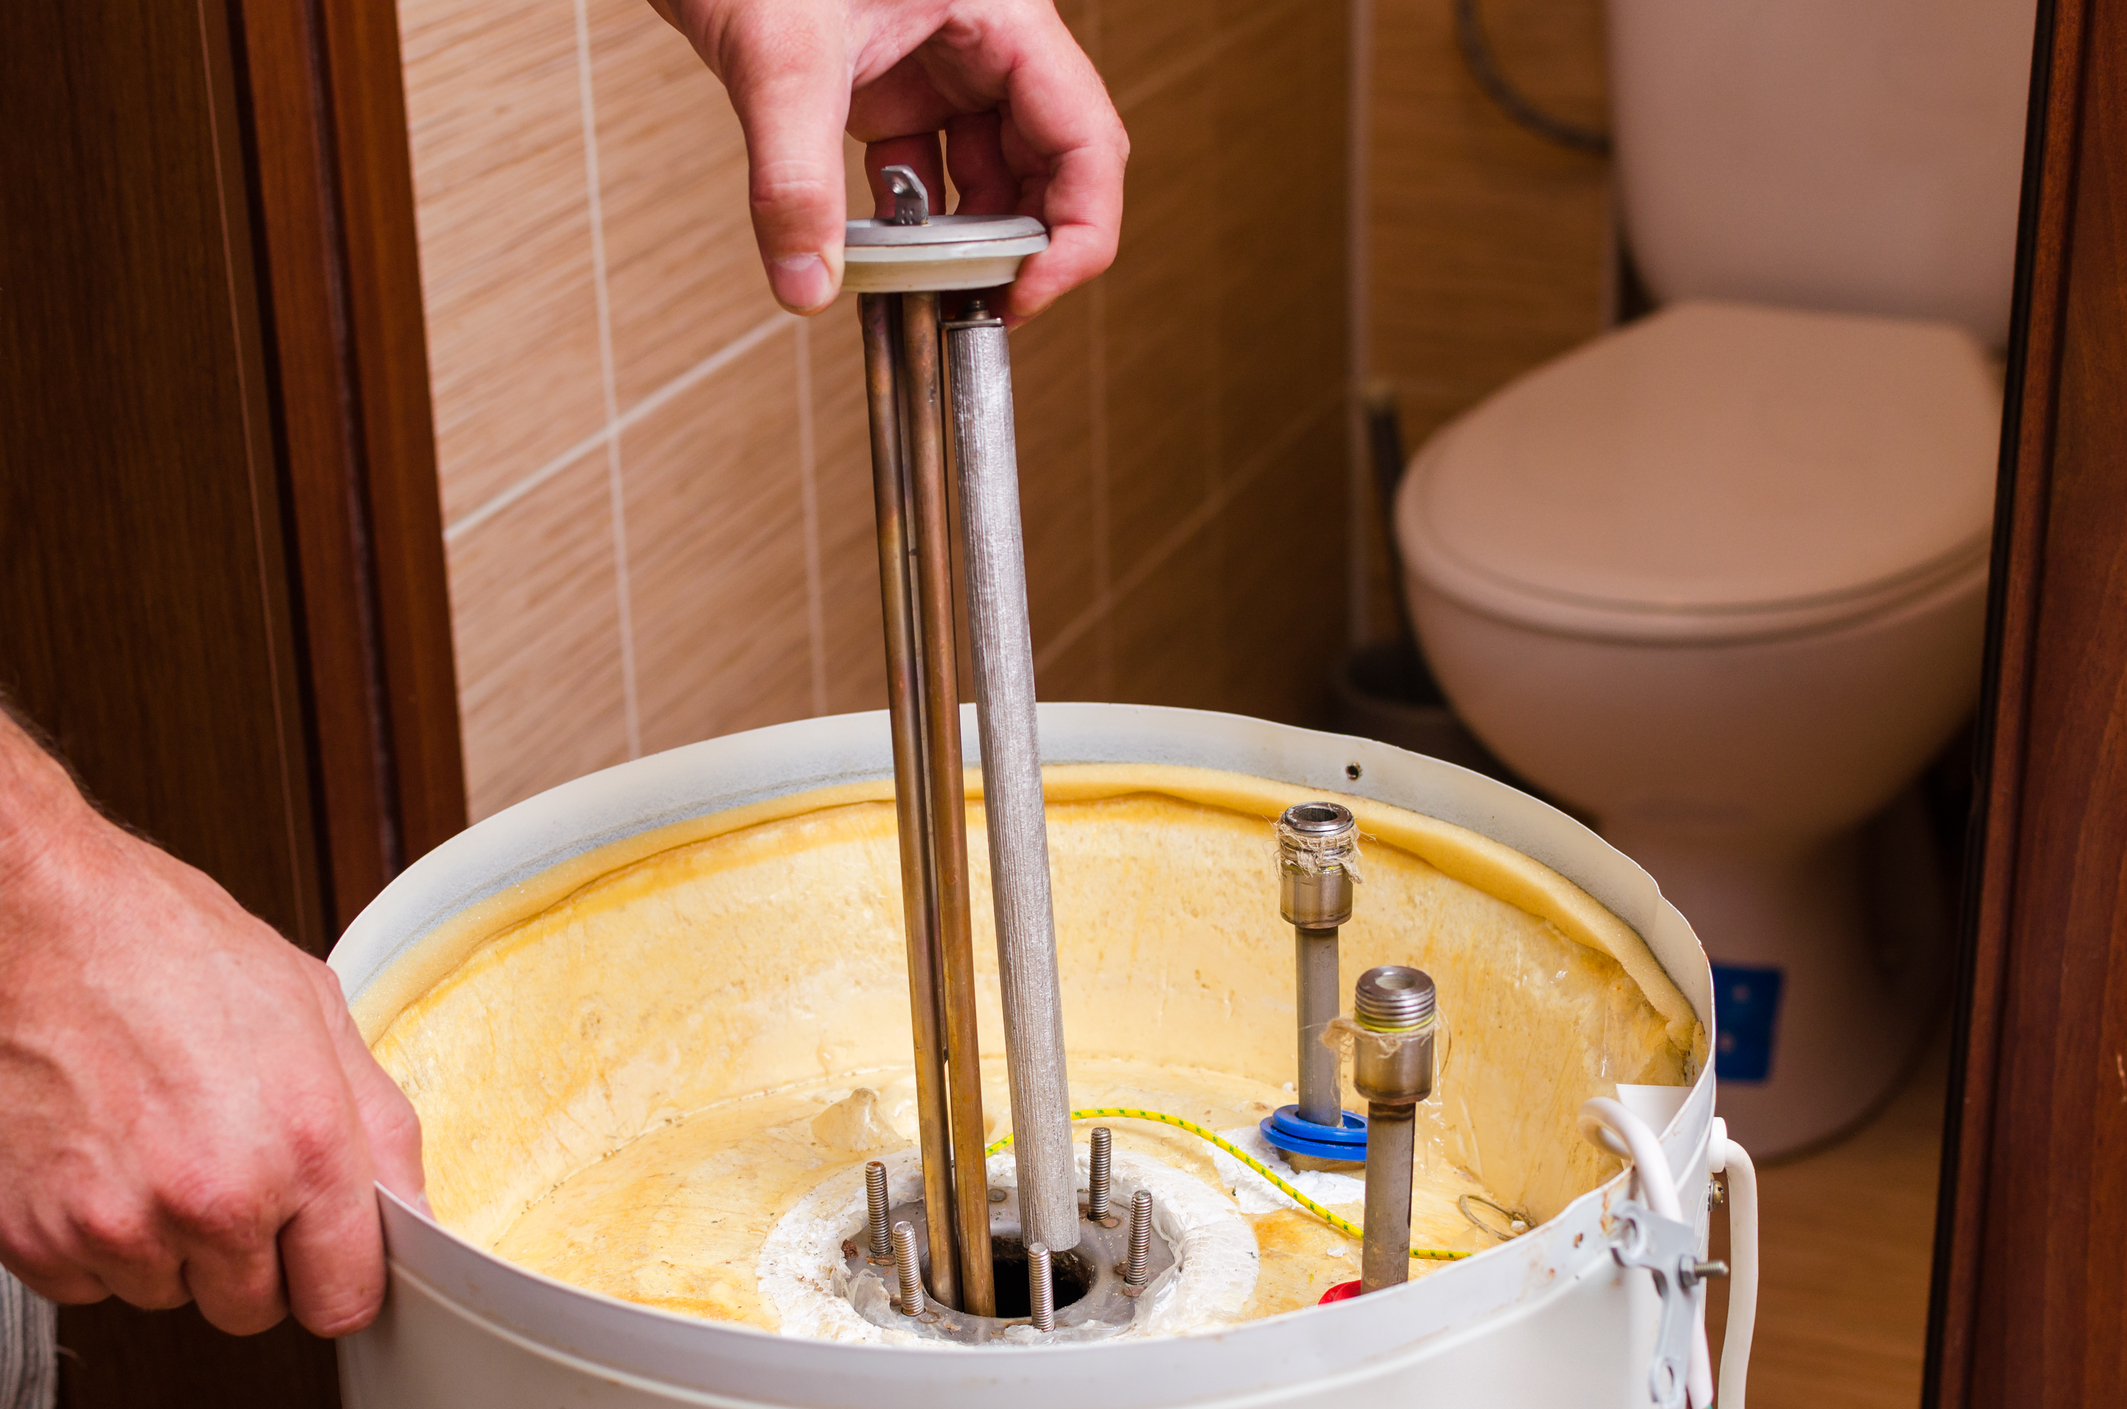
Your boiler takes care of the heating, through gas, fossil fuels, or electricity. They heat the water that enters your home. It splits into two categories, most of that goes into your shower, dishes, and hot tea. The rest of it goes through your radiator and becomes a vital part of keeping you warm.

Heating problems can significantly affect your quality of life, so it is best to get to work. You can choose to DIY some of these problems like balancing your radiator. But when in doubt, always contact a professional

Find the best local plumbers in the UK!

What Are Radiators?

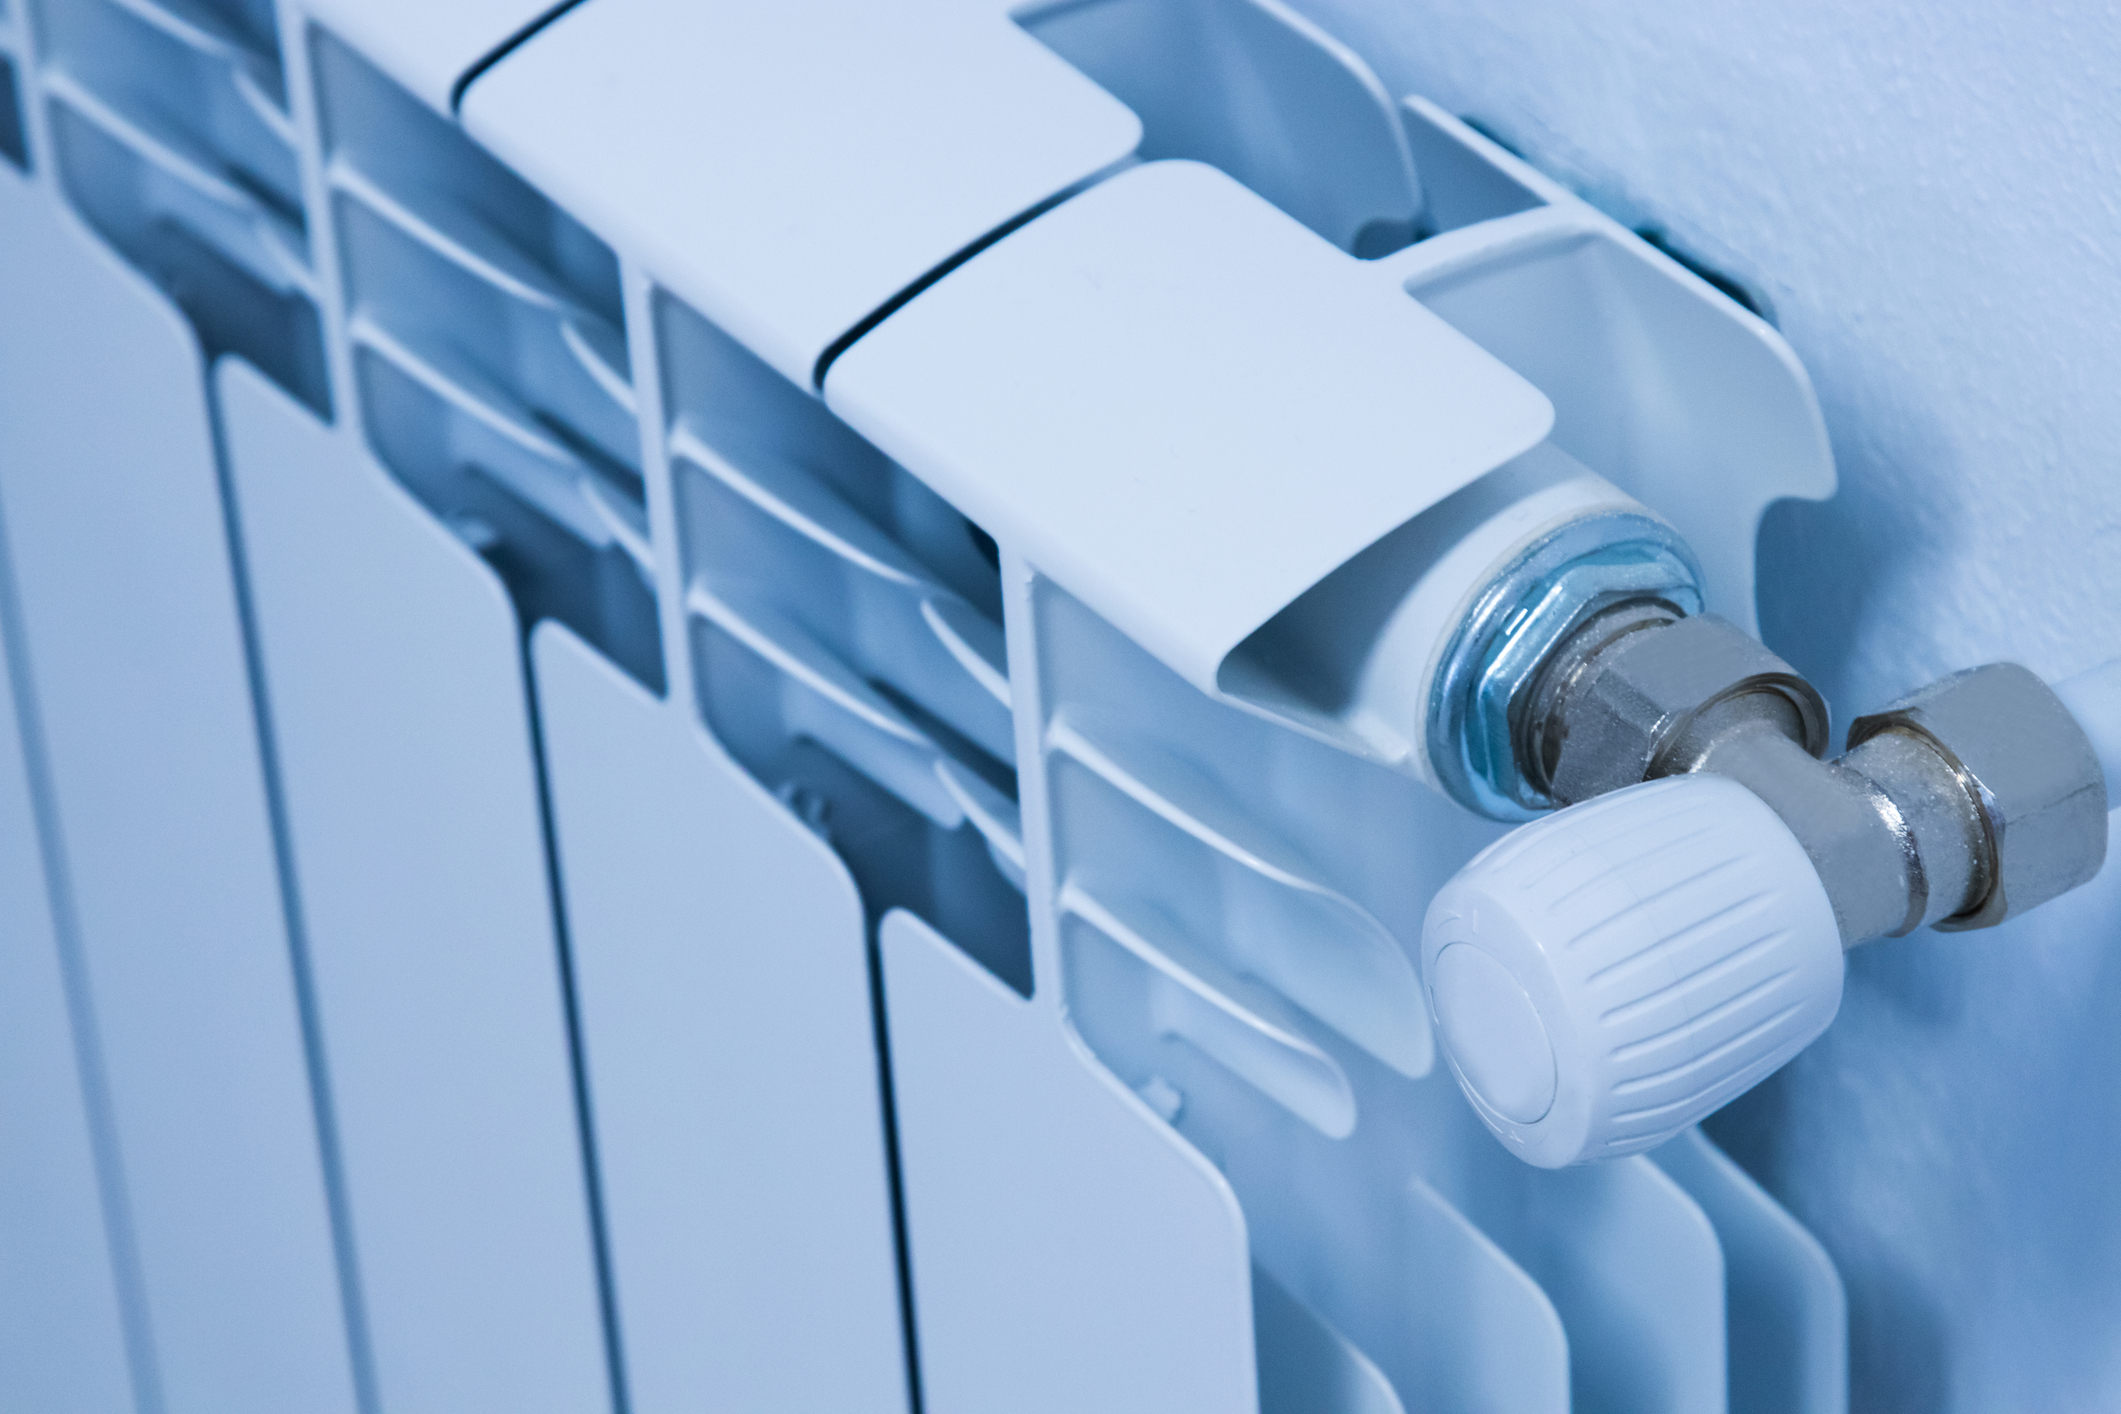
They are an important part of your central heating. Hot water runs through the series of bent pipes in the radiator. The twists and turns slow down the journey of your water and create a spot where you can feel the concentrated heat. So, when you stand by a radiator, you can feel that heat transfer. The longer it runs, the warmer the room will be. 

After the hot water cycles through the house, it goes back to the boiler to reheat. While traditional hot water radiators do not need plugs like other appliances, you can still save energy with proper use, by properly maintaining them throughout the year and turning them off when not in use. With proper use and maintenance, you can extend the life of your central heating system. 

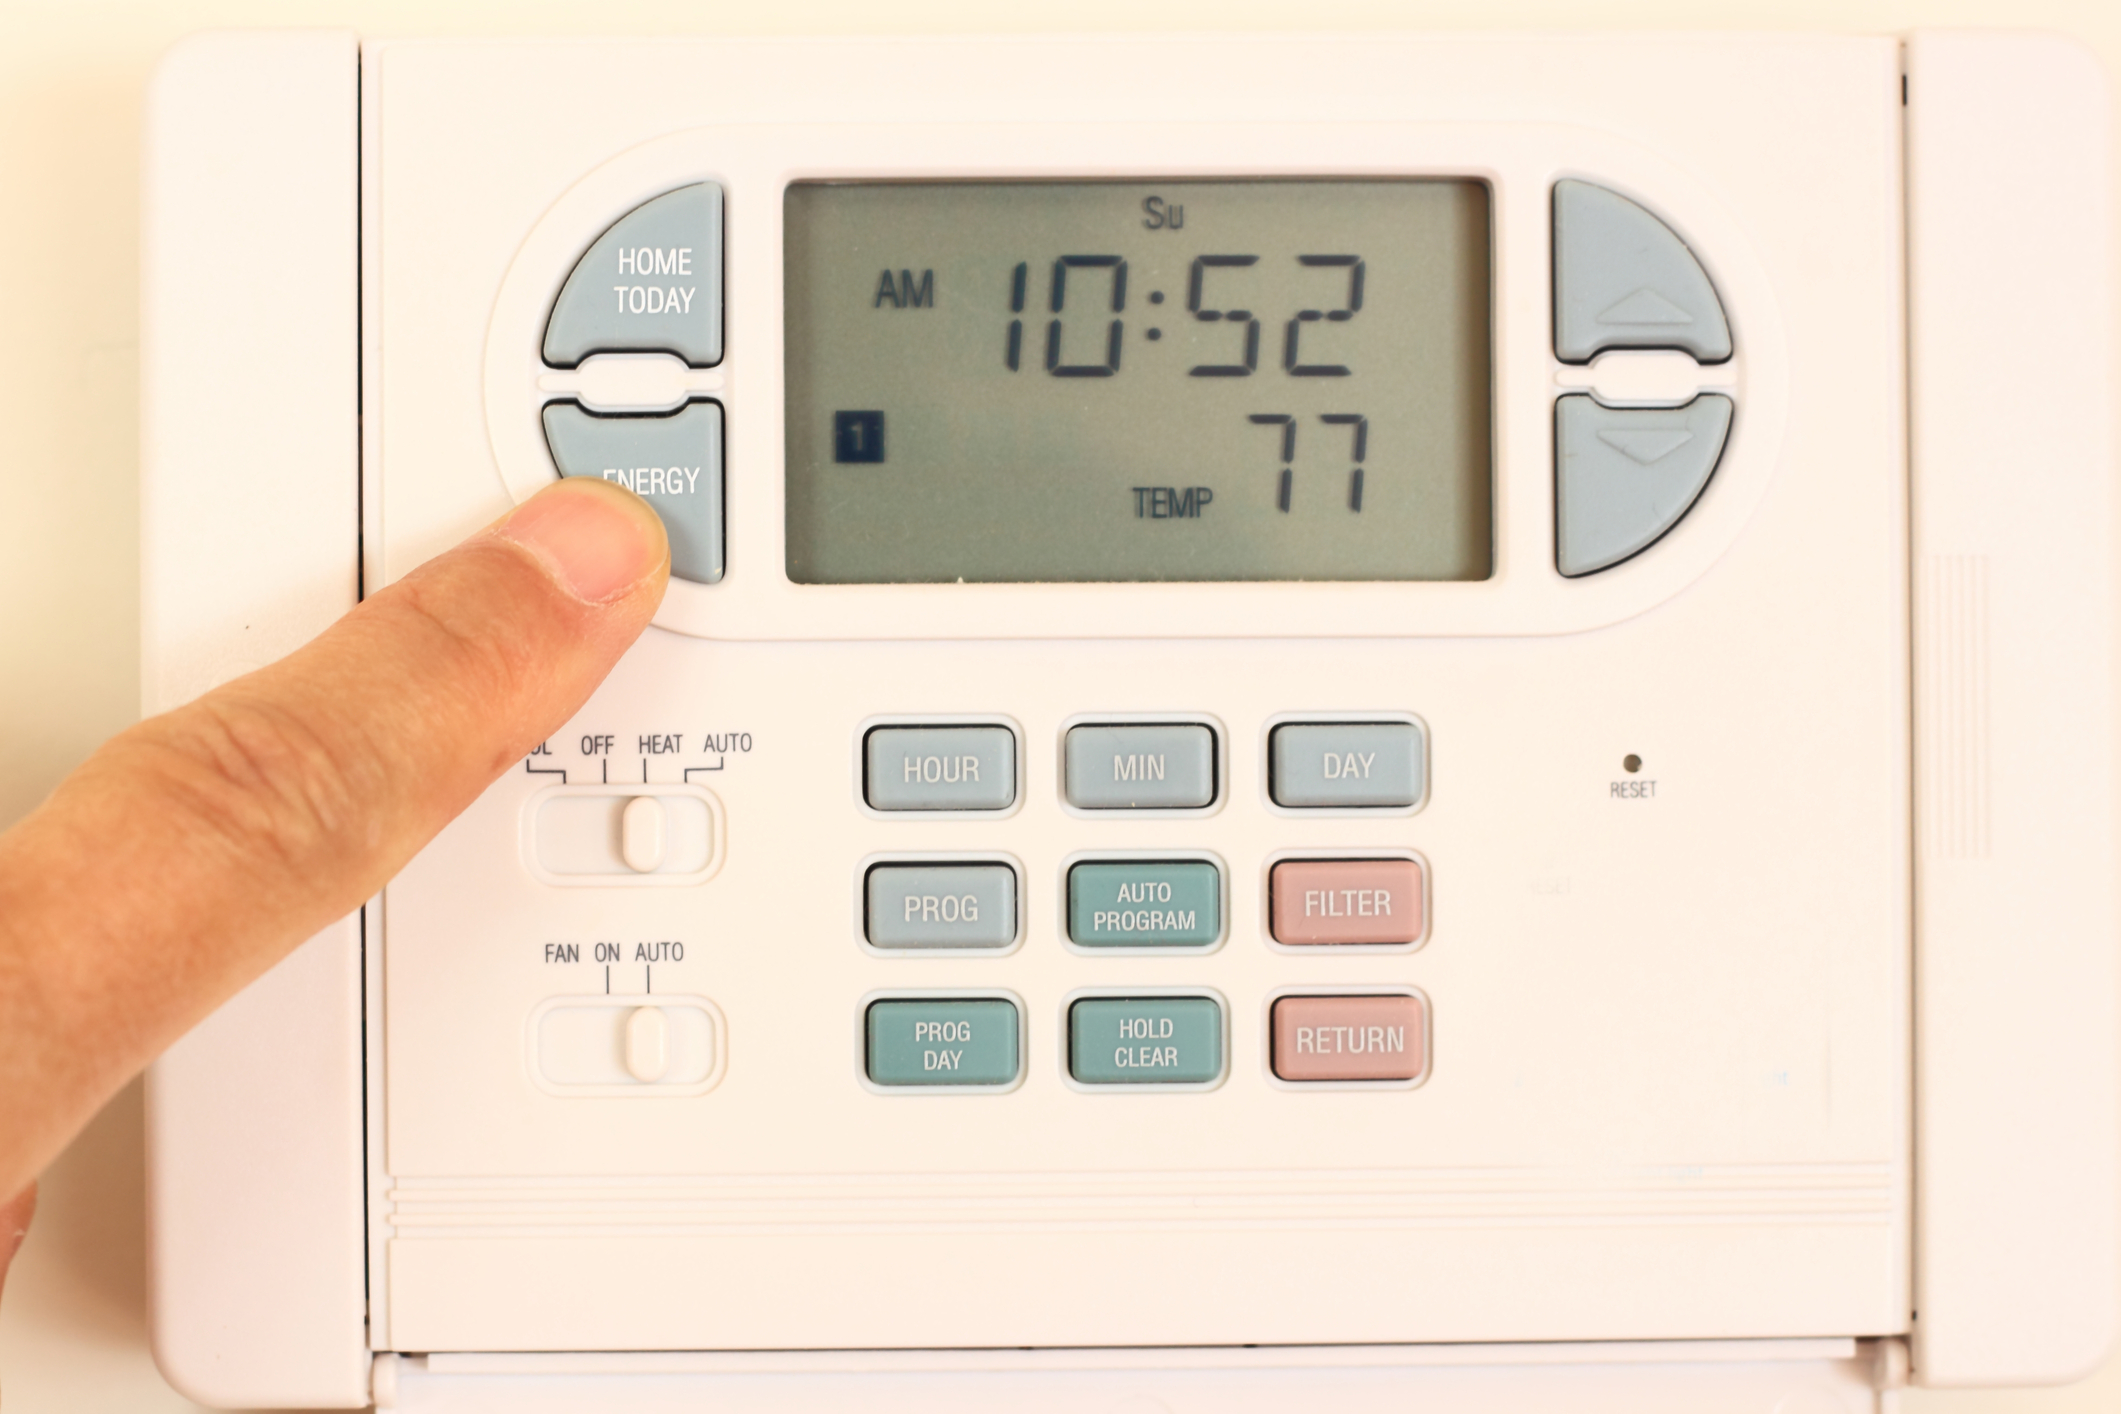
When your radiator works properly, you don’t have to increase the heat of your boiler. By changing the set temperature, you can save on electricity and money.

Why Do I Need To Balance My Radiator?

In flats with multiple rooms or large houses, you need to have numerous radiators for your central heating. When radiators run warmer in one place more than another, there is an imbalance with the distribution of hot water. 

For example, you find it chilly in the bedroom, and you turn up the heat on your thermostat. You feel fine, but your roommate starts complaining about the temperature in the living room. You check it out and agree that it is significantly warmer than your bedroom. That means that your radiators are not balanced. 

When left like this, your boiler will have to work harder to keep your house at a decent temperature. If you don’t live alone, other members of your home may play around with the thermostat too much and destroy your boiler. The worst-case scenario is you get higher fuel bills, and you need to replace your rad and boiler. Just imagining the costs could give you a major headache.

When Do You Balance Your Radiator?

It shouldn’t be too hard to maintain your radiator correctly. Try to balance your radiator once a year or whenever necessary regularly. As soon as you notice one unit taking too much time to heat up, it’s a good sign you need to balance a radiator.

It is a time-consuming task that needs a bit of manual labour. Try to block off a good chunk of your day when you decide to get to work. The more radiators you have in your home, the more work you need to do. 

What Is The Difference Between Balancing And Bleeding Your Radiator?

Balancing is about the distribution of heat in your central heating system. Rad A is hot, but Rad C is cold, even with a 30 min wait. Bleeding your radiator is about even heating within the unit. The top part of Rad A is cool, but the bottom of Rad A is hot. Bleeding takes away the air inside the unit, which makes the top part cool.

You need to do both to maintain your radiator properly. When balancing your radiator, you need to bleed it first. However, you do not need to adjust your system every time you bleed your radiator. 

How Do You Balance Radiators?

Balancing your radiator is about cycling the water through your system until all your radiators heat up at the right time. The air, debris, or a faulty valve can affect the heating times of your radiators. Balancing it out takes care of most of it. 

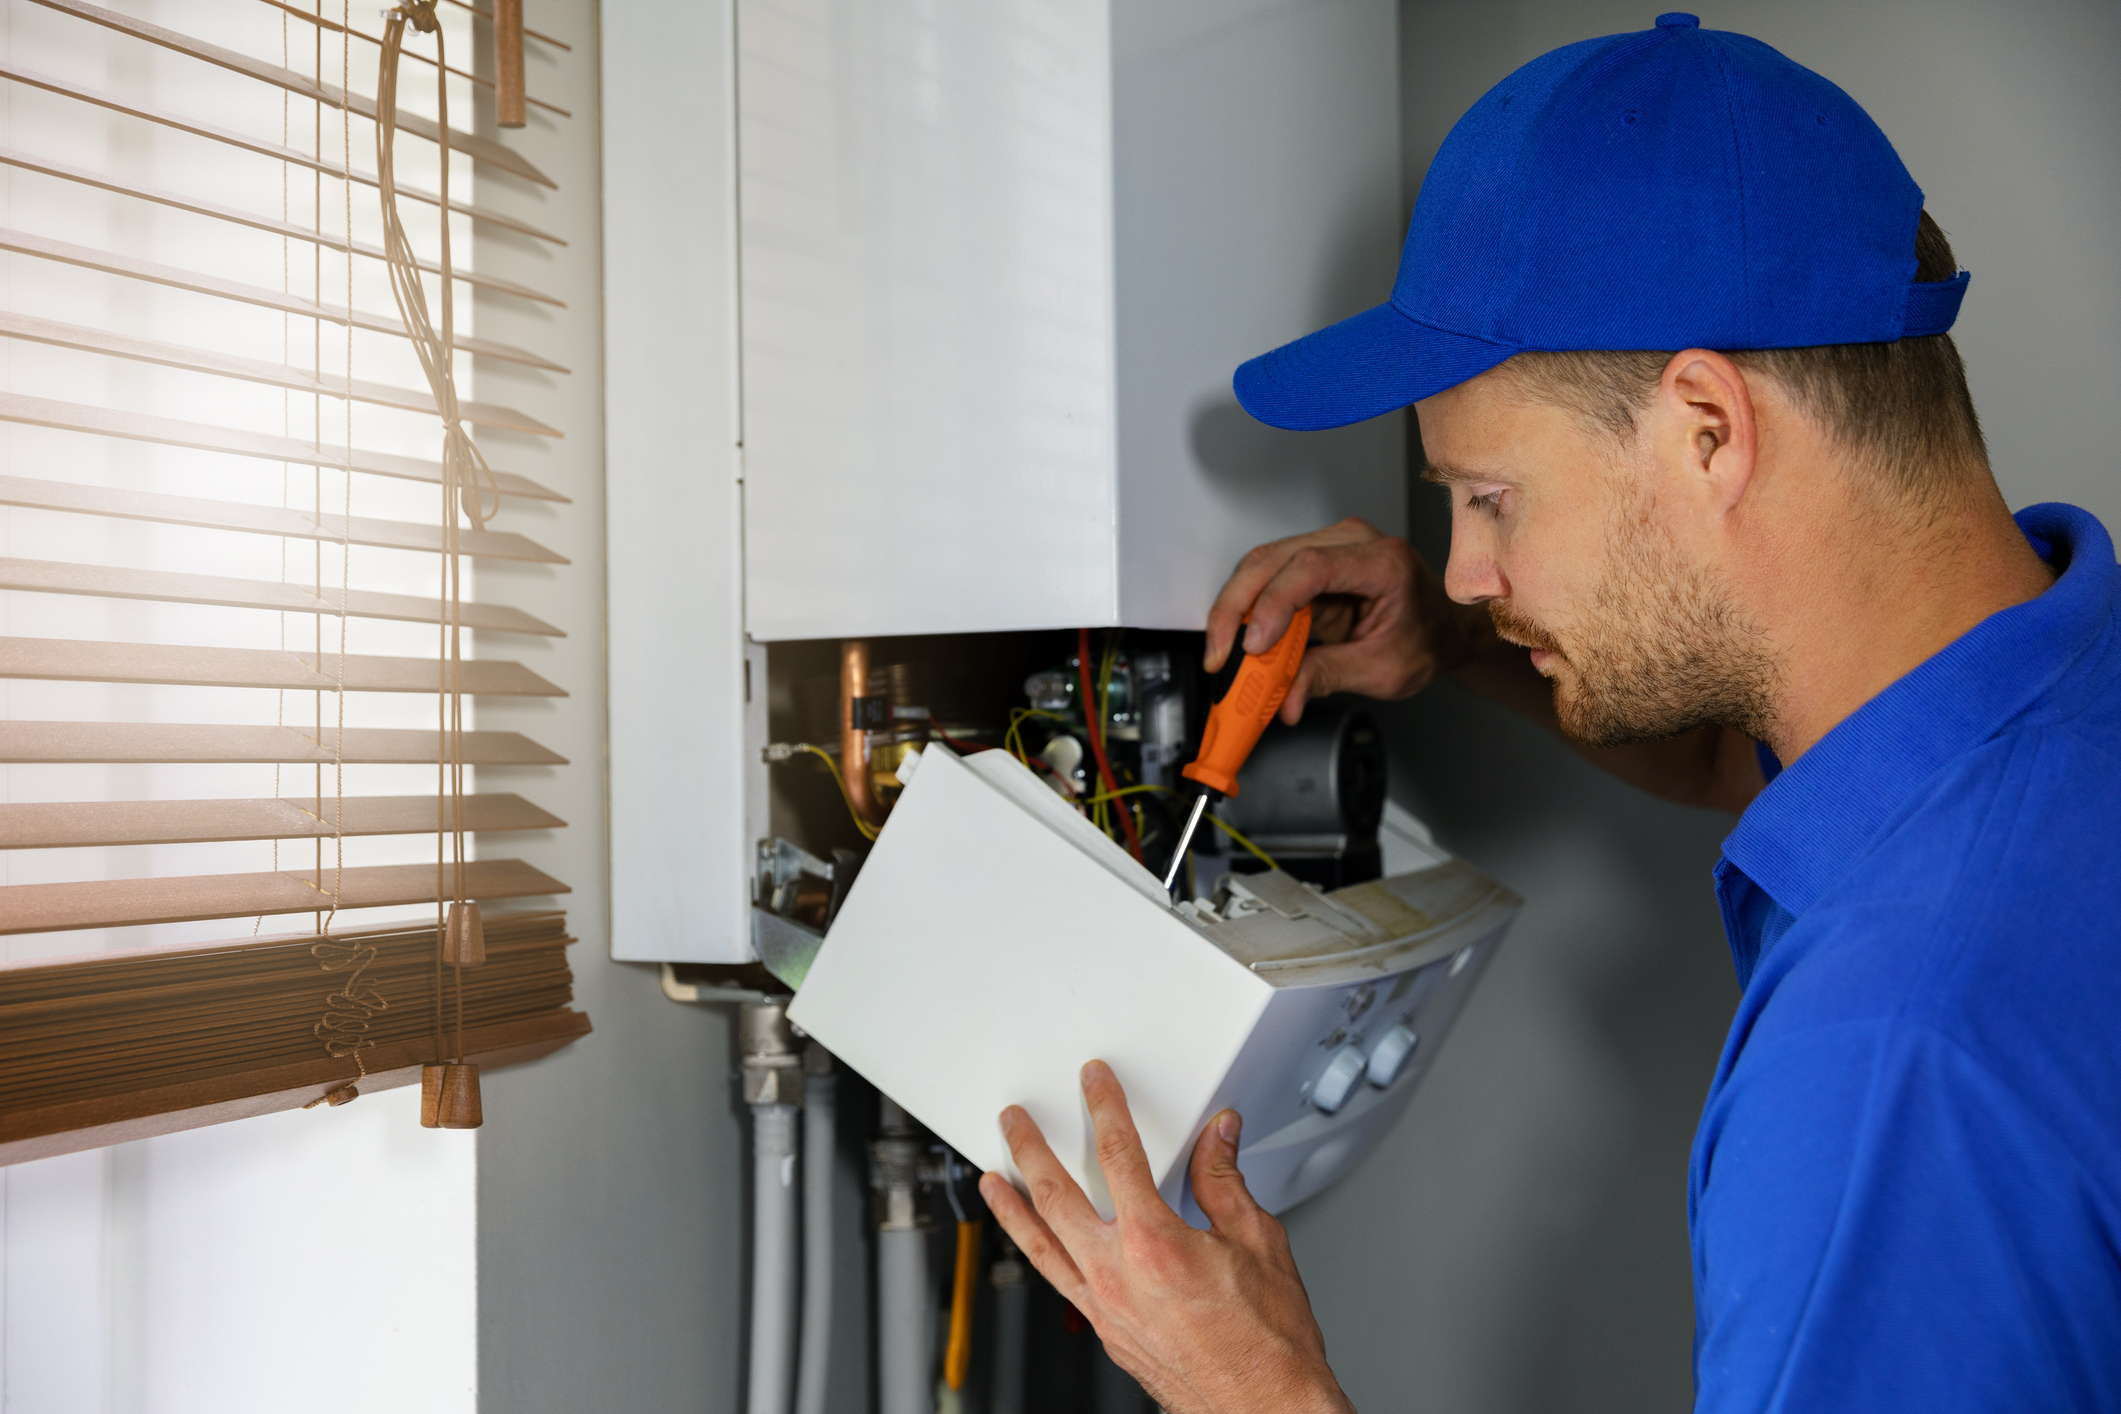
With the right patience, these steps on how to balance radiator are beginner-friendly. If the DIY method does not work, your radiator might be in worse shape. You may need a professional plumber like Plumbingforce to come in and take care of that. Now, let’s get to it!

Materials and Tools

It is time to invest in a couple of tools so you can do this on the regular. For most radiators you will need the following things: 

Radiator bleed key or a screwdriver*

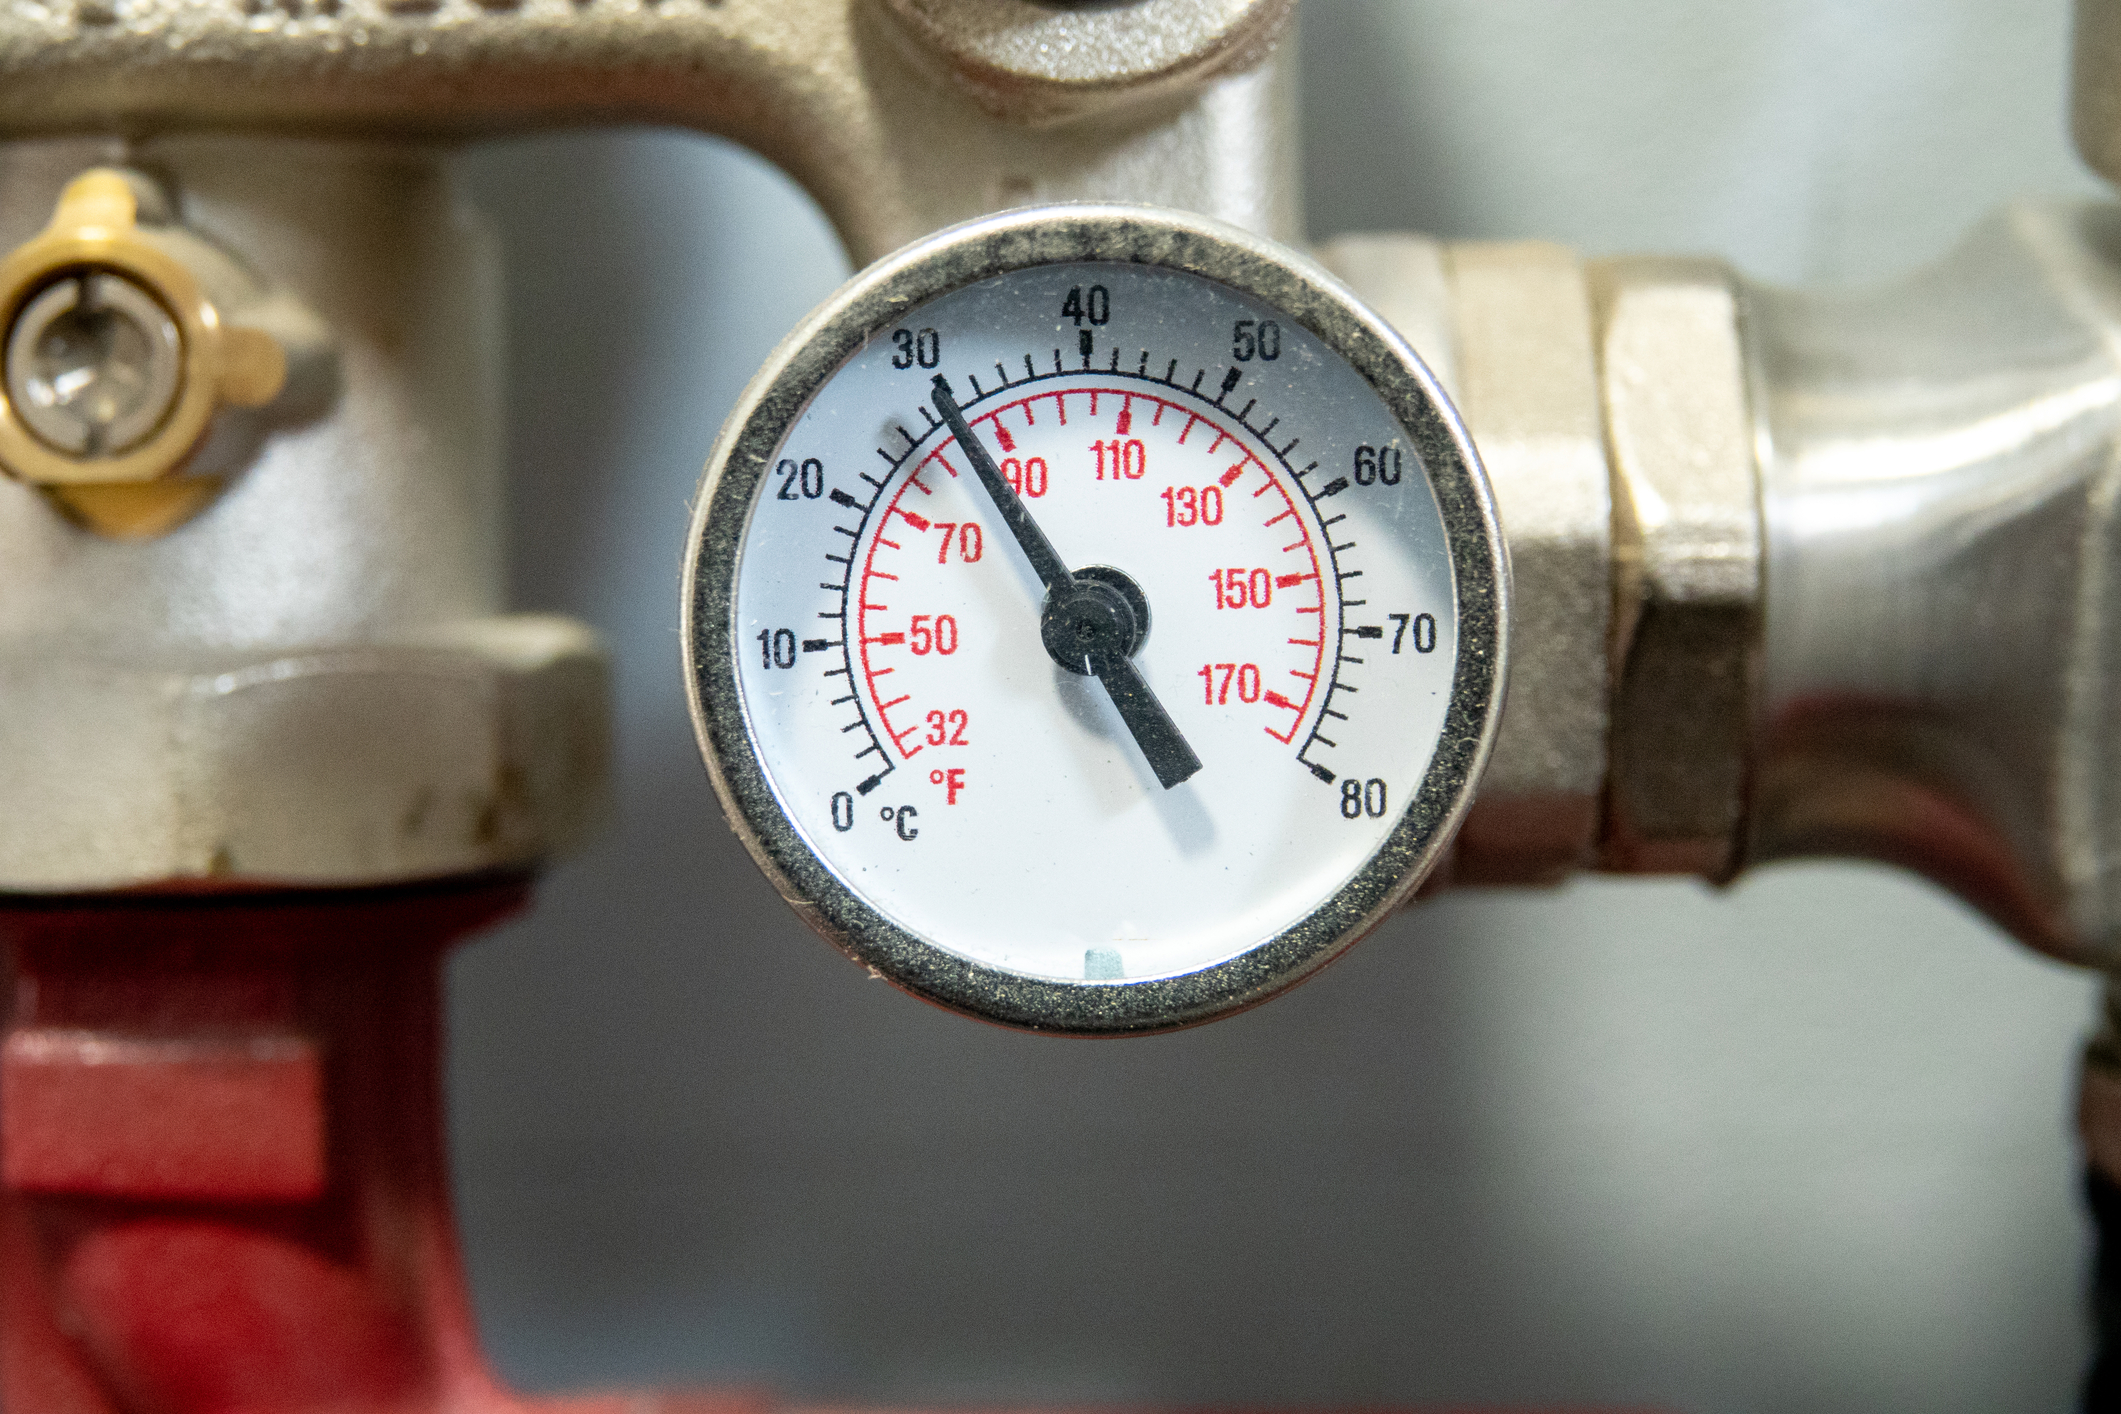
Digital thermometer or multimeter that can work as a thermometer

Lockshield valve adjuster or adjustable wrench 

Paper and pen

A helping hand

* If you do not have a radiator bleeding key, a flat-blade screwdriver can work, but it depends on your radiator. Radiator keys are easy to find in your local hardware store, so you may want to invest in one for your toolkit. 

DIY Steps To Balancing Radiators

When you do try DIY balancing radiators, do not rush the process. Work with a friend or family member and go through the following steps together.

Turn Off Your Heating System

Radiator balancing should happen when the weather is comfortable or warm because you will be turning your heating system on and off. Give yourself a clean slate and turn off your heating system. It is an essential step in bleeding your radiators. Even if you opt not to bleed, starting from ground zero can give you better numbers for balancing later. Wait for your radiators to cool before proceeding to the next step.

Bleed Your Radiators 

 Radiators tend to unevenly heat when there is air or debris. Bleeding your radiators first is an ideal step. Start by prepping your space for the leak with towels and a bucket. Use the radiator bleed key and release the air and water. You can read more about draining your radiator here

Go Through Your Radiator Valves

Open all your radiator valves. Each one has a lockshield valve (LSV) and a thermostatic radiator valve (TRV). Open the TRV manually, no tools necessary. Open the lockshield valve by removing the plastic cap and turning it with a lockshield valve adjuster or an adjustable spanner/wrench. Keep the plastic caps!

Connect with the best local plumbers and boiler engineers near you

Create A Basic Map Of Your Radiators

Take your paper and pen and draw out your radiators, name or number them, so they are easily identifiable. You will need this map to keep track of how the heat distributes in the system. 

Turn The Heating System On And Take Notes

After you turn the heating back, it’s a race against time. See the first radiator to heat up, then identify the heating order of your radiators. If you live in a large house, it can be challenging to do it alone. Recruit help and signal each other when other radiators heat up. This step could take a while, but you must get the order right. 

Turn It Off Again And Wait Until It Is Cold

Once you have your list, turn the system off again. The radiator balancing starts after this. Make sure that all of the units are cold. You can step out for a while. 

Turn The Heating Back

Turn the heating back to a random temperature and go to the first unit on your list.

Adjust The Valves On The First Radiator

Close your lockshield valves completely and slowly open it by a quarter turn as your unit’s temperature reading reaches 12 degrees. Use your thermometer or multimeter here. You can also take note of how long it takes for it to reach 12 degrees for future reference. 

Check The Temperature Of The Radiator

Use your digital thermometer to check if the temperature is 12 degrees. 

Check The Temperature Of The Pipes

After the unit reaches 12 degrees, move your digital thermometer and take the temperature of the nearby pipe. Take the temperature reading and wait until it reaches 12 degrees as well. Take note of the time between your heater and the neighbouring pipes to heat up. It can help you spot damaged units. 

Repeat Until You Finish All The Radiators

Then move to the next radiator on your list. Follow the order of radiators heating up and do steps 8-11 until you finish all the radiators in your home. It shouldn’t take too long for a small flat, but a large house might take a while. 

Note

When your radiators are not heating the way they should even after bleeding, check if the valves have signs of corrosion. The air, water, and metal could create debris in the system that could damage your radiator. 

You can call a professional plumber for a power flush if the valves are in good condition. It takes 6-10 hours. If the valves are not ok, you can replace them. DIY the replacement or ask a professional. 

Do You Need To Balance Radiators With Thermostatic Valves?

Thermostatic radiator valves are slowly phasing out in the era of smart homes. However, that does not mean you don’t have one in your place. The TRV is there to help regulate the heat of your radiator. Without them, the water can be scaldingly hot and be a safety hazard. 

There is at least one radiator with a TRV. Since it gets cold water, do they still need balancing? Yes, it does since it is a part of a greater system. 

How Long Does It Take To Balance Radiators?

There is no clear answer to how long it takes to get the job done. There are too many variables:

How many radiators do you have?

Are your radiators well-maintained?

How efficient is your boiler?

Did you recently power flush and bleed your radiators?

What model do you have? 

How large is your home?

A conservative estimate for how long it takes to finish the job in a small flat is 2-3 hours. A home with multiple floors and many rooms can take up to half a day, maybe more if you don’t have help. 

What Is The Quickest Way To Balance Radiators?

There is no quick way to do this. You can streamline the process by having a map, and previous notes ready so you don’t have to watch the clock closely. Doing it right means taking the take to balance each radiator.

However, if you just want to “loosely” correct it, you can open the lockshield valves in the beginning. The rooms that need to heat up quickly should have their LSV’s open fully. Places that don’t get the same traffic should partially open their LSV. This method does not fix your system, but it can do well in a pinch. 

When Do You Need Professionals For Radiators?

Always call professional plumbers when in doubt. If there is uneven heating even after bleeding, signs of corrosion, or leaks in the pipework – do not attempt to do it by yourself. These are not DIY friendly. Contact your local plumbers from Plumbingforce for these extreme cases. 

You can also opt to get the professionals in when you don’t have the time to go through balancing your radiators. When you have a place that can take half a day they can do it better, save your time for other tasks. 

All homeowners should be able to have a little heating-know-how. Learn to do basic maintenance steps yourself so you can troubleshoot radiators in your home. However, it is also essential to identify what you can and cannot do. A well-functioning home is a balance of DIY and professional work. 

Best Smart Thermostat to Use: Hive Vs. Nest

thermostat
Since their first introduction in the 1830s, thermostats are an industrial invention that made its way into our homes. They do more than regulate the heat. They are a tool that makes homes across the UK eco-friendly without too much compromise. So we cut down on electricity and fuel bills while living in a warm and comfortable space.  How does a small panel manage to achieve all of that? Besides heavy-duty appliances like refrigerators, the top expense for home energy consumption is our central heating system and hot water collection. These systems run like clockwork, and in the cold and wet UK weather, it is a necessity. The proper regulation of our heating system saves energy, budget, and repair costs. When you upgrade to a smart thermostat, you can have better control over these things and move towards a smart, sustainable home.

Smart Thermostats Vs Traditional Thermostats

Now, what is the difference between a regular thermostat and a smart thermostat? A smart thermostat follows the trend of creating smarter homes. Smart homes are all about control. You can control how much energy you use and plan ahead without too much effort. The main feature of a smart thermostat is that it can connect to other devices like your mobile phone or tablets. Say good-bye to small errors like forgetting to turn off your boiler while you are away. Cold showers or long waits when you run out of hot water will be a thing of the past.  You cannot compare smart thermostats against their traditional counterparts. It isn’t a fair fight. It is easy to sink into the new habit of checking your phone instead of walking to your thermostat. They can work with most modern homes and can pay for themselves. Smart thermostats are a convenience that is here to stay. With so many features, it is quite obvious that a smart thermostat is the way to go. There are two stand-out brands for thermostats with smart tech: Hive and Nest. Let’s go into the nitty-gritty details and see which one between the two is the best.

Find the best local plumbers in the UK!

 Nest Vs Hive

Both companies have the same goals. They hope to improve your home experience by giving you more control by managing your heating schedule. From there you can use the saved money in other projects and focus on living your best life. As you read the Hive vs Nest comparison, think about your heating system and your home to see how they can fit. 

What Is Hive?

The Hive is a company that now creates smart appliances. Their first model is a riff of the British Gas remote heating control. Their current model is the Hive Active Heating 2

The Hive Active Heating 2 can control up to 3 zones of heating in your home. From your mobile phone, you can manage the schedule of your heat. Maintaining your heating schedule means that while you are away on holiday, you can keep your home warm enough for things without blasting the heat. 

There is also a frost protection feature for your pipes in the winter. Besides your pipes, your Hive thermostat can also control your floor heating. You can get into detail about their features on their website. 

In your everyday life, it can turn off the heat while you are at work, and warm up as you brave traffic on your way home. There is also a geolocation feature that reminds you to turn off your heating if you left it on. When your hands are full, you can voice activate this thermometer. Smart houses are all about the hands-off experience. 

The Hive Active Heating 2 is compatible with the majority of the boilers available in the market. You will have no problem with combi boilers. They can work with oil and electric boilers if they have a thermostat or programmer. It is a bit tricky with gas and LPG models, it’s okay for the majority, but some models are not compatible. There are so many boiler models out there. There is a chance it won’t work, so it is best to ask first. 

Design Features

The sleek version of Hive 2, both wired and wireless, is a small box with a colourful frame. You can select from 12 different colours and purchase them separately at £19.99 per piece. It has a mid-century modern vibe with its strong geometric shapes and bold colours. 

It has a dial that you can use to control the temperature. There are three buttons for your main controls. You can also opt to use the thermostat stand and keep it in the room you use it most for your convenience.

The Hive app covers all its bases. However, in the Hive app vs Nest, Nest has a more user-friendly design. Though finger-crossed that this changes in the future. Hive is steadily improving their design to catch up with the competition. First, it was their device. Maybe the app could be next? Who knows. 

What Is Unique To The Hive Thermostat?

The model is quite easy to install. You don’t necessarily need professional help since it uses batteries. The A4 batteries can last you 2 years without replacement. It is portable and there’s no messy wiring here! The Hive hub and Hive receiver that comes with your active heating purchase take care of that for you. Talk about convenient.

How Much Is Hive? 

The Hive Active Heating 2 cost £179.00. The box includes the Hive Hub and Hive Receiver. Every purchase has a 1-year hardware warranty. Right now, there is a promotion for a free Amazon Echo Dot (3rd Gen) for every Hive active heating purchase. This price does not include installation since you can do that yourself. If you are a British Gas customer, you can get a discount with the Hive active heating packages. We, at PlumbingForce, would be more than happy to install your Hive system for you so you don’t have to do it yourself.

Hive also has a monthly subscription service for their smart house packages. The subscription aims to bridge the gap between smart houses and renters. The monthly payments make the expensive price tag that usually comes with these devices affordable. You can cancel your contract any time, but you may have to pay the remaining balance. 

The prices online for the Active Heating subscription tend to vary. It should be around £12-£27.99 depending on your setup. 

Hive In Your Home

The best way to check if a smart thermometer works for you is to see how well it fits into your smart home ecosystem. Your Hive thermostat is compatible with both Amazon and Google assistants. You should have no problem connecting it to your current setup. 

What Is Nest?

Google and Nest are now one entity since the merge in 2014, as Google Nest. It is all about taking the Nest products and pairing it with Google Assistant and Home to create the whole smart house experience. Despite its rocky start, the focus right now is to be a competitive presence that can rival Amazon. 

For the most part, their Nest Learning Thermostat accomplishes most of that. Their smart thermostat is the first to get an Energy Star certification. Surveys show that homes with Nest thermostat can save 10%-12% off of your heating bills. 

The thermostat can heat up to 20 different zones in your home. You can manage them all from an app on your phone. You can remotely control the heating and cooling inside your house while you are away. 

You can manually set your heating schedule, but it defeats the purpose. The thermostat smart, compact, and convenient – learns from your habits. It tracks how you use your boiler and adjusts. Even without pre-setting anything, it only takes a matter of months for Nest to create a customised plan for you.

Similar to other smart thermostats on the market, Nest has a geofence feature. When you get past a specific area, it will remind you about your boiler, and you can remotely adjust. Nest also controls the heating for your pipes and your floors. 

They also are compatible with 95% of the heating and cooling systems on the market. Old boiler models and certain oil boilers might not work with it, but combi boilers and condensing systems should be fine. 

Besides being a feature that adjusts so you can live an energy-efficient life, it also tries to make it a learning experience. A leaf symbol appears every time you change the temperature to save energy. The balance depends on the home and climate, so the leaf’s appearance is customised as well. 

The Nest app can show your energy history. They have daily, monthly, and yearly reports. The report is an excellent reference if you want to change your boiler and hot water habits. 

Design Features

The early models of their thermostat like the Nest Thermostat E have the same circular shape. But while they tried to blend in, the new model is here to stand-out. It now has a high-res colour display, a significant difference from the old frosted glass. You can also customise the ring/frame with 7 neutral colours. For the app interface Nest vs Hive, Nest has a sleeker, user-friendly interface. 

Connect with the best local plumbers and boiler engineers near you

What Is Unique To The Nest Thermostat?

Stand out features for the Nest thermostat is its ability to learn. No worries about the data leaking though! Since it is a part of Google, they have a strict privacy setting for your home data. The way it keeps track of your energy-saving habits is also unique to the Nest.

How Much Is Nest?

You can purchase the Nest Learning Thermostat (3rd Gen) in the Google Store for £219 with free shipping. This price does not include installation fees. You can opt to do it yourself or just call the professionals to avoid unnecessary hassle.

Google Nest does not provide installation services, but they can link you to recommended services. Or you can look for Gas Safe engineers in your area to help with your installation. Companies like Plumbingforce are based around the country and can help you with your thermostat and boiler needs. 

Your Nest thermostat comes with a 2-year limited warranty. Read the terms and conditions to know more. Always consult your sales representative if you have more questions. 

Nest In Your Home

Nest has a bunch of other smart home appliances that have a similar design to the Nest Learning Thermostat. Besides them working seamlessly together, they have a consistent look. There are no clashing styles here. 

Despite being a Google sub-company, Nest also works with Amazon or Google assistant. It can blend in your current home from the home assistant to the other smart appliances. There is no problem. 

Which Is Better, Hive Or Nest?

So, which one between the two is the best? The Nest vs Hive question is difficult because they do the same things. It isn’t a battle between the one with the unique features, but between which product does the job better. No matter the outcome of Nest vs Hive, always purchase according to the needs of your home. 


Hive Active Heating 2

Nest Learning Thermostat (3rd Gen)

Price

£179.00 or with a monthly subscription
Installation not included

£219

Installation not included

Connection

Wifi

Wifi

Geolocation

Available

Available

Design Customisation 

12 different colours 

7 neutral colours 

Mounting

Wall Mount or Stand

Wall Mount or Stand

Multizone 

3

20

Heating Schedule

Manually set

Self-learning

Warranty 

1 year

2 years limited

Heating Package

Available

Available

Voice Control Compatibility 

Amazon Echo and Google Home

Amazon Echo and Google Home

A couple of years ago, Nest would have blown Hive out of the water, but the steady changes and updates by Hive have put them on an even playing field. However, even with the upgrades, Nest Learning Thermostat is still the best on the market. The extra £40 is worth its self-learning abilities.

However, Hive Active Heating 2 is still a great option, especially for those who like the monthly subscription. There is always a little manual input, but it is more convenient than traditional thermostats. 

Can Nest And Hive Work Together?

Nest and Hive smart thermostats do the same thing. So there is no need to have both in the same home. However, if you are considering mixing and matching your other smart home appliances, then yes, you can make it work. 

Hive’s smart light bulbs with Nest’s wifi? No problem. Nest’s smart thermostat with Hive’s sensors or plugs? It’s okay too. You cannot, however, control Nest products through Hive and vice versa. It is best to buy the things in the same range so you can better control them.

No matter what you decide, homes that are always on the go can rest easy with Nest and Hive thermostats in their home. The smart home might still be a distant possibility for most families, but the tech is here. It will only advance more in time. 

Besides Hive vs Nest thermostats, you should also consider the other bare bones of the house. These systems cannot work well if you have a faulty boiler or damaged pipes. For any central heating and hot water needs, just contact us here at Plumbingforce and work towards building an energy-efficient home. 

Things You Need To Know Before You DIY Your Gas Hob Connection

Gas Hob Connection

Food is one of our basic needs as human beings, needing it primarily for energy and nutrition. That is why homes need to be fitted with cooking stoves, whether electrical or gas. As opposed to the open fires that our ancestors used to cook with, using stoves produce less smoke and needS less work. Because we can adjust the heat accurately, stoves are also less dangerous and more efficient. With just a flick of our wrist, a blue flame flickers to life, ready to cook up your meal. If your old stove is starting to break down or you’re moving into a new, unfurnished home, we’ll be tackling everything you need to know about connecting and fitting gas hobs in your property.

The Different Parts of a Gas Hob 

As their names suggest, gas appliances use gas as fuel. Before installing a new one in your house, you need to first understand how it is meant to work and what are its different parts. It’s also beneficial to know a gas hob’s difference from a gas cooker.

Natural gas comes from a gas main that is connected to the cooker or stove. When you turn the control knob on, the valve regulator opens and gas flows through the jets of the burners. And once the cooker ignition is pressed, a circuit or batter produces a spark that ignites the gas. A hob burner is merely a part of an entire cooker. Let’s examine its parts.

The valve of your gas hob controls the gas supply from the pipe to the jet. It is either fully opened or fully closed. The jet is used to distribute the gas evenly through tiny slots that form a circle on the edge of the burner. In the middle of this circle, a burner cap prevents food from spilling onto the burner and keeps the gas flow focused on the burner slots. When you switch your knob on, the ignitor creates the spark that should burn the gas as it exits from these slots.

When part of an entire cooker, the gas is shared by the oven and the grill. Setting the oven to your desired temperature will trigger a gas flow to the burner at the back of the oven. While the grill works the same way, the gas flames flow our from the pipe’s tiny holes to heat up the gauze or grid equally.

To make a booking or to find out more about our services!

Can I DIY my Gas Hob Connection?

Now that you know how a hob operates, it’s important to learn what you can or cannot do during a gas hob connection. If you want to fit a gas hob yourself, always remember that you are not allowed to connect the hob unless you are a Gas Safe registered engineer. 

According to the Gas Safety (Installation and Use) Regulations 1998, you must be competent before working on a gas appliance. Regulation 3 (3) it states that anyone who is rewarded for gas work (whether fitting or otherwise) should be registered with Gas Safe. While a lot of DIYers debate the meaning of “competence” under the regulation, we believe that you must have the knowledge and experience to fit gas appliances before installing your own. There are different exams, as well, that cover domestic, commercial, liquefied petroleum gas (LPG), and other gas fitting skills.

While this regulation prevents unregistered professionals from selfish motives, it also protects the public and the customer from dangerous activities. Should some catastrophe result from your work, then that is a clear sign that you are not competent enough to handle a gas fitting task and have broken the law. Assuming no major accident befell you, you are most likely going to face legal action.

When looking at instructions fitting your gas hob may look simple and straightforward. However, this four-step process needs to comply with different standards that your installation manual may not mention. Gas Safe Registered engineers normally run many checks before, during and after their work. Though tedious, the process is necessary. Before carrying out any gas work, it’s important to know and understand the regulations and standards for every aspect of your task.

A good compromise we recommend is to call a registered fitter and work together in a mentor-student type of fashion. The fitter can act as your adviser when dealing with finer points of the regulations, approves the final plan before starting and checking the work once finished. While you may have a difficult time finding registered fitters who are willing to do this, this is still a better way to DIY your gas appliances without breaking the law.

What are the Regulations for Gas Hob Connections?

Before you start fitting your gas hob, you need to draw out your plans. Here are some things you can take note of:

  • Distance: While you work, keep a safe distance from anything that could be a fire risk. If you’re working with an LPG instead of NG, it is worth noting that LPG tanks are more flammable than NGs and should not be placed below ground level. For this reason, consult a gas engineer for specific regulations.
  • Ventilation: While you’re keeping a safe distance from any fire risks, make sure that the room you’re in is also ventilated. Should a gas leak occur before or after installation, it is better to place the gas appliance where there is a window or door nearby. With this in mind, there are also guidelines when it comes to positioning your hob:
  • If the hob is placed under a window, the window should be at least 500mm away from it.
  • If it is by a door, it should be at least 500mm away.
  • The hob should always be against a wall and at the end of a worktop.
  • Hot Zones: When installing your cooker or hob, take note of the hot zone on top of and on either side of the appliance. Make sure that there is nothing fixed for 760mm above it, including the extractor hood. On both sides, the hot zone is at 150mm where nothing is placed up to a height of 460mm. Once you have your hot zone laid out, there should be no plugs, kitchen units or wares placed here that could burn or melt.
  • Gas and Electricity Supply: Your gas and electricity supply should be placed within 1.5m from your appliance’ location. Check what kind of feed your hob will need. Normally, most gas appliances only need 13A. In some cases, however, you will need a 32A fused spur.

Fitting a gas hob into your home is not as simple as it sounds. While you may have these regulations and standards down pat, we still recommend having an expert on board. Our engineers at Plumbingforce are Gas Safe registered and can install and test your gas hob. Book an appointment with us today.

Gas Fire Installation: The What’s and The How’s

Gas Fire Installation

Coming home from a long and cold drive home, it feels nice to settle on your couch in front of your fireplace. The sight of the swaying flames, the smell of burning oak and the sound of crackling wood is enough to calm the mind of the day’s worries. While it can be comforting to lay in front of your open fire, having to sweep up the ashes, stabilising the temperature and keeping the warmth in your room is time-consuming and inefficient. If you want to be more efficient with your time and money, you may want to consider replacing it with a gas fire. 

In this blog, we will tackle what a gas fireplace is, the process of gas fire installation and how much it may cost you.

What is a gas fire fireplace: Open Fire vs Gas Fire

Heating your room through an open fire will give you the ambient temperature, allowing you to choose between different types of wood or coal available in your area. However, as its name suggests, having an open fire leaves your fuel (the wood) to burn up quickly, wherein most of the heat escapes through the smoke and out of the chimney and warms your room only by 30%. Even after the fire is extinguished, the heat from the room will still rise up and out of the chimney. What’s more, it’s hard to put out a full grate of coal once it starts burning. You will need to make sure it keeps burning by stoking the flames from time to time. This means, four hours into your sleep, you will need to plan ahead before refuelling your fireplace with more coals.

Your gas fire is a cleaner and more convenient way to heat up your room. While there are real flames, a modern gas fireplace is sealed with glass and provides radiant heat. Because the fuel is gas, the fires don’t emit smoke. Instead of a chimney, they will need a tube in the wall where waste gases can escape. The experience is very like having an open, giving off radiant and convected heat without wasting so much energy. In comparison to wood fires, the air in your home is cleaner and the installation is more affordable. You won’t need a complicated masonry hearth and chimney that can take up a lot of floor space. If you already have a hearth, engineers will have an easier time fitting a gas fireplace insert instead of building a fully-functioning chimney. While, of course, electric fires offer the highest level of cleanliness, gas also has the lowest cost among the three choices. And you don’t even need to buy wood and find a space to keep them dry.

To make a booking or to find out more about our services!

Now that you know how gas fireplaces work, it has three different build types.

  • Insert: As mentioned earlier, if you already have a wood-burning firebox, it can be retrofit with a gas fireplace. This is a reliable source of warmth, filling your room with warm air and heat.
  • Built-in: If you don’t have a hearth in your home, built-ins are more common in minimalist and modern homes as they can be built according to contemporary styles. Whether you want your fireplace underneath your television or in Scandinavian design, built-ins tend to be more flexible.
  • Log sets: Built for style more than heat, basic burners are installed in open fireplaces.

With each type, you may choose to either have a vent where the fumes are sent outside of your home or have no vent where all the heat and exhaust disperses into the house.

How does gas fire installation work?

While it may be cheaper to run a gas fireplace than an electric one, gas fire installation requires a Gas Safe registered engineer for safety and legal reasons. This badge of credibility assures you that your appliance will be tried and tested before and after installing it. While it may be tempting to connect a gas fire to your system on your own, it is illegal and dangerous. Given this, it is important to add an installation fee to your budget. Though most retailers also offer installation services, this easy route may not be the most affordable.

If you’re in need of a replacement instead, you will need new plasterwork where the old gas fire was removed. This means, hiring a plasterer and redecorating the affected areas. 

Before choosing a new gas fire, make sure that your engineer comes to your place to have your flue or chimney lined and tested. If you don’t have one, you may opt to install the matching flue to your gas fire or choose a gas fire that does not need one. These models use catalytic converters to change the particles into a harmless vapour that can be dispersed into the room.

How much does installation cost?

An average gas engineer will charge about £100 to £150 per day in labour. It can take about one to two hours to fit a new gas fire but if the engineer were to replace an old model, the work may take up to three hours. The price of your installation will depend on the model you choose and on any extra work (e.g. pipe repairs). 

Once your new gas fire has been installed, make sure that you or your landlord procure a Gas Safe certificate. Carrying out an annual maintenance check may cost from £60 to £100 and take up to two hours. We also recommend installing a carbon monoxide detector in your room to alert the household if your gas is leaking.

Should I DIY?

If you are interested in building your own fireplace, we recommend that you still call a gas engineer to check your DIY-ed creation and have professionals install your gas fire. Whether or not you have a background in construction, having other experts check on your build can prevent further accidents from happening (especially when you have no prior experience with carpentry). When it comes to installing your gas fire, however, leave it to the Gas Safe Registered engineer.

When it comes to heating your home, we always recommend choosing the safest option. Not only are gas fires cleaner and more efficient, but they also keep your family and pets from unnecessary burns from getting too close to the flames. Our engineers at Plumbingforce are Gas Safe registered and can install or repair your gas fireplace. Book an appointment with us today.

Do I Need A Gas Safety Certificate As A Landlord?

Gas Safety Certificate

If you decide to become a landlord, it is your responsibility to provide your tenants accommodation that is fit for living. The standard of the property should adhere to the Landlord and Tenant Act 1985, wherein it has to be structurally sound and in good repair, with natural lighting and facilities for hygiene. To make it appropriate for the colder months, the property will also need enough insulation and water and electrical supply. This means the landlord has four main responsibilities when caring for his or her tenants:

Build or furnish a property that is free of health hazards 

If you want to place a fireplace or a wood-burning stove in any of the rooms, you need to ensure to fit a carbon monoxide alarm. Using the right, high-quality materials for the place can also hinder any damages that are detrimental to your tenants’ health. This also means regularly scheduling inspections done by professionals.

Ensure that there are fire safety tools in place

In relation to the previous point, it is also helpful to have your walls made of fireproof material (or check if it is up to the standards of the 1988 Fire Safety Regulations). Because it’s best to prepare for any calamities, natural or manmade, the best way to appreciate your property’s value is by keeping its build sturdy. Always have a fire extinguisher, fire blankets and fire alarm in places where fires are more likely to start (e.g. kitchen area, fireplace, boiler room, etc). You must also ensure that the furniture meets the same standards, checking the manufacturer’s label if they are fire-safe.

To make a booking or to find out more about our services!

Carry out repairs once faults and defects are detected 

Once the place is furnished, it is also the landlord’s responsibility to keep it in top shape. Of course, this will also depend on how quickly your tenant can report these faults may they be moulds, infestation or short circuits.

Install and test if gas and electrical appliances work according to industry standards 

According to the 1994 Electrical Equipment Regulations, all of your electrical equipment needs to be regularly tested by a professional, ensuring that wirings are concealed and plugs are BS1363 compliant. Meanwhile, fire-guards need to be BS3248 compliant, and fire extinguishers need to be BS6575 compliant.

If the gas appliances are your own and not the tenant’s, you are required to have a Gas Safe engineer check if they are safe and in good working order. The 1994 Gas Safety Regulations also require a landlord Gas Safety Certificate that is valid for one year. Make sure to keep a record of these safety checks and give your certificate within the 28 days that a potential tenant agrees to the tenancy contract.

Gas Safety: The Most Important Certificate Of All

While you have a lot of legal obligations to your tenant, procuring a Gas Safety Certificate is the first and most important step when keeping your property in the market and winning a potential tenant’s trust. Widely known as the CORGI Proforma or CP12, this takes note of the dates that all of the gas appliances in your property have been checked by a Gas Safe registered engineer. These people are the only ones qualified and certified to ensure the safety and the efficiency of your appliances. You can find the official list on Gas Safe’s website. 

If your tenant owns the gas appliances, it is still your duty to have the flues and fittings regularly checked. While these may be time-consuming on your end, a whiff of gas in a home can turn into something more dangerous had it not been prevented. Here are some risks landlords may encounter is the compliance system is ignored or bypassed:

Gas leaks: The first sign of a faulty stove, fireplace or pipeline is the smell of gas that lasts for longer than normal. While it may not be poisonous, these things can quickly escalate into fires or explosions if not handled immediately. If your appliances are not being regularly maintained or checked, the metal will start to rust through and pipes will start to have a green discolouration.

Fires and explosions: Because of continued neglect or a sudden action, the gas can explode into flame really quickly. Once exposed to a sudden spark, the fire can spread throughout the building and cause great damage to your property and to the lives of your tenants.

Carbon Monoxide Poisoning: If your kitchen is not well-ventilated and your LPG gas burns incompletely, your tenants may report experiencing sleepiness and lethargy. Before they get sick and report your unit to authorities, it will be better to install a detector in the kitchen and have your appliances regularly checked instead.

When a gas engineer arrives at your property, the inspection normally starts with checking the density of your appliances and verifying the standing and working gas pressure. Afterwards, the engineer also checks the manufacturer’s nameplate for a burner or gas pressure and assesses if your appliance is placed in a room with enough ventilation. A smoke flow test will also be conducted to ensure that there are no combustion products anywhere near your appliances. Once the safety devices are checked, engineers also look if the gas appliance has been misused in any way. 

Normally, if your gas appliance is damaged or dysfunctional, the engineer will carry out repairs. Because of this, you may incur additional charges before you can get your certificate. That said, we recommend properly cleaning and maintaining your gas appliances to avoid higher rates. If you notice potential damage, we also advise calling professionals immediately. With the previous risks that we explained, dealing with gas problems can be tricky and dangerous if handled with inexperienced hands.

Once you have your property checked, you will receive your compliance certificate within ten to fifteen working days. If you are due for a yearly maintenance check for your appliances, our Gas Safe registered engineers are available to provide gas and plumbings services throughout London. Simply contact us here and we can schedule our visit to your property immediately.

Boiler Maintenance Tips: What You Can Do Without Calling an Engineer

boiler breakdowns

Boilers are the heavy-duty heroes that keep our homes warm during the cold seasons. Prevent boiler breakdowns during the snap by staying on top of their problems. As a homeowner, landlord, or tenant, there are things you can do to help maintain your boiler. 

What is boiler maintenance?

Boiler maintenance is the work you do to ensure that it has no hiccups that could lead to a broken machine. It is a combination of inspection, cleaning, and small repair tricks to keep your boiler functioning and fuel-efficient. Since boilers vary from type and brand, read through and see what applies to the one you have in your home. Before we begin, we have to consider what work is safe for us to DIY versus what isn’t.

The line between you and a Gas Safe engineer

  While you can pick up tricks from the boiler maintenance work previously done on your boiler, it is essential to note that it is illegal to do gas work. You are not protected when boiler issues arise when you do it yourself. Warranties require regular boiler service from the professionals in the Gas Safe Register or the OFTEC else they become invalid. When you do the job yourself, you are accepting the risk that comes with misdiagnosing or aggravating the problem. When you spot a problem during your visual inspection or tricks don’t work, please call a Gas Safe engineer in your area. 

Who are Gas Safe and OFTEC? 

In case you are not aware, Gas Safe or the Gas Safe Register and OFTEC are the regulating bodies for gas and oil work respectively. They conduct tests and inspections to check the company and trade workers in the industry. They issue IDs to every engineer and plumber registered with them. You can run ID numbers through their website to confirm. Any complaints of work done or suspicion of illegal boiler maintenance work should be reported to them. 

To make a booking or to find out more about our services!

What happens when you do work meant for Gas Safe engineers?

When you do gas fittings or repairs without being a Gas Safe engineer, you are always in the position of ruining your boiler. Your boiler can last for 15 years or more with proper maintenance. Shoddy work leads to an expensive repair or replacement that could have been avoided. You could also miss vital signs of boiler failure, which ranges from a broken boiler, a gas leak, and possible fire, among other things.

How do you maintain a boiler?

Before problems occur, make it a habit to check on your boiler regularly. Keep the manual on hand and highlight important manufacturer notes. 

Personal Inspections

Keep your boiler well-ventilated, avoid cluttering the area with old clothes, coats, or other miscellaneous items. When living with other people, you may have to check every month–case they forget. 

All air vents and flues must be free of obstruction. They are the passageway of the air; any kind of blockage could affect your boiler performance. If you do not have a flue access panel, have one installed.

Check if your boiler flame is blue. If the fire is orange or red it is an indicator of improper combustion or build-up of dirt and debris which may lead to carbon monoxide (CO) leak. You may need to contact a British gas boiler service.

Inspect the water/boiler pressure. The proper range should be indicated in your manual. If you do not have a manual on hand, the ideal pressure is within the first two levels. If they are not on the correct level, you can adjust it. Turn on the taps on either side of the system to fill the loop, or consult your manual. It is safe to do this yourself.

Check your radiator, if you find that the top is hot, but the bottom is cold it is a sign of dirt building up inside. To fix this call an engineer for a power flush If the radiator is not hot at all, you may need a valve replacement.  

Last but not least, visually inspect your external pipe for any leak or dripping. One of Gas Safe’s testimony was of a family that did not spot the dripping of the boiler because a dresser blocked the water damage. Their broken boiler had been in bad shape for a while, regularly releasing CO. Keep an eye out for any leaks and contact an engineer to have these issues addressed.

Boiler Maintenance Tips

After your inspection, there are things you can do at home without calling an engineer: 

When you notice the nights are getting colder as winter approaches, lag your pipes. For conventional, condensing, and system boilers, check the pipes in your loft. They should all be insulated. If you find any gaps around the pipe, joint, or taps cover it with pipe lagging. You can find DIY lagging kits at the hardware store. Fit your tank with an insulated cover, if it does not have one yet. Frozen pipes are tricky to deal with and deal with losing central heating and hot water.

Electric boilers don’t have pilot lights, but if you have an older model, check them. If your pilot light is out and you cannot generate a spark when you release the spark generator button, you may need to replace the universal thermocouple. Find a spare and replace it by undoing the nuts holding it in place and remove it from its tube then replace. Not all work to bring back the pilot light can be done by yourself. Do not work with the jets and consult an engineer. 

When you live in areas with hard-water, reduce/ descale your system. Scale builds up inside the heat exchanger. Fit a self-dosing phosphate scale inhibitor on the supply pipe between the feed and expansion tank to the boiler. It comes with a cartridge that needs to be replaced annually.

  If your boiler doesn’t work, try troubleshooting it by turning it off and on a couple of times. If the switch is stuck, this is a short-term solution, and you may need to have the switch professionally replaced. Another reason for your boiler turning off is the system that kicks in when it overheats, which occurs when the pressure drops. You can add water in the system (as mentioned earlier) and reset. 

How often should a boiler be serviced?

A lot of things are going on inside the boiler. Boilers are serviced once a year, ideally. Since the state of your furnace varies, sometimes not a lot of work is necessary if it is new. You can apply the steps listed above to maintain it yourself. However, if you spot any problems or would rather have a professional do it, please contact your local boiler service. Prices vary so consult your homeowner’s cover and check if boiler services are included. Annual boiler services are also provided, for a fee you can be covered the entire year and have access to boiler maintenance and repair when needed.

There is a lot you can do to stay on top of boiler problems without calling an engineer. However, this means putting the time in and regularly consulting your manual. Even if you do everything right, you may come across issues that are beyond your capabilities. Stay vigilant and stay safe!  

Before the Boiler Breaks: When and Where Should I Get My Boiler Serviced

boiler breakdowns

In 2017, 18% of the UK faced winter with boiler breakdowns and had to dip into half of their savings to repair or replace their boilers. In 2019, 12% of homeowners prioritised renovations over boiler issues, and 24% of British citizens have never had their boilers serviced. The numbers may not be overwhelmingly high, but the fact that they are in the double digits and two years have passed without proper boiler knowledge is appalling.

Boilers are essential especially in countries where three out of the four seasons are unusually cold, especially in households who are temperature sensitive or have existing conditions that are aggravated by the cold. Before your boiler breaks, look into long term boiler maintenance. Anticipate the chill and avoid spending winters in houses with no centralised heating or hot water.

What is the average lifespan of a boiler?

While boilers are used almost on a day to day basis, we often neglect it. They are machines that are built to last, installed out of sight, and any hiccups seem to be only comprehended by an engineer. They aren’t like cars whose problems are easy to spot and experience. They aren’t like personal computers where we are taught to diagnose underlying issues. Without proper boiler service, the problems can accumulate and next thing you know it – you come home to a cold house in the middle of peak service season. The average lifespan of a boiler is 10-15 years. Top-rated boiler models are in the upper bracket of that range at 12-15 years. In homes with the top boiler brands and with regular service they can outlive the average at 20 years or more.

To make a booking or to find out more about our services!

How often should a boiler be serviced?

No matter what you consult, the answer is the same: annually. Your boiler should be inspected and serviced every year. As heavy-duty as boilers are, they are frequently used, and they become less efficient over time.  Boilers should be repaired before efficiency issues surface. The high fuel cost and the risk of carbon monoxide poisoning are two-pronged issues that can be avoided if they were taken care of early.

In the case of boilers with a warranty, how often should they be serviced?

If you have an active warranty with your boiler brand, it should be the same: annually. It is important to note that long-term warranties, the type that goes from 5-12 years, require a yearly boiler service to maintain validity. Without proper boiler maintenance, it is difficult to identify who is at fault. It protects you as well, so you can get a relatively worry-free replacement. When you purchase a new boiler, don’t forget to have the warranty registered within 30 days or it becomes invalid. Check the fine print!

What is done in a boiler service?

The hesitation in having boilers serviced probably stems from a lack of awareness of what is done when you ask for it. Your boiler service may vary depending on the brand and the manufacturer’s instructions, but generally, boiler service does seven things:

–       Check boiler controls

–       Check gas pressure and flow

–       Check safety devices

–       Check your boiler seals

–       Check the main internal components

–       Inspect the water and gas pipework

–       Inspect the flue and combustion releases

Carbon monoxide (CO) detectors are not required as a household feature in the UK, though they are highly encouraged. A possible source of CO emission comes from your boiler. Since they are colourless and odourless, it is not easy to detect. The Gas Safe engineers aim to identify corrosion and leaks, clean boiler parts when necessary.

Where should I have my boiler serviced?

Seek out a reputable company. Boiler service needs to come from engineers who are registered with the appropriate authorising body: Gas Safe Register (GSR) for gas boilers that deal with propane and LPG and the Oil Firing Technical Association (OFTEC) for oil-based furnaces. On top of working with a reputable company when the engineer comes, be sure to ask for their ID. When it comes to heating, you want to ensure that you have the professional you need. 

How much does it cost to service a boiler?

Similar to the purchase of your boiler, the service price may vary. Take note that the cost of the service and value of the materials/ fitting are separate and that these prices may inflate depending on your location. A conventional boiler may cost between £ 50-80, and high-efficiency boilers like the condensing and combi are between £80-160.

Can the cost be lower?

Yes! Boiler services may go down during the non-peak seasons, so late spring to the whole of summer. If you have availed of a service plan, boiler cover plan or have added your boiler to your homeowner’s insurance; these fees can come at a discounted price depending on your service provider.

You can also try to avail of the ECO’s initiative for affordable heating. You may be able to get a free boiler replacement or reduce the cost of repairing/replacing your boiler.

When should I have my boiler serviced?

As essential as it is for health and safety, consider your budget and try to set aside money to have it done during seasons when it is cheap. If you have a newly installed boiler, you can probably get away with holding on boiler service, but only when it is not financially feasible. When your boiler is five years older, and above, it becomes more urgent that you follow it up annually.

Is boiler maintenance worth it?

Boiler maintenance is worth it. It may seem like an unnecessary expense, but when it comes to public health and safety, you know what should be first. Besides keeping an eye out for potential issues, boiler service addresses problems as they come. By having steady efficiency, you can keep your heating bills low in the long-term. Yearly service means your warranty stays valid and breakdowns don’t have to eat up 50% of your savings to repair or replace. Call us for a quote!


The DIY Guide On Pressurising A Boiler

repressurise boiler

It might take a while getting used to not having hot water available in your piping system, but it entirely becomes a pain when winter comes, and you’re left with only cold water to deal with. This may lead to chattering teeth after a good shower and general discomfort among the members of the household. So, you check for a problem and realise that your boiler pressure has been going down. I imagine the first thing you did before anything else is google “repressurise boiler,” and that’s what has brought you here today. So here’s our little gift for you, a short how-to on how to get that pressure working back to its best form. 

Checking the boiler if the water pressure is low

To assess if pressure really is the problem, start by checking the gauge for water pressure in the boiler’s facade. To make sure that you are looking at the right gauge (because different makes and models tend to display this differently), check the user instructions provided when you bought the boiler. 

A digital gauge will either show only 1 bar (reading here is quantised as bars) or an alarming sign such as a flashing reading or a pressure warning. Hydraulic gauges, on the other hand, show only red sections or zones both on the left and right side of the display dial. An indicator needle lying on the far right red zone indicates that the water pressure is high, while if the needle is on the far left red zone, it means that the water pressure is low. 

How to find out your boiler’s correct water pressure

The best possible pressure to reflect on your gauge would be something between 1 and 2 bars. For reference, a cold radiator will show only 1 bar. If the pressure reads 2.75 bars or higher, it is indicative of dangerously high pressure, and anything lower than 1 bar is considered low pressure. It’s quite dangerous to have your boiler keep such a high pressure as this may be signs that the boiler’s pressure release system is broken or there’s too much water in the heating system. For such cases, always consult professionals so as not to endanger your entire household.

To make a booking or to find out more about our services!

A few instances that may be the cause of your low water pressure

There are only two common mishaps that occur in your boiler for it to have low pressure:

You just conducted radiator bleeding – For case 1, it usually occurs after water from the central heating system is let go. By bleeding radiators, you release water from your central heating system. Sometimes, this could cause low boiler pressure. Fortunately, this could be easily remedied by when you repressurise the system. 

Your heating system has a leak – For case 2, there might be a hard-to-find leak somewhere in your central heating system that’s the cause of boilers losing pressure. If you check the pipes, the boiler, or the radiator, you may notice damp spots around. These are usually small hence the slow drop in pressure on your boiler, as you may have noticed. 

Also, please do not attempt to check for a leak inside the boiler – it’s too dangerous. Please leave the job to a Gas Safe registered plumber or heating engineer instead. If you may have found any leaks, do not hesitate to contact an engineer to have it fixed to save you time and money. 

A Step-by-step guide on repressurising a boiler

There are two ways to increase the pressure on your boiler, depending on its the make and model. So make sure to check your boiler’s user manual before proceeding. You may opt to search for yours online if you seem to have misplaced your copy. You may also opt for something visual; manufacturers usually put up videos of a DIY fix that can be found through a quick google search.

FIX 1: To repressurise your boiler with a filling loop

  1. Switch off the boiler and leave it to cool.
  2. When cool to the touch, check on the filling loop or filling hose to see if both ends of it are correctly connected to the boiler.
  3. Open the two valves on your boiler and wait to have cold water from your mains fill it.
  4. Leave the valves open for a while. When the pressure hits 1.5 bars, close both valves subsequently.
  5. Try powering on your boiler again. In some cases, electric boilers have reset buttons so you may also opt for that.
  6. Check the pressure gauges to see if you have successfully topped up the pressure. Watch the pressure rise. 
  7. Once the pressure on your boiler has reached the optimum level, take out the filling loop or filling hose from the system and make sure the water caught in it doesn’t spill.
  8. Dry out the filling loop and store is a safe place until needed again.

FIX 2: To repressurise your boiler with a repressure key

  1. Switch off the boiler and leave it to cool.
  2. Underneath the boiler, look for a concealed tray that houses the key and its slot.
  3. Insert the key and make sure it lines up on the unlock position or the “open padlock” engraving on the slot.
  4. Give it a push and turn it to the locked position or the  “closed padlock” engraving.
  5. Make water flow into the boiler by turning the white square nut in a clockwise direction. 
  6. Let the water in until it reaches a pressure of 1.5 bars. After this turn, the nut in a clockwise direction again to stop the water from coming in. 
  7. Push and turn the key back to the unlock position or “open padlock” engraving. Some water may fall off the boiler; it’s normal.
  8. Power on the boiler again. Again, check the pressure gauges to see if you have topped up the pressure. If the pressure reads an ideal level, then your boiler is up to the task of once again heating your home!

How many times should I repressurise my boiler?

You may conduct this every time you find the pressure is low. However, repressurising the boiler should only be done once a week at the maximum. If you seem to be conducting this too often or too regularly, might as well outsource for help as water damage, as well as further damage to your boiler, are both bigger problems to resolve.

To avoid this from happening, do consider having annual boiler checks just to see if your boiler is in tiptop shape! If you doubt you could do all this by yourself, it would always be best to have a Gas Safe engineer do this for you instead. After all, boiler repairs cost less than having to purchase a new one and pay for boiler installation services when you cause irreparable damage to your boiler. So, don’t hesitate to call a professional today!

Tips to Help You Fix a Leaking Radiator

Leaking Boiler

From the pre-historic hearths and Korean Ondol to the Franklin Stove and British steam heating systems, indoor heating has been a prominent feature in different countries. For as long as autumn and winter left people yearning for warmth, heaters were a necessity. When Stephen Gold, Franz Sans Galli, and other manufacturers invented their own models of the radiator, it would be a mainstay in houses for the longest time. Today, these contraptions come in different designs and models but with one commonality. 

All radiators have a copper pipe that is bent back and forth until it forms a metal circuit along the side of your house. Through convection, hot water will move through these pipes and provide warmth. There are three ways radiators can do that:

To make a booking or to find out more about our services!

Dual Fuel Radiators

As the name suggests, this radiator has the option to connect to either the central heating or the main electricity. When the power starts, the heated towel rail can either heat up with the rest of your radiator system or operate on its own via electricity.

Electric Radiators

These types of radiators are deemed energy-efficient as it does not need gas to operate. They have a container filled with thermo-fluid that heats up once the machine is plugged to the nearest power outlet.

Central Heating Radiators

The most common out of the three, central heating radiators are connected to a boiler that heats up the water.

From these, there are different types the market offers:

K1 Radiators

Also called single panel radiators or Type 11, these are the most basic and most affordable out of the four. This feature only has one panel mounted onto the wall and works best in medium or small rooms.

P+ Radiators

K1’s counterpart, this has double panels that are stacked on top of each other with the convector in between. Once they are mounted onto the wall, they are noticeably thicker than the previous radiator. This offers better heating, perfect for rooms on the corners of your house. Being a newer model, they are also called Type 21. 

K2 Radiators

As an upgrade to P+, K2 or Type 22 radiators not only have two panels but also two convectors between them. Because of the added power, this can warm up a large room without needing to be larger in size.

K3 Radiators

These radiators are more heavy-duty, having three panels and three convectors. Perfect for rooms with more space, its panels are more spread out to provide even heating.

Once you have chosen the design that works best with your home and has it set up, maintaining its quality can save you a lot of money. Because radiators have hot water passing through its pipes, leaks are common problems households have had to face for many years. 

A leaking radiator can cause multiple problems. While a leak itself is not dangerous, getting too close to a radiator with hot water spewing from it can cause burns on our skin. If your radiator is leaking and the water seeps into your carpet or the flooring and is left unattended, this can lead to expensive water damage. 

Stay cost and energy-efficient by keeping your radiator clean and leak-free. Simply follow these steps:

Identify where the leak is coming from

Before going anywhere near your radiator, it’s best to place towels around it and prepare a bucket beside you. Having water pour all over the room might be the worst-case scenario but it’s important to prepare for anything that could happen. Another precautionary measure is to wear protective gear around your hands and arms.

When you have all of that in place, get an old towel and pat your radiator and its panels completely dry. Afterwards, get some toilet paper and find the leak by placing it on different parts of the machine. They will come from either of the three: the body of the radiator, the controls (e.g. the bleed point and thermostatic valve), or the pipes that connect the boiler and the radiator.

Repair what can be salvaged and replace what cannot

One of the easiest parts to repair on a leaking radiator is the radiator dashboard. First, take a look at the bleed point. This is meant to release air that has settled inside the radiator. If you find that there is a leaking radiator valve or the bleed valve is moist, try to turn it clockwise. If the screw tightens, that means the valve loosened. 

If the bleed valve isn’t tightening, the cause of the radiator leak is probably at the thermostatic valve. This integral part of the heating system dictates the temperature of the room by controlling how much water will enter the radiator. It slows the water down, stops it, and allows it to flow again when the radiator cools. If you find it leaking, this is most likely caused by the wax inside the knob. When this object expands or contracts according to the temperature, it acts as a sign for more water to flow through. In time, it may wear out and cause leaks when it is partly open. Notice if the leak stops once you fully close the valve.

Since repairing the thermostatic valve needs some expertise, we don’t recommend doing this without prior knowledge and experience. However, if you know your tools, you may try to take your dashboard apart.

First, drain the leaking valve. Next, close the supply and lock valve, noting how many turns it takes. After you undo the union nut and open the bleed valve, make sure to catch all the water that escapes. Take some PTFE tape and wrap it around the valve tip. Afterwards, you can assemble everything back, wait for your radiator to refill, and check if the leak is still there.

If the leak is coming from the body of the radiator, then placing a sealant on it can act as a temporary solution. These holes are caused by black sludge collecting inside that will later create patches of rust. As these parts are irreparable, it is best to seal the hole until a plumbing engineer sees to it.

A leaky radiator is an issue that you do not want to get stuck with. It is also expensive to buy a new radiator, costing you up to thousands of pounds. Before this happens, give us a call so that we can provide maintenance service like draining the insides of your radiator. Not only will this increase the longevity of your machine but also keep it from draining your wallet of money.

What Is The Gas Safe Register?

gas-safe-registered-notice-img

Gas, according to the Health & Safety Executive, has caused a great number of injuries and deaths in the past three years alone. A huge percentage of the gas fires that occur was caused by illegally installed, poorly fitted, and damaged appliances that use natural gas for power or heat. One way to prevent gas leaks, as well as other gas-related incidents like explosions or fire, is by making sure that you employ licensed professionals for any gas-related work you may encounter. They’re called gas fitters or gas safe registered engineers. This means making sure that the person, or company, that you hire to install, check, and repair your gas burners, ovens, boilers, and the like are accredited by the Gas Safe Register. This should be your top priority as it is you and your house’s health and safety that we’re talking about.

What is the Gas Safe Register?

The Gas Safe Register is the official gas registration body of gas engineers and gas companies in the United Kingdom, Isle of Man and Guernsey. They have the authority to inspect, facilitate, and implement such provisions that will ensure businesses and individuals in the field of gas work are all qualified, adequately trained, and equipped to work on gas. 

Required by law to be on this register before being eligible to work on gas, engineers will have to go proper training and assessment to be deemed qualified in terms of gas safety, while businesses will only be recognized if they have at least one gas safety qualified engineer on their roster. 

The Gas Safe Register also raises consumer awareness and conducts the implementation and investigation of policies, sanctions, and cases of illegal or unsafe work. If you have yet to find an engineer for the job, the Gas Safe Register website also has an engineer-finding feature, which helps you locate qualified gas safe registered engineers in your area. 

The Gas Safe Register ID

Knowing that there is a governing body that oversees gas safety is one thing, but knowing which engineers are actually accredited is another. In order to determine if your engineer is gas safe, be sure to check their Gas Safety Register-issued ID card. It is also very important to remember that not all engineers are qualified to work on all kinds of gas-related services, so be sure to check their ID card for these details as well. 

Gas Safety registered engineers are provided with an ID card which should contain the engineer’s photo, the validity dates of the ID, license number, the Gas Safety Register security hologram. On the backside of the ID card, there should be a list of services your engineer is qualified to perform.

Check out this video by the Gas Safe Register for more information on how you should check your engineer’s gas safety ID card:


Alternatively, you may also call the Gas Safety Register at 0800 408 5500 or visit the Gas Safe Register website to check the registration and qualifications of your employed engineer.

Keeping Safe

While making sure that your gas engineer or gas service provider is an accredited affiliate of the Gas Safety Register is important, this does not completely prevent gas-related incidents such as gas leaks, fires, and explosions. In order to help lessen the occurrences of such, here are some other tips you should follow:

Hire a Gas Safe Registered Engineer to conduct annual safety checks. This is a regular service that almost any gas safe engineer should be able to provide. By the end of the inspection, the engineer must provide you with a Gas Safety Certificate or a CP12.

During a gas safety check, an engineer should be able to ensure that: All gas appliances are operating with the same amount of pressure, gas is being burned properly, there are enough ventilation and airflow in the appliances, and that all gas devices are not damaged and working properly.

Additionally, if you think a gas safe registered company or engineer has unsafely installed any of your gas appliances, then you may nominate your appliance for a free inspection as conducted by representatives of Gas Safe Register. However, whenever you have any safety concerns, you may also raise a gas safety concern at any time.

Regularly check for any symptoms of a gas leak, especially if you have a gas boiler. Such symptoms include physical effects to humans, plants, and animals, damage to the gas line, a sulfuric or rotten egg smell, hissing sounds, and flames of orange or yellow hue.

Install gas detectors where gas is likely to accumulate. This will alert you of any gas leaks within your property.

Keep your gas appliances well-maintained. It is also best to ensure that they are properly turned off or unplugged when not in use.